
1.在微信小程序上,实现多图片的上传在wxml文件中实现页面布局。
<view style="width:100%;float:left;margin-top:25rpx;margin-left:40rpx;padding-bottom:120rpx;" class="weui-uploader__bd">
        <view class="weui-uploader__files">
              <block wx:for="{{pics}}" wx:for-item="image" wx:key="item">
               <view class="weui-uploader__file">
                 <image src="../../../images/warehouse/scanCode_delete.png" wx:if="{{image!=''}}"
                 bindtap="img_delete" class="image_view_css" data-index="{{index}}"
                 data-sign="{{disabl}}"></image>
                 <image class="weui-uploader__img" wx:if="{{image!=''}}" src="{{filters.updateImag(httpURL,deURL,image)}}" bindtap="previewImage"></image>
               </view>
              </block>
            </view>
            <view class="weui-uploader__input-box {{isShow?'true':'hideTrue'}}">
              <view class="weui-uploader__input" bindtap="chooseImage" data-sign="{{disabl}}"></view>
            </view>
</view>
2.这里页面样式的布局实现。
.weui-uploader__bd {
  margin-bottom: -4px;
  margin-right: -9px;
  overflow: hidden;
}
.weui-uploader__file {
  float: left;
  margin-right: 15px;
  margin-bottom: 9px;
}
.image_view_css{
  width:60rpx;
  height: 60rpx;
  position: absolute;
  z-index: 5;
  margin-left: 65px;
  margin-top: -25rpx
}
.weui-uploader__img {
  display: block;
  width: 79px;
  height: 79px;
}
.weui-uploader__input-box {
  float: left;
  position: relative;
  margin-right: 9px;
  margin-bottom: 9px;
  width: 77px;
  height: 77px;
  border: 1px solid #d9d9d9;
}
.weui-uploader__input-box:before, .weui-uploader__input-box:after {
  content: " ";
  position: absolute;
  top: 50%;
  left: 50%;
  transform: translate(-50%, -50%);
  background-color: #d9d9d9;
}
.weui-uploader__input-box:before {
  width: 2px;
  height: 39.5px;
}
.weui-uploader__input-box:after {
  width: 39.5px;
  height: 2px;
}
.weui-uploader__input {
  position: absolute;
  z-index: 1;
  top: 0;
  left: 0;
  width: 100%;
  height: 100%;
  opacity: 0;
}
.hideTrue {
  display: none
}
3.在js层的实现中在在data变量中先定义好
pics: [],
count: [1, 2, 3],
isShow:true,
变量
1)onload的方法中首先要加载
isShow: (options.isShow == "true" ? true : false)
2)页面布局形成的为:
3)在实现图片的选择上传中点击空白的页面增加图片调用执行方法
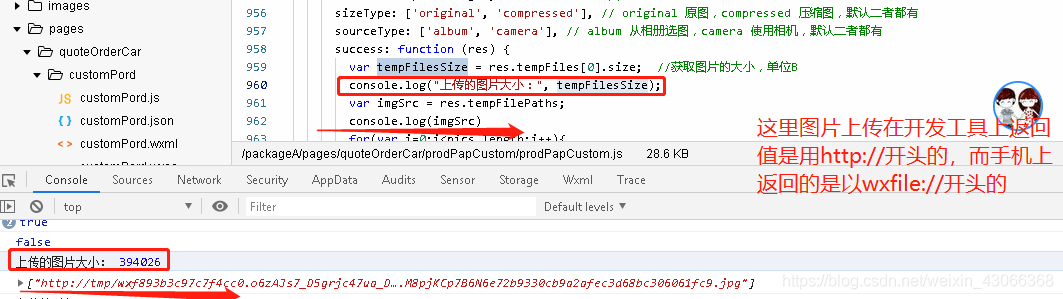
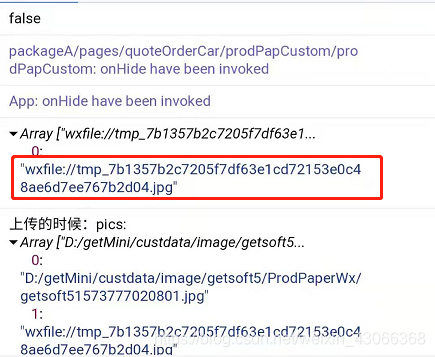
在 图片的上传后success成功返回值中在开发工具上是以http://开头返回图片文路径,手机上返回的是wxfile:// 开头的
4)而实现图片的预览调用的方法是:
  previewImage: function (e) {
    var current = e.target.dataset.src
    wx.previewImage({
      current: current,
      urls: this.data.pics
    })
  },
- 实现将图片上传到后台的服务器上,在js中调用的方法
//对保存了图片数组pics做一个for循环。
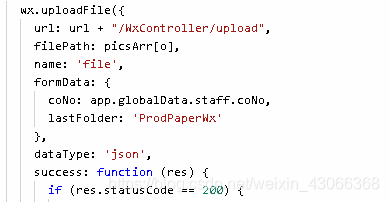
 wx.uploadFile({
              url: url + "/WxController/upload",
              filePath: pics[0], //这里微信的调用方法只能每次上传一张图片所以可以再调用方法前做对数组pics的一个迭代循环。
              name: 'file',
              formData: {
                coNo: app.globalData.staff.coNo,
                lastFolder: 'ProdPaperWx'
              },
              dataType: 'json',
              success: function (res) {
                if (res.statusCode == 200) {
					console.log("成功返回值:",res)
				}
			  }
	})
后台接口方法/WxController/upload 用java执行
 public Map<String,Object> upload(HttpServletRequest request, @RequestParam(value = "file", required = false) MultipartFile file) throws IOException {
        Map<String,Object> map=new HashMap<String, Object>();
        String msg="",ret="success",path="",type=null;
        request.setCharacterEncoding("UTF-8");
        String coNo=request.getParameter("coNo");
        String lastFolder =request.getParameter("lastFolder");
        if(!file.isEmpty()){
            String fileName = file.getOriginalFilename();
            type = fileName.indexOf(".") != -1 ? fileName.substring(fileName.lastIndexOf(".") + 1, fileName.length()) : null;
            if(type!=null){
                if("PNG".equals(type.toUpperCase())||"JPG".equals(type.toUpperCase())) {
                    // 项目在容器中实际发布运行的根路径
                 String realPath=BaseController.getCustFilePath()+"image/"+coNo+ "/" + lastFolder + "/";
            //这图片存放的路径采用了在指定的方式,在BaseController的getCustFilePath()方法中指定好了
                 File myFilePath = new File(realPath);
              if (!myFilePath.exists()){//文件夹不存在,生成一个文件夹
               myFilePath.mkdirs();
              }
                    // 自定义的文件名称
                    String trueFileName=coNo+String.valueOf(System.currentTimeMillis())+"."+type;
                    // 设置存放图片文件的路径
                    path=realPath+trueFileName;
                    file.transferTo(new File(path));ret="success";msg="";
                }else {
                 msg="不是我们想要的文件类型,请按要求重新上传!";ret="error";path="";
                }
            }else{
                msg="文件类型为空!";ret="error";path="";
            }
        }else {
            msg="没有找到相对应的文件!";ret="error";path="";
        }
        map.put("ret",ret);
        map.put("msg",msg);
        map.put("path",path);
        return map;
    }
这里是BaseController类内的一个指定图片存放路径的方法。
public class BaseController {
	//客户文件存放路径
		public static String getCustFilePath(){
			return "D:/lqb/imge/";
			}
}

为什么不可以用
秋斌,
= =可以使用markdown改下