# 使用 GitHub Actions 持续集成到静态资源托管
本篇主要讲解如何结合 GitHub Actions 和微信云托管 CLI,实现 GitHub 仓库推送时,触发 GitHub Actions 构建静态资源,并上传到静态文件托管。
GitHub Actions 是 GitHub 推出的持续集成服务,支持使用 yml 编排自动化任务。类似的,在 GitLab 中也有 GitLab Runner,Coding 中可以使用 Coding CI 实现类似的能力。
# 一、创建项目
本文将采用 11ty(eleventy) 构建一个最简单的静态网站,同样的,也可以使用 Next.js,Jekyll 等其他支持静态网站生成的框架来实现。
首先,我们创建项目:
# 需要系统中安装有 NodeJS >=12
mkdir wxcloud-static-demo
cd wxcloud-static-demo
npm init -y
# 安装 Eleventy
npm install --save-dev @11ty/eleventy
# 生成 README.md
echo '# Weixin Cloud Run Static Storage Demo' > README.md
# 生成 .gitignore
echo 'node_modules' > .gitignore
创建完成后,我们需要修改 package.json 文件,增加构建命令:
  "scripts": {
    "build": "npx @11ty/eleventy"
  },
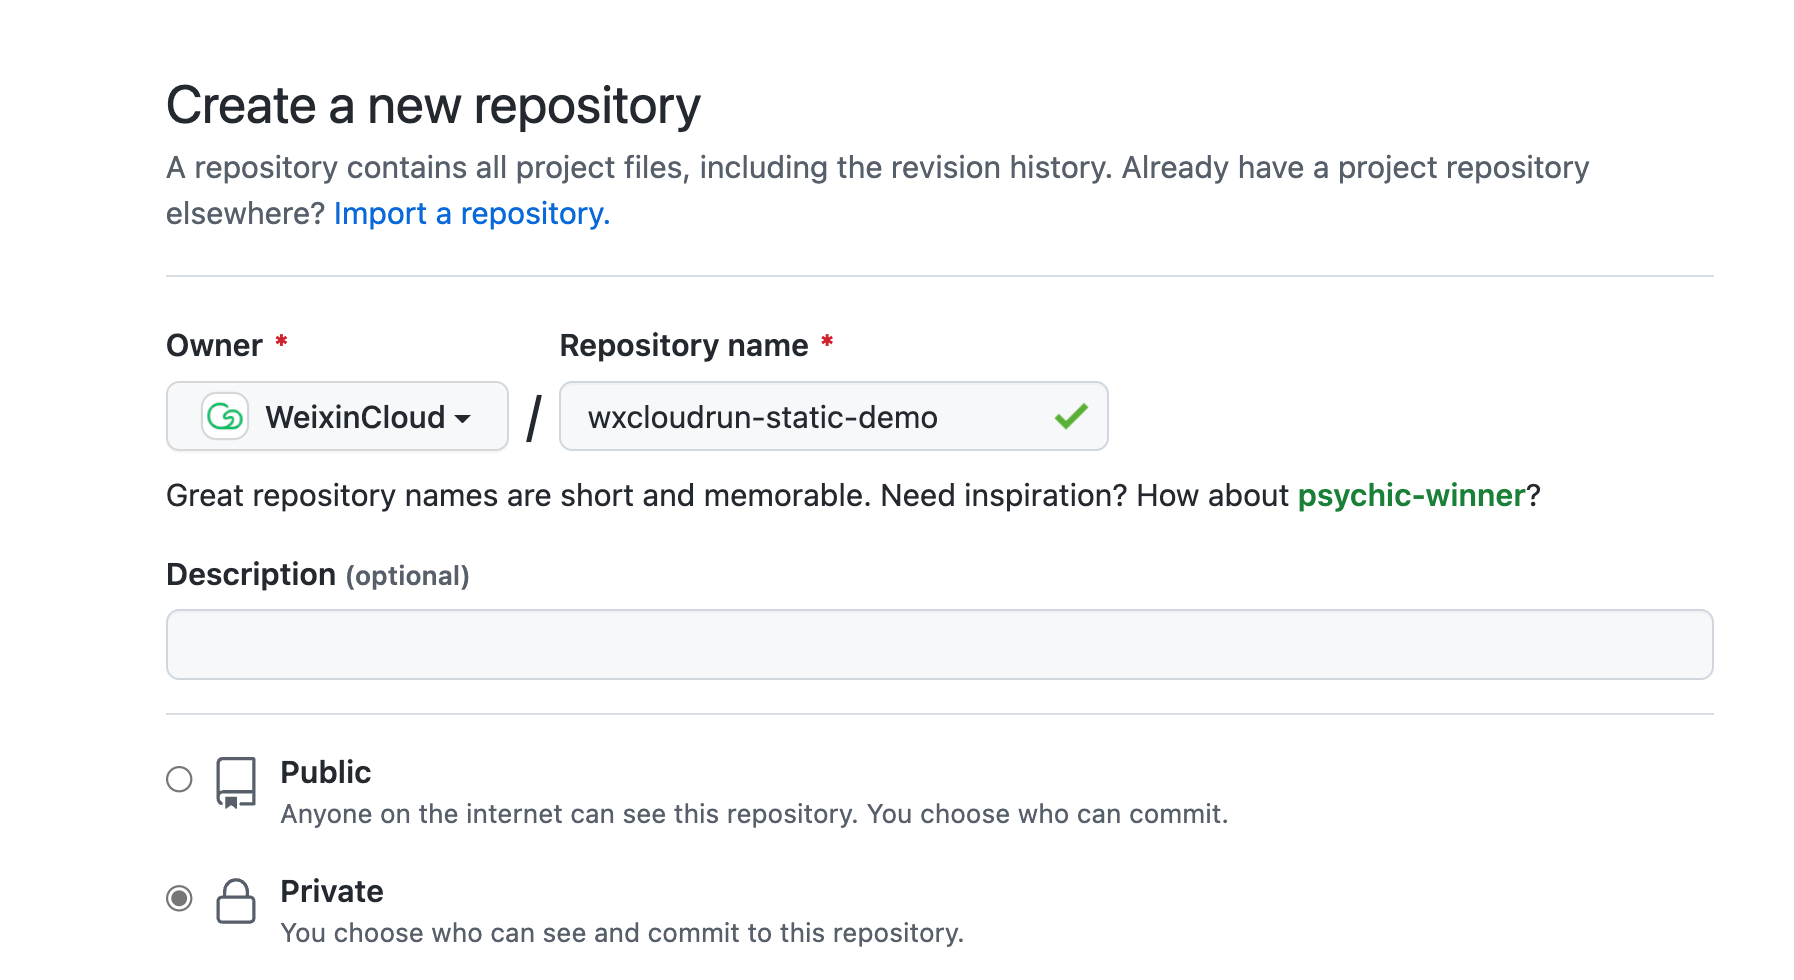
此时我们仓库已经准备完成,到 GitHub 上新建一个仓库,填入需要的名字:
创建完成后,我们将仓库同步到 GitHub 上:
git init
git remote add origin <你的仓库地址>
git add .
git commit -m 'init'
git push -u origin main
此时,我们仓库同步完成后,即完成了前期的准备工作。
# 二、生成云托管 CLI 密钥并写入到 GitHub Secret
我们打开微信云托管的设置页面,进入 ”全局设置“,选择 “CLI 密钥 > 生成密钥”
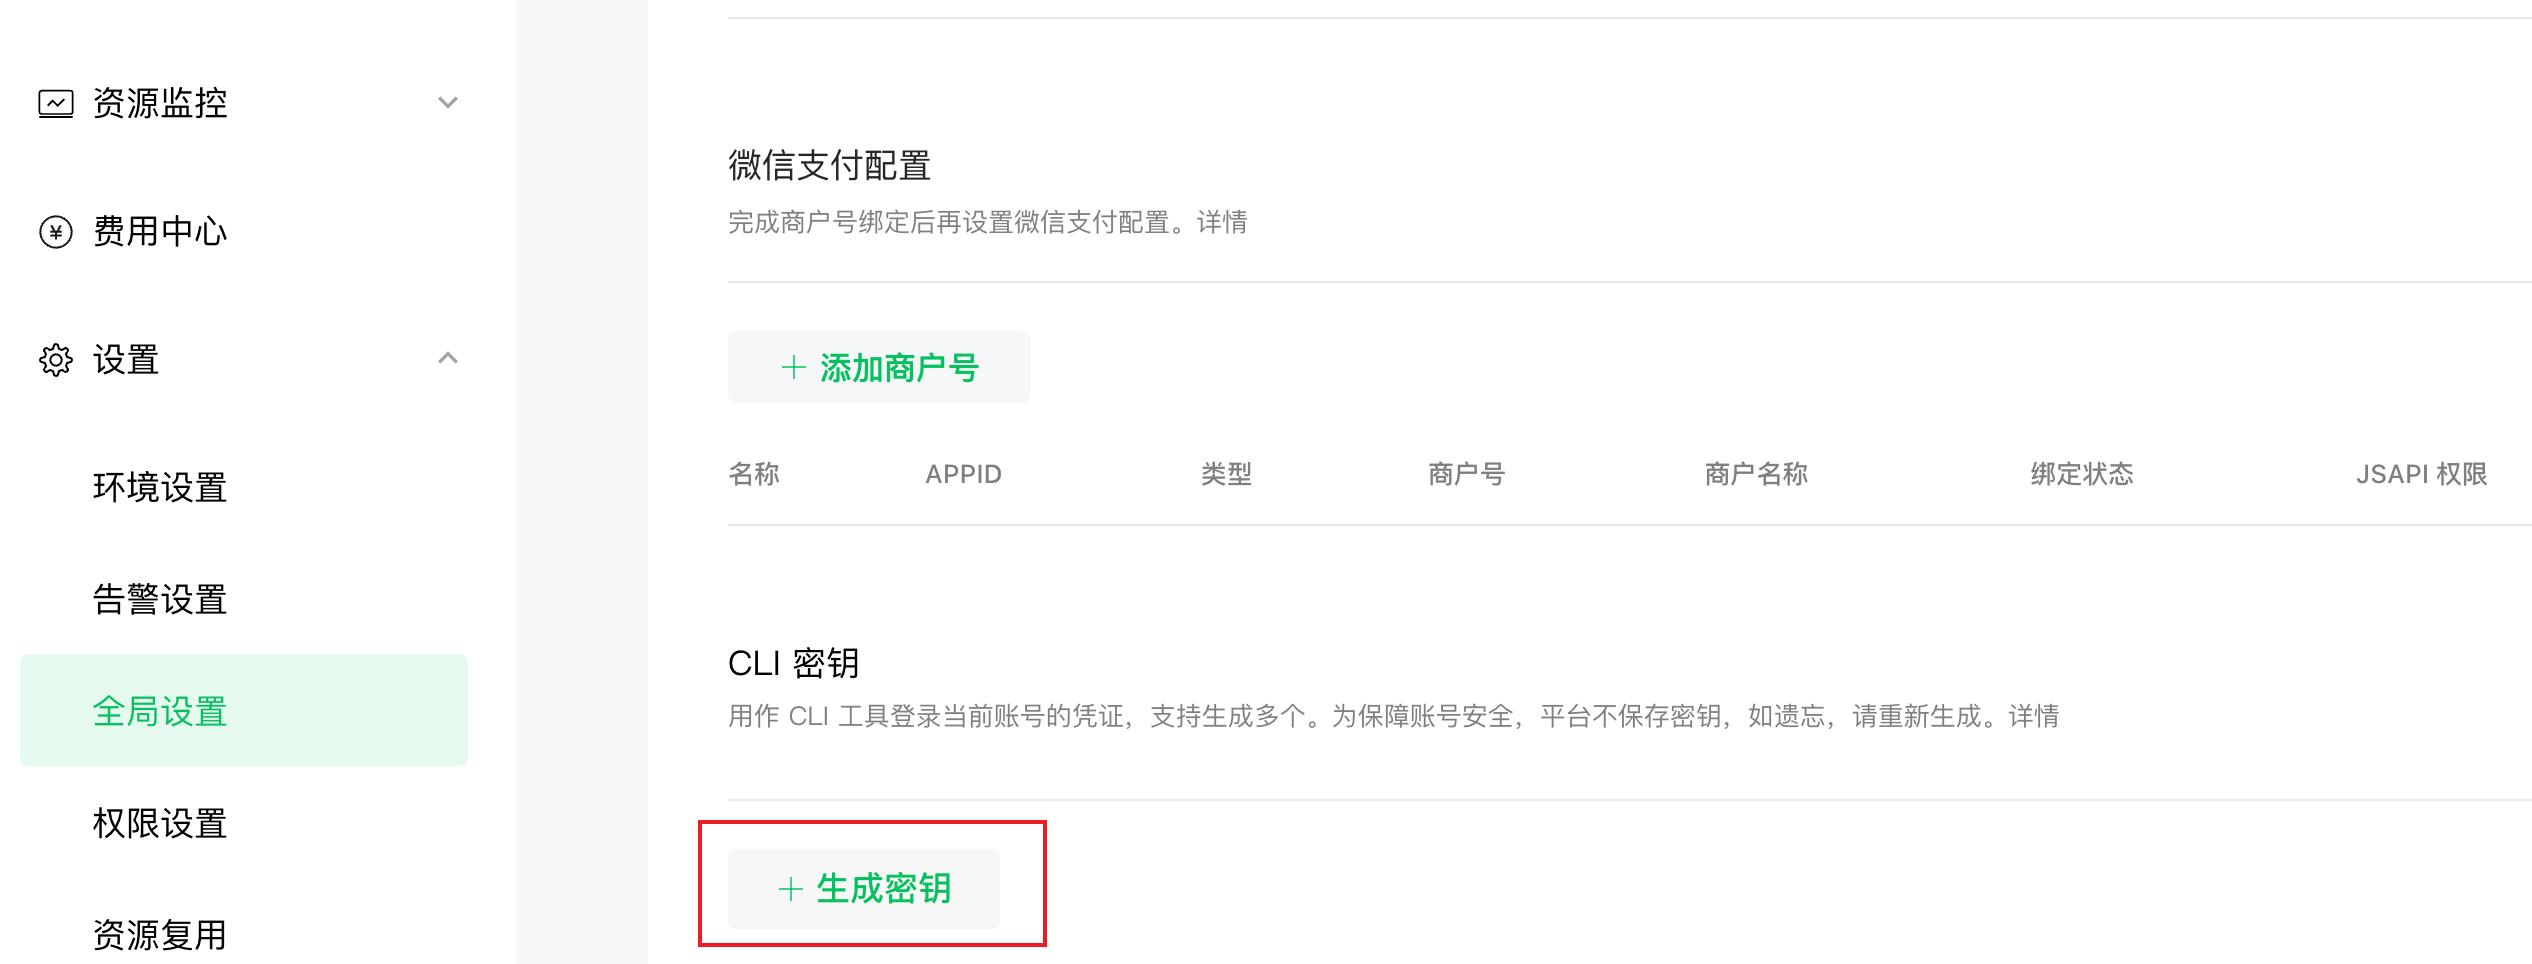
生成的秘钥需妥善保存,不应以明文的形式出现在仓库流水线(.yml)文件中。如秘钥泄漏,应尽快在云托管控制台中将密钥删除。
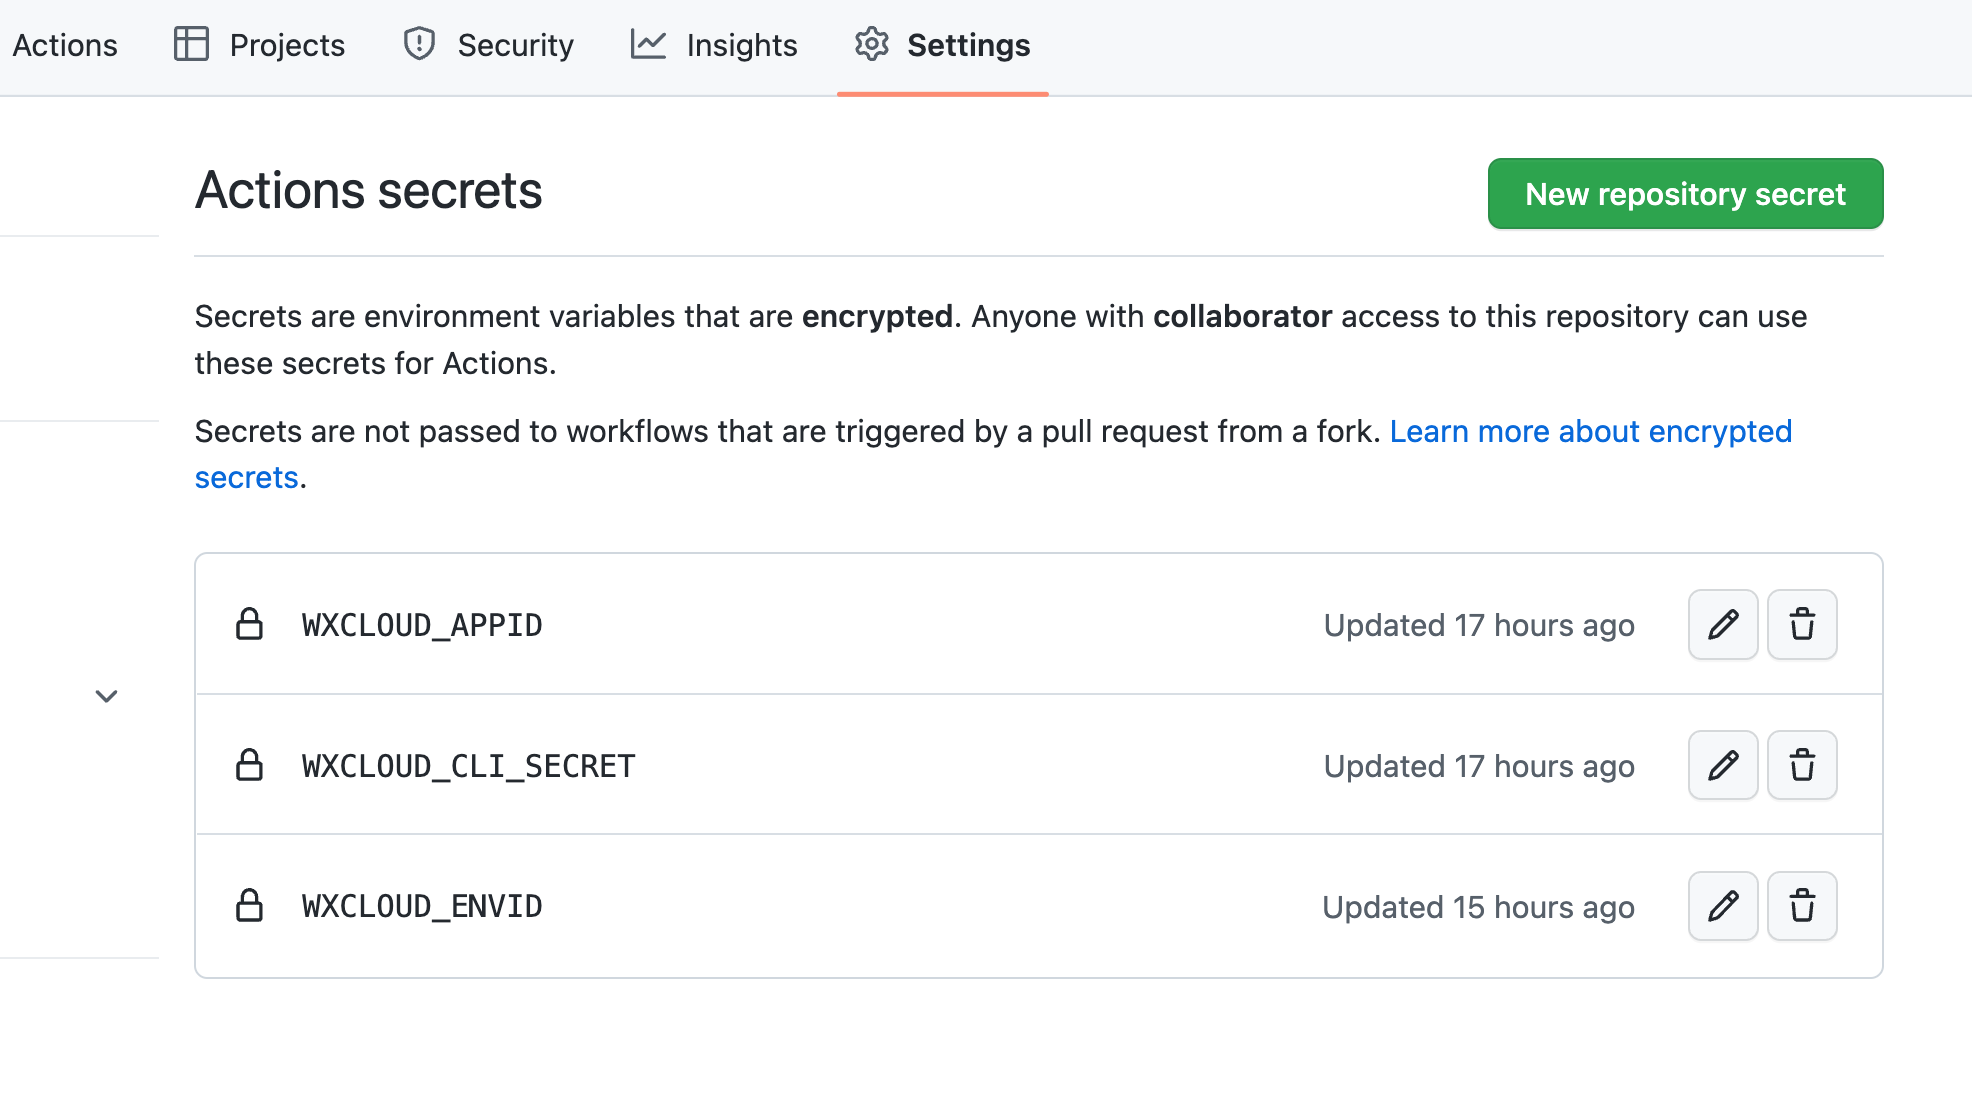
生成后,我们复制 AppID 和对应的 CLI 密钥,进入 GitHub 仓库,选择 “Settings > Security > Secrets > Actions”,点击 “New Repository secret”
我们新建以下三个 Secret:
- WXCLOUD_APPID:云托管环境所在的 AppID
- WXCLOUD_CLI_SECRET:云托管 CLI 密钥
- WXCLOUD_ENVID:云托管环境 ID
完成后,我们可以看到秘钥已经保存在 GitHub Secret 中。
# 三、创建 GitHub Actions 流水线并部署
我们需要新建一个 Actions。点击 ”Actions“,选择 ”New Workflow“
在新的页面中,我们选择 ”set up a workflow yourself“

此时,我们进入 main.yml 的编辑界面。将以下内容粘贴进去:
name: 'Deploy to Weixin Cloud Run Static'

# **What it does**: Build and deploy static site to Weixin Cloudrun.

on:
  workflow_dispatch:
  push:
    branches:
      - main # 监听的分支,可以根据自己项目情况修改
  pull_request:

permissions:
  contents: read
  # Needed for the 'trilom/file-changes-action' action
  pull-requests: read

# This allows a subsequently queued workflow run to interrupt previous runs
concurrency:
  group: '${{ github.workflow }} @ ${{ github.event.pull_request.head.label || github.head_ref || github.ref }}'
  cancel-in-progress: true

jobs:
  deploy-to-static:
    env: # Or as an environment variable
      WXCLOUD_APPID: ${{ secrets.WXCLOUD_APPID }}
      WXCLOUD_CLI_SECRET: ${{ secrets.WXCLOUD_CLI_SECRET }}
      WXCLOUD_ENVID: ${{ secrets.WXCLOUD_ENVID }}
    runs-on: ${{ fromJSON('["ubuntu-latest", "self-hosted"]')[github.repository == 'github/docs-internal'] }}
    steps:
      - name: Checkout
        uses: actions/checkout@v3

      - name: Setup node
        uses: actions/setup-node@v3
        with:
          node-version: 16.13.x
          cache: npm

      - name: Install
        run: npm ci

      - name: Install @wxcloud/cli
        run: npm i -g @wxcloud/cli

      - name: Login @wxcloud/cli
        run: wxcloud login --appId "$WXCLOUD_APPID" --privateKey "$WXCLOUD_CLI_SECRET"

      - name: Build Static Files
        run: npm run build # 构建命令,可以根据项目实际情况修改

      - name: Deploy to Static Site
        run: wxcloud storage:upload _site --envId="$WXCLOUD_ENVID" --remotePath=/ --mode=staticstorage # 上传生成的 _site 文件夹到静态托管的 / 目录下,可以根据项目实际情况修改
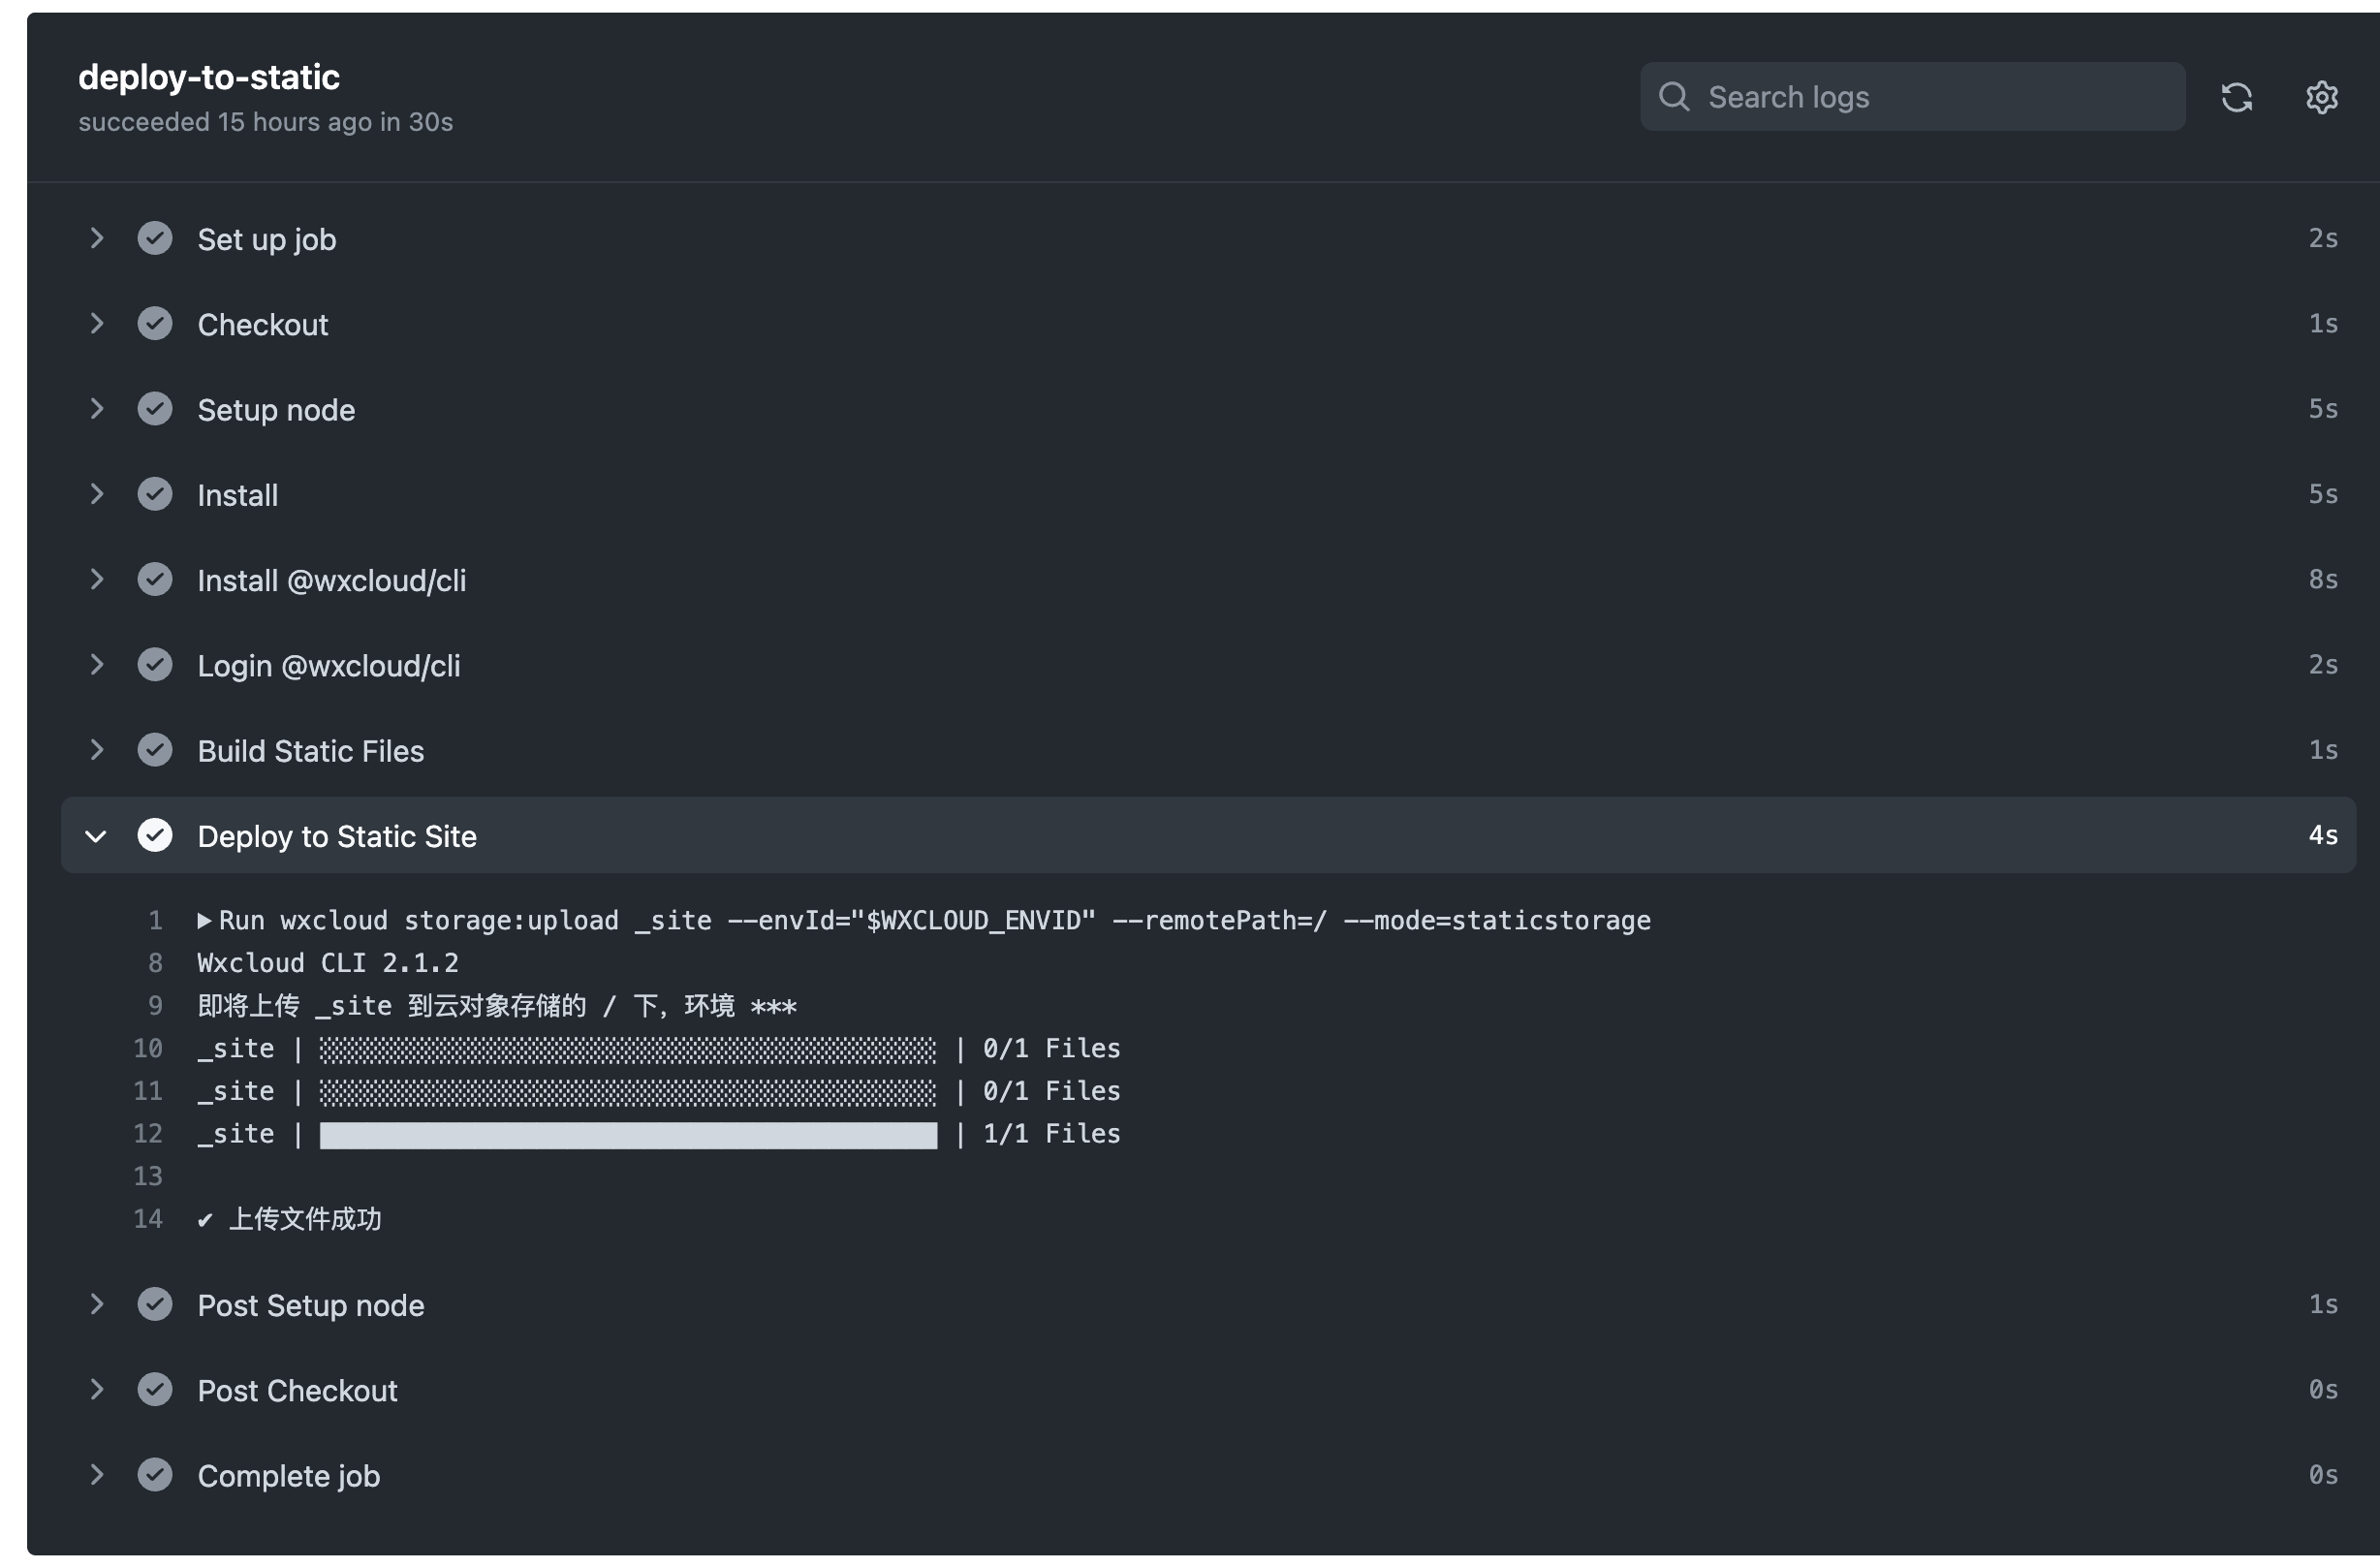
点击 “Start commit” 保存文件,即可自动触发 Actions。我们点击 “Actions” 进入刚才触发的一次执行,如果一切配置正常,执行成功后可以查看对应的日志。

点击 Workflow runs,可以查看每一步的执行日志情况。
# 四、查看部署效果,管理部署后的静态文件
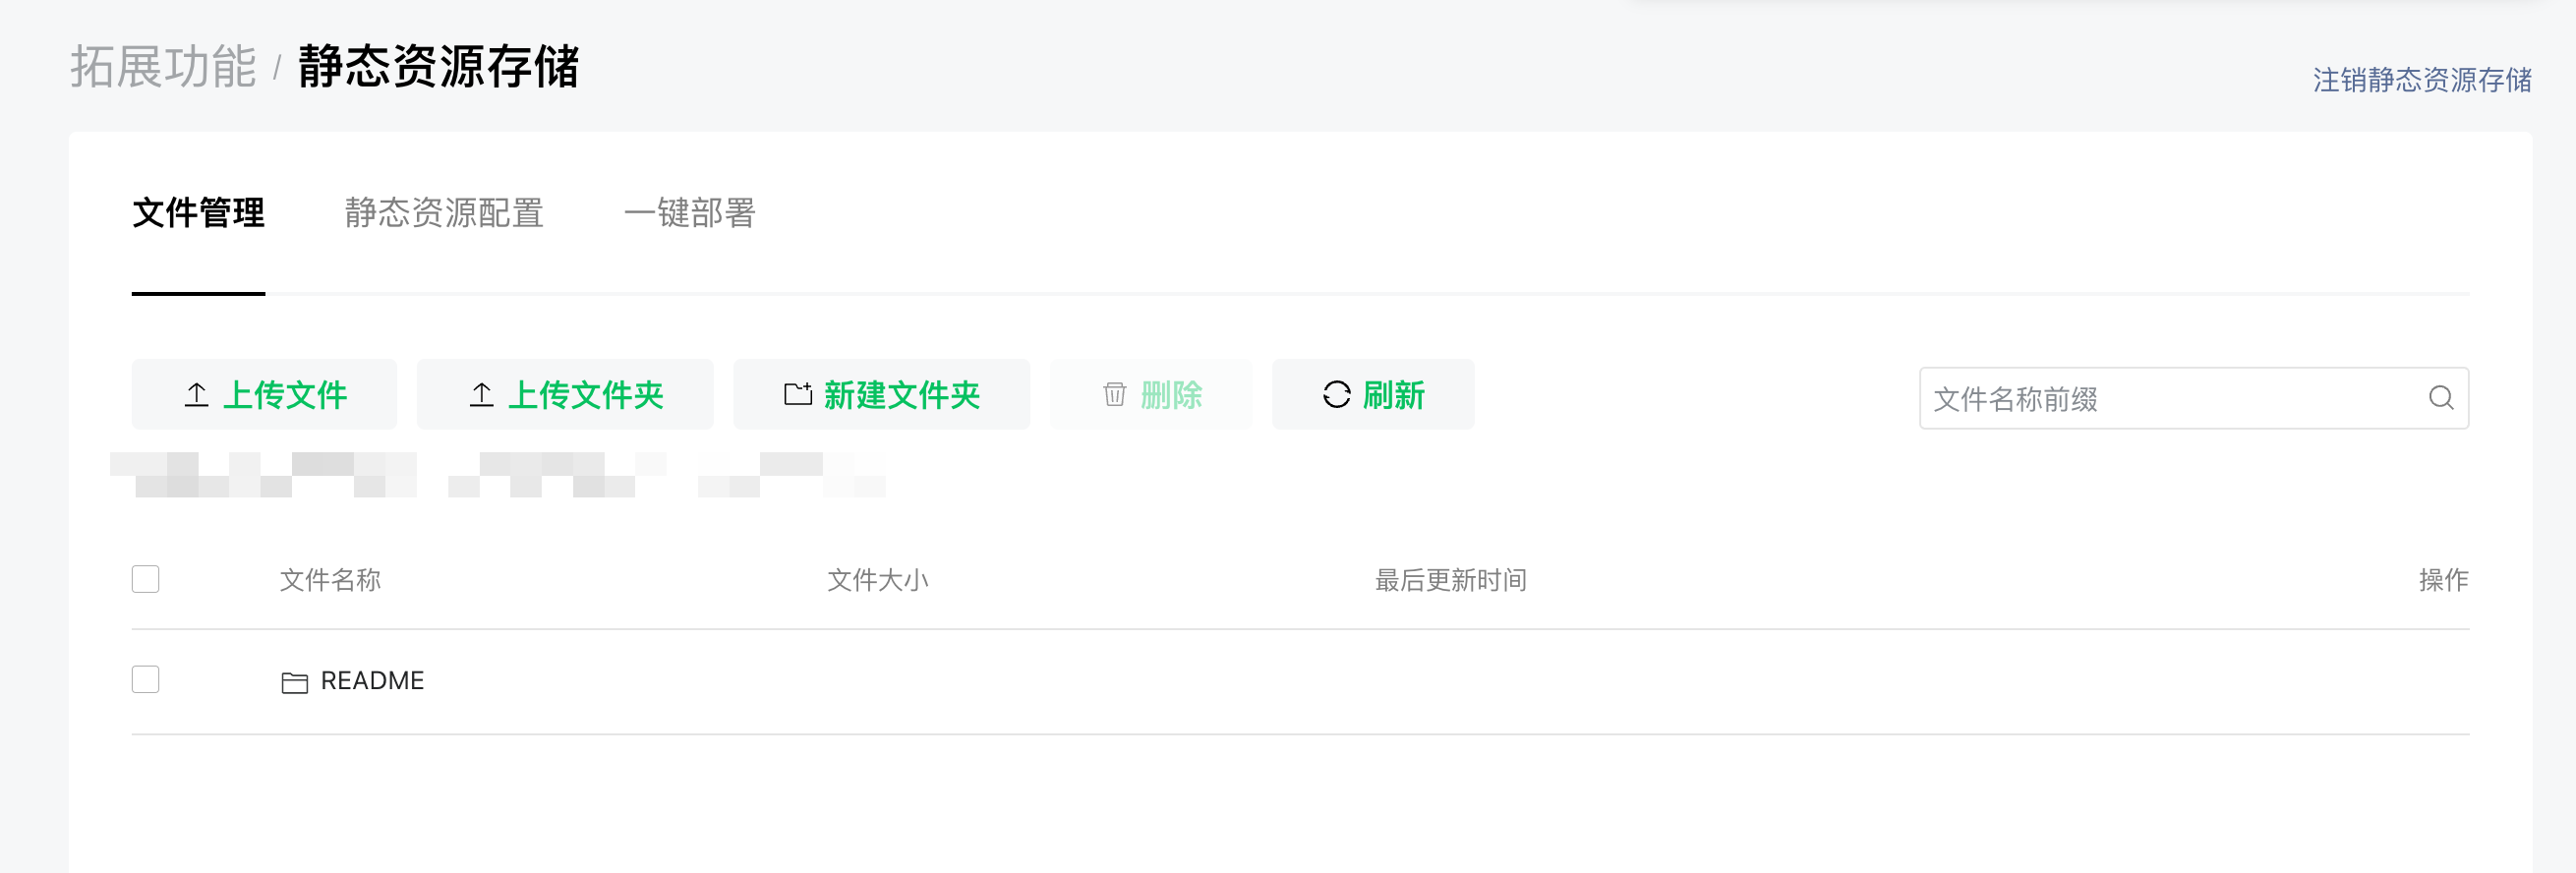
我们可以在云托管控制台中选择“拓展功能 > 静态资源存储 > 文件管理”,看到刚才部署的文件:
访问时,只需要使用静态托管域名,即可打开:
https://<你的静态域名>/README/index.html
我们可以修改上述的 yaml 文件,实现更多的自动化操作,具体方法可以参考 GitHub Actions 的相关文档。
同理,我们也可以通过 @wxcloud/cli 实现更多的自动化部署,比如上传对象存储、新建云托管版本等。
# 五、总结
以上是我们通过 GitHub Actions 结合微信云托管最佳实践,完成自动化推送部署静态托管的教程。
更多文档可参考: