# Quick Getting Started
The purpose of technical documentation for public platforms is to explain the use of interfaces concisely, and the statements are inevitably difficult to understand and even confusing to different readers. Everything is difficult to get started, and it's even harder for new developers.
In order to lower the barriers and make up for the shortcomings, we have written a Developer Guide to explain the basic common features of the WeChat open platform, which is designed to help you get started with the developer mode of the WeChat open platform.
For developers who are familiar with interface usage or have some experience in public platform development, skip this article directly. This article doesn't give you serious coding skills or a deep understanding of interfaces.For questions about the existing interface, you can visit the community post exchange, contact Tencent customer service or use WeChat feedback.
# 1.1 Request a server
If you already have Weixin Mini Program and have Mini Program cloud development , you can use Service Account environment sharing to use cloud development in your service number.
# 1.2 Setting up a service
Take web.py network box, python, Tencent cloud server as an example.
- Install / update the software needed
Install python2.7 above
Installing web.py
Install libxml2, libxslt, lxmlpython
- edit the code, if you do not understand python syntax, please go to the python official documentation query instructions.
vim main.py
# -*- coding: utf-8 -*-
# filename: main.py
import web

urls = (
    '/wx', 'Handle',
)

class Handle(object):
    def GET(self):
        return "hello, this is handle view"

if __name__ == '__main__':
    app = web.application(urls, globals())
    app.run()
If it occurs“socket.error: No socket could be created"The error message, which may be port number 80 is occupied, may not have permission, please search for a solution yourself."If you encounter other error messages, please go to web.py official documentation and learn webpy framework 3 to execute the command: sudopython main.py80.
url fill in: http:// external network IP / wx (external network IP, please go to Tencent cloud to buy the success of the inquiry).As shown below, a simple web application has been created.
# 1.3 Registration Service Account
- Click here to register Service Account
- Click here to register Service Account
# 1.4 Basic Configuration for Developers
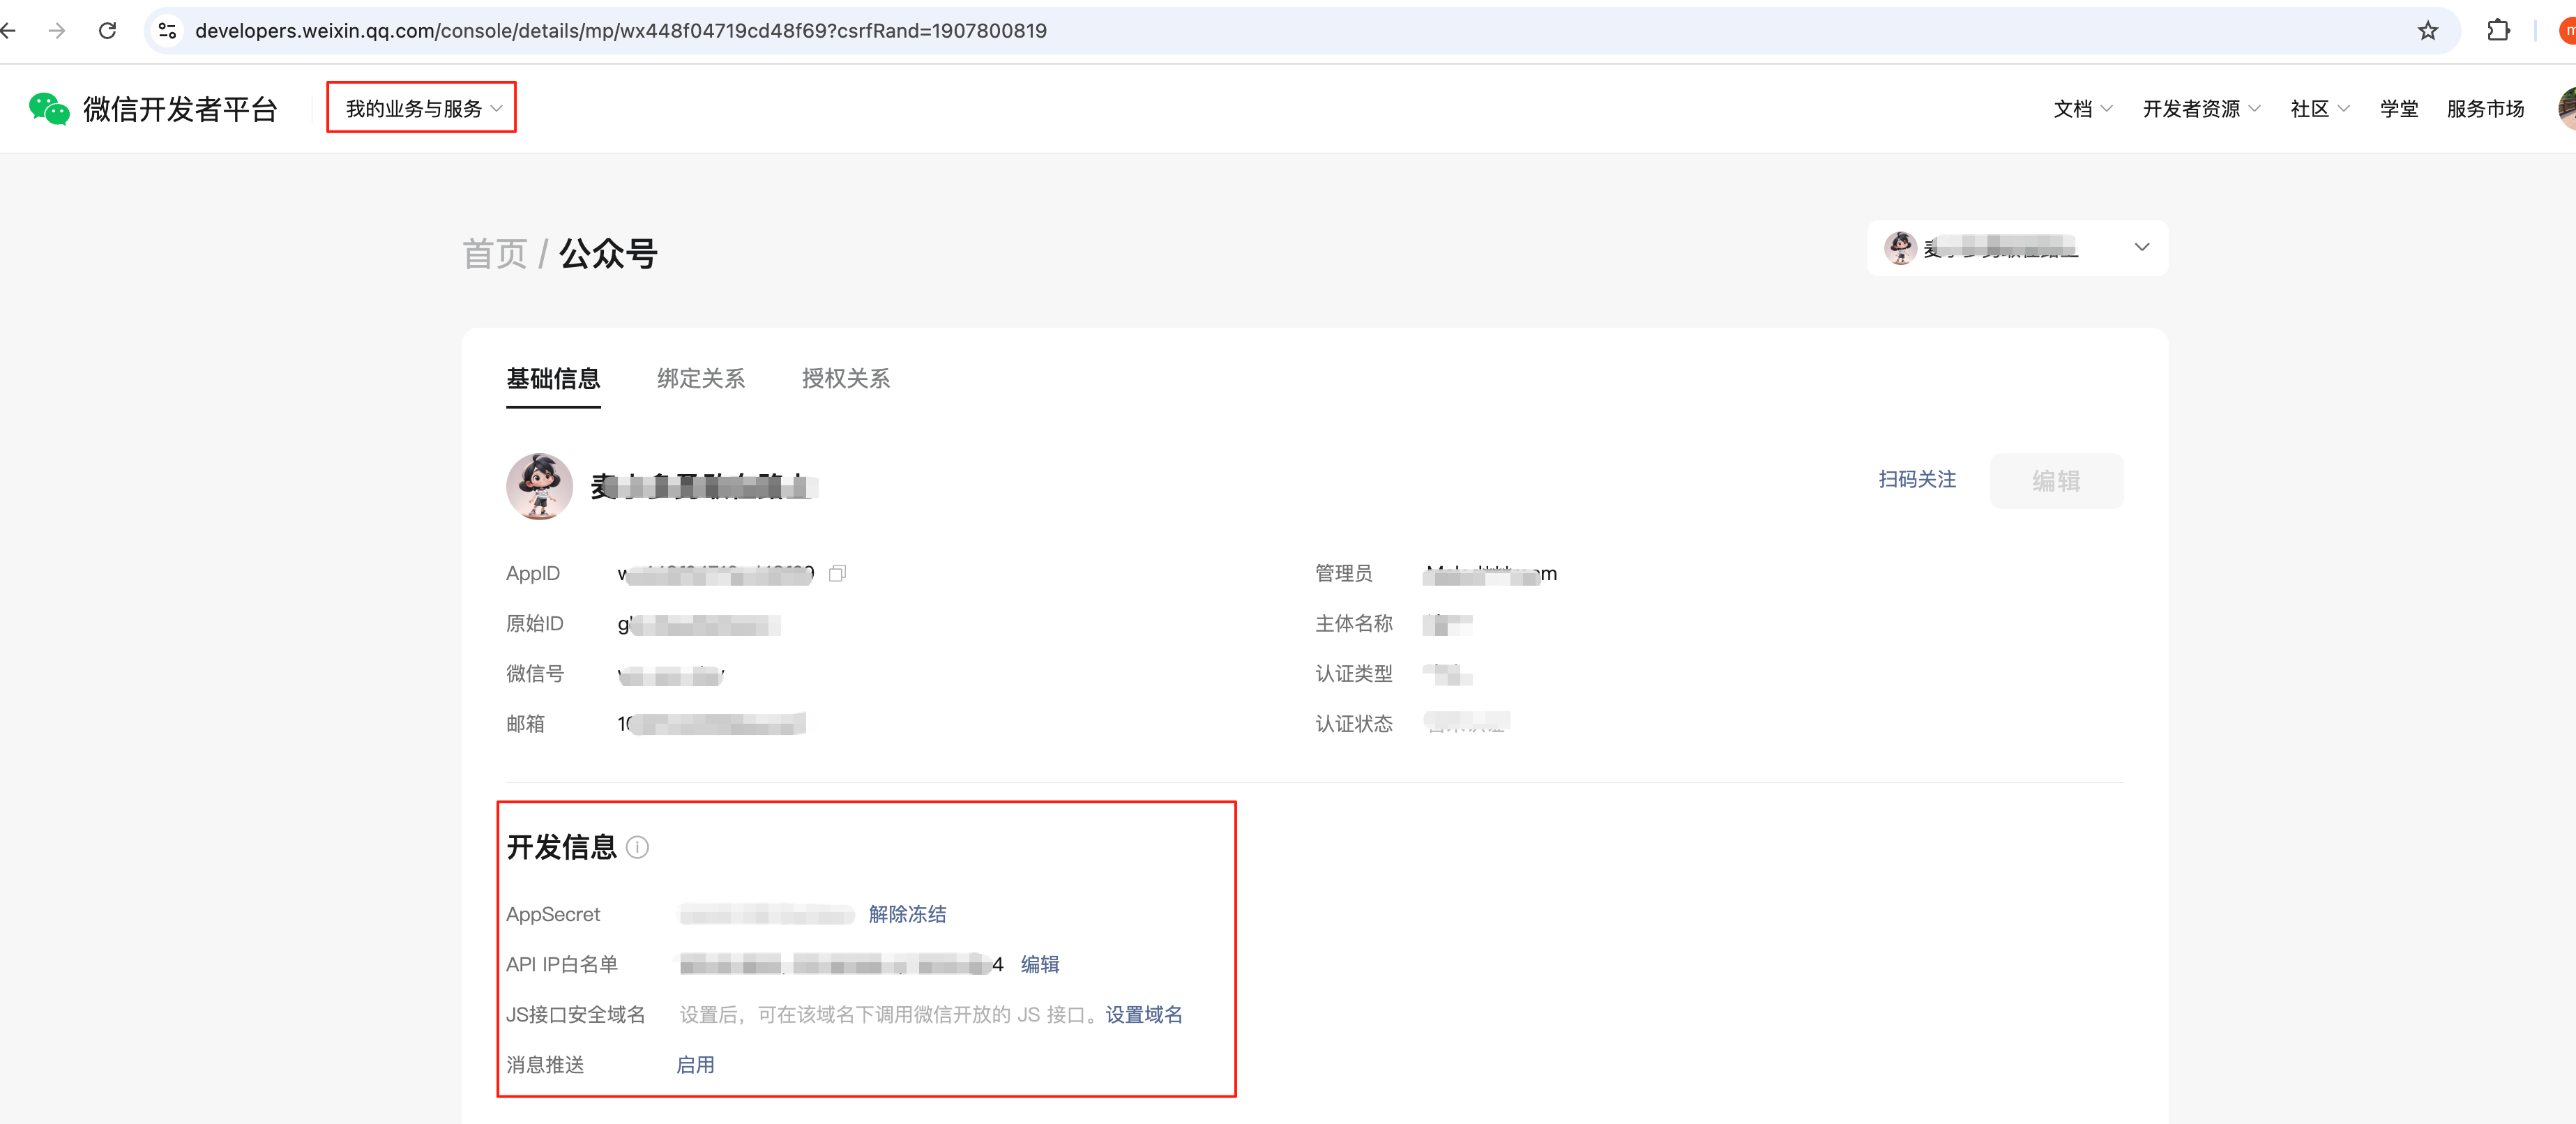
- Go to "WeChat Developer Platform - My Business and Services - Service Account - Development Information" for relevant configuration
 3) Choosing to commit now must be a failure to validate the token because the code logic still needs to be completed. Change the original main.py file, add handle.py
a)vim main.py
# -*- coding: utf-8 -*-
# filename: main.py
import web
from handle import Handle

urls = (
    '/wx', 'Handle',
)

if __name__ == '__main__':
    app = web.application(urls, globals())
    app.run()
b)vim handle.py
Attach a logical flow chart first
# -*- coding: utf-8 -*-
# filename: handle.py

import hashlib
import web

class Handle(object):
    def GET(self):
        try:
            data = web.input()
            if len(data) == 0:
                return "hello, this is handle view"
            signature = data.signature
            timestamp = data.timestamp
            nonce = data.nonce
            echostr = data.echostr
            token = "xxxx" #请按照公众平台官网\基本配置中信息填写

            list = [token, timestamp, nonce]
            list.sort()
            sha1 = hashlib.sha1()
            map(sha1.update, list)
            hashcode = sha1.hexdigest()
            print "handle/GET func: hashcode, signature: ", hashcode, signature
            if hashcode == signature:
                return echostr
            else:
                return ""
        except Exception, Argument:
            return Argument
- After a successful restart (pythonmain.py80), click the submit button. If the message "token validation failed," please carefully check the code or network links. If the token is verified successfully, it will automatically return to the main page of the basic configuration, click the start button
- To facilitate debugging by developers, we provide URL validation tools for developers to use.
Developers need to fill in AccessToken , URLAddress, Token, and click "Check parameters and initiate validation," the debugging tool will send a GET request to the server referred to by the URL and return relevant debugging information.
# 1.5 Something important is told ahead of time.
Next, the article intends to start with two simple examples.
Example 1: Implement "You Say I Learn"
Example 2: Implementing Graph Exchange
After two simple examples, an introduction to some of the basic features: material management, custom menus, and group posting. All of the sample code is meant to illustrate the problem concisely and to avoid code complexity.
To build a safe, stable and efficient Service Account in practice, it is recommended that the reference frame is as follows:
There are three main parts: the server responsible for the business logic part, the AP-Proxy server responsible for docking the WeChat API, and the only AccessToken in-control server
- AccessToken Central Controller:
Responsible: Provide active refresh and passive refresh mechanism to refresh the accessToken and store (in order to prevent concurrent refresh, pay attention to add concurrent lock), provide valid accessToken to the business logic.
Advantages: Avoid the business logic side concurrent access to access_token, avoid AccessToken overwrite each other, improve the stability of business functions.
- API-Proxy Server:
Responsible: dedicated and WeChat API docking, different servers can be responsible for docking different business logic, but also call frequency, permission restrictions.
Advantages: A certain API-proxy exception, and the rest of the server support to continue to provide services, improve stability, avoid directly exposing the internal interface, effectively prevent malicious attacks, improve security.
# 2 Realizing "You Ask Me Anything"
Purpose:
Understand the meaning of passive messages
Understand the messaging mechanisms
Pre-implemented features:
Fans to Service Account a text message, the service number immediately reply to a text message to fans, do not need to operate through the public platform web page.
# 2.1 Accept text messages
A text message sent by a fan to Service Account.Official wiki link: Receive general messages
A fan sends a text message to Service Account saying, "Welcome to the service number developer mode." In the developer background, the public platform receives the following XML: (Both ToUserName and FromUserName information are hidden below)
<xml>
 <ToUserName><![CDATA[服务号]]></ToUserName>
 <FromUserName><![CDATA[粉丝号]]></FromUserName>
 <CreateTime>1460537339</CreateTime>
 <MsgType><![CDATA[text]]></MsgType>
 <Content><![CDATA[欢迎开启服务号开发者模式]]></Content>
 <MsgId>6272960105994287618</MsgId>
</xml>
Explanation:
CreateTime is a WeChat public platform to record the specific time fans send the message
Text: used to mark the xml is a text message, generally used to distinguish the judgment
Welcome to open Service Account developer mode: The specific content that the fan sends to the service number is welcome to open the service number developer mode
MsgId: is the public platform for the record to identify the message of a marked value, WeChat background system automatically generated
# 2.2 Passive reply to text messages
Service Account text messages sent to fans, official wiki link: passive reply to user messages
Special emphasis is placed on:
Passive reply message, that is, to send a passive response message, unlike the customer service message interface
It is not actually an interface, but a reply to a message sent by the WeChat server
If you don't want to or can't reply within 5s after receiving the fan message, you need to reply "success" character string (detailed below)
- The customer service interface is called at any time if certain conditions are met
Service Account Want to reply to a text message to the fans, the content is "test," then the developer sends the following xml to the backend of the public platform:
<xml>
 <ToUserName><![CDATA[粉丝号]]></ToUserName>
 <FromUserName><![CDATA[服务号]]></FromUserName>
 <CreateTime>1460541339</CreateTime>
 <MsgType><![CDATA[text]]></MsgType>
 <Content><![CDATA[test]]></Content>
</xml>
Special note:
ToUserName (recipient), FromUserName (sender) fields please fill in the actual.
createtime is only used to mark the developer's reply to the message time, WeChat background sent this message are not bound by this field.
Text: Used to indicate that the behavior is to send a text message (of course, it can be image / voice, etc.).
Text change lines '\n’。
# 2.3 Reply to success question
Query the official wiki The opening emphasis is that if the server cannot guarantee to process a response within five seconds, the response must be "success" or "" (the empty string), otherwise the WeChat background will initiate three retries.
Explain why there is such a strange rule.Initiate retry is WeChat background in order to ensure that fans sent content developers can receive.If the developer does not respond, the WeChat backend cannot confirm that the developer has received the message, so they must try again.
Is this really the case? Try to receive the message without doing any reply.In the log view to WeChat background initiated three retry operation, log screenshot as follows:
After three retries, no content was returned in a timely manner, and the system automatically displayed an error in the fan session interface saying, "The Service Account service is temporarily unavailable, please try again later."
If the reply succeeds, the WeChat background can be sure that the developer has received the fan message without any unusual hints.Please pay attention to the question of success.
# 2.4 flow chart
# 2.5 Code code
The main.py file does not change, handle.py needs to add a bit of code, add a new file receive.py, reply.py
1)vim handle.py
# -*- coding: utf-8 -*-#
# filename: handle.py
import hashlib
import reply
import receive
import web
class Handle(object):
    def POST(self):
        try:
            webData = web.data()
            print "Handle Post webdata is ", webData
            #后台打日志
            recMsg = receive.parse_xml(webData)
            if isinstance(recMsg, receive.Msg) and recMsg.MsgType == 'text':
                toUser = recMsg.FromUserName
                fromUser = recMsg.ToUserName
                content = "test"
                replyMsg = reply.TextMsg(toUser, fromUser, content)
                return replyMsg.send()
            else:
                print "暂且不处理"
                return "success"
        except Exception, Argment:
            return Argment
2)vim receive.py
# -*- coding: utf-8 -*-#
# filename: receive.py
import xml.etree.ElementTree as ET


def parse_xml(web_data):
    if len(web_data) == 0:
        return None
    xmlData = ET.fromstring(web_data)
    msg_type = xmlData.find('MsgType').text
    if msg_type == 'text':
        return TextMsg(xmlData)
    elif msg_type == 'image':
        return ImageMsg(xmlData)


class Msg(object):
    def __init__(self, xmlData):
        self.ToUserName = xmlData.find('ToUserName').text
        self.FromUserName = xmlData.find('FromUserName').text
        self.CreateTime = xmlData.find('CreateTime').text
        self.MsgType = xmlData.find('MsgType').text
        self.MsgId = xmlData.find('MsgId').text


class TextMsg(Msg):
    def __init__(self, xmlData):
        Msg.__init__(self, xmlData)
        self.Content = xmlData.find('Content').text.encode("utf-8")


class ImageMsg(Msg):
    def __init__(self, xmlData):
        Msg.__init__(self, xmlData)
        self.PicUrl = xmlData.find('PicUrl').text
        self.MediaId = xmlData.find('MediaId').text
3)vim reply.py
# -*- coding: utf-8 -*-#
# filename: reply.py
import time

class Msg(object):
    def __init__(self):
        pass

    def send(self):
        return "success"

class TextMsg(Msg):
    def __init__(self, toUserName, fromUserName, content):
        self.__dict = dict()
        self.__dict['ToUserName'] = toUserName
        self.__dict['FromUserName'] = fromUserName
        self.__dict['CreateTime'] = int(time.time())
        self.__dict['Content'] = content

    def send(self):
        XmlForm = """
            <xml>
                <ToUserName><![CDATA[{ToUserName}]]></ToUserName>
                <FromUserName><![CDATA[{FromUserName}]]></FromUserName>
                <CreateTime>{CreateTime}</CreateTime>
                <MsgType><![CDATA[text]]></MsgType>
                <Content><![CDATA[{Content}]]></Content>
            </xml>
            """
        return XmlForm.format(**self.__dict)

class ImageMsg(Msg):
    def __init__(self, toUserName, fromUserName, mediaId):
        self.__dict = dict()
        self.__dict['ToUserName'] = toUserName
        self.__dict['FromUserName'] = fromUserName
        self.__dict['CreateTime'] = int(time.time())
        self.__dict['MediaId'] = mediaId

    def send(self):
        XmlForm = """
            <xml>
                <ToUserName><![CDATA[{ToUserName}]]></ToUserName>
                <FromUserName><![CDATA[{FromUserName}]]></FromUserName>
                <CreateTime>{CreateTime}</CreateTime>
                <MsgType><![CDATA[image]]></MsgType>
                <Image>
                <MediaId><![CDATA[{MediaId}]]></MediaId>
                </Image>
            </xml>
            """
        return XmlForm.format(**self.__dict)
After coding, restart the program, sudopython main.py80.
# 2.6 Online Testing
WeChat The public platform provides a in-line testing platform to facilitate developers to simulate scenarios to test code logic.Just as 2.2 Passive Response Text Message explains that this passive reply interface is different from the customer service interface, and you should be aware of the difference when testing.
The purpose of online testing is to test whether the developer's code logic is incorrect and doesn't conform to expectations. Even if the test is successful, the content will not be sent to fans. So you can test it at will.
Test results:
- "Request failed," indicates that there is a problem with the code. Please check the code logic.
2) "The request was successful," and then check whether it met expectations based on the returned results.
# 2.7 A real experience.
Take out your phone, WeChat scan Service Account two-dimensional code, and become the first fan of your service number.Service number QR code location is shown below:
Test the following figure:
# 3 The implementation of "diagrams" is still a work in progress
Purpose:
Introduce material management
Based on text messages and picture messages, the remaining voice messages, video messages, geographical messages, etc. can be understood on its own.
Pre-implemented features:
Accept a photo message sent by a fan and immediately reply to the same photo to the fan.
# 3.1 Receive photo messages
A picture message sent by a fan to Service Account.The official wiki link: Message Management / Receiving Messages - Receiving Regular Messages / Picture Messages From an example, a fan sends a picture message to a service. The XML received in the service's developer background is as follows:
<xml>
 <ToUserName><![CDATA[服务号]]></ToUserName>
 <FromUserName><![CDATA[粉丝号]]></FromUserName>
 <CreateTime>1460536575</CreateTime>
 <MsgType><![CDATA[image]]></MsgType>
 <PicUrl><![CDATA[http://mmbiz.qpic.cn/xxxxxx /0]]></PicUrl>
 <MsgId>6272956824639273066</MsgId>
 <MediaId><![CDATA[gyci5a-xxxxx-OL]]></MediaId>
</xml>
Special note:
PicUrl: This parameter is used by the WeChat system to automatically convert image messages sent by "fans" into URLs.This url can be opened in a browser to view the picture.
MediaId: The id generated by the WeChat system is used to tag the image. For more information, see the wiki Material management / Access temporary material ,
# 3.2 Passive Reply to Photo Message
That is, the picture message sent by Service Account to fans.Official wiki link: Message Management / Sending Messages - Passive Reply to User Messages / Picture Messages
Special note:
Passive reply message, that is, to send a passive response message, unlike the customer service message interface
It is not actually an interface, but a reply to a message sent by the WeChat server
If you don't want to or can't reply within 5s after receiving the fan message, you need to reply "success" character string (detailed below)
- The customer service interface is called at any time if certain conditions are met
The xml that the developer sends to the WeChat back end is as follows:
<xml>
 <ToUserName><![CDATA[粉丝号]]></ToUserName>
 <FromUserName><![CDATA[服务号]]></FromUserName>
 <CreateTime>1460536576</CreateTime>
 <MsgType><![CDATA[image]]></MsgType>
 <Image>
 <MediaId><![CDATA[gyci5oxxxxxxv3cOL]]></MediaId>
 </Image>
</xml>
The MediaId content filled in here is actually the original MediaId that the fan sent the picture, so the fan received an identical original picture. What if you want to respond to other pictures from fans?
To add material, please refer to Add temporary material or Add permanent material
Get its MediaId, refer to Get Temporary Material MediaID or Get Permanent Material MediaID
# 3.3 flow chart
# 3.4 Code code
Only the portion of the code that has been changed shows the rest. Refer to the sections above, online testing, real-world experience, reply to the empty string. Refer to implement "You Ask Me Anything." vim handle.py
# -*- coding: utf-8 -*-
# filename: handle.py
import hashlib
import reply
import receive
import web

class Handle(object):
    def POST(self):
        try:
            webData = web.data()
            print "Handle Post webdata is ", webData   #后台打日志
            recMsg = receive.parse_xml(webData)
            if isinstance(recMsg, receive.Msg):
                toUser = recMsg.FromUserName
                fromUser = recMsg.ToUserName
                if recMsg.MsgType == 'text':
                    content = "test"
                    replyMsg = reply.TextMsg(toUser, fromUser, content)
                    return replyMsg.send()
                if recMsg.MsgType == 'image':
                    mediaId = recMsg.MediaId
                    replyMsg = reply.ImageMsg(toUser, fromUser, mediaId)
                    return replyMsg.send()
                else:
                    return reply.Msg().send()
            else:
                print "暂且不处理"
                return reply.Msg().send()
        except Exception, Argment:
            return Argment
# 4 AccessToken
- For information on how to generate AccessToken and advice on how to use it, see Access_token Instructions
Special emphasis is placed on:
The third party needs a access_token to acquire and refresh the in-control server.
Concurrent access to access_token causes AccessToken to overwrite each other, affecting specific business functions
# 4.3 Code code
Again, the following code is just meant to briefly illustrate how the interface is obtained.In fact, it is not recommended, especially the heavy business Service Account, more need to control the server, unified access to accessToken.
vim basic.py
# -*- coding: utf-8 -*-
# filename: basic.py
import urllib
import time
import json
class Basic:
    def __init__(self):
        self.__accessToken = ''
        self.__leftTime = 0

    def __real_get_access_token(self):
        appId = "xxxxx"
        appSecret = "xxxxx"
        postUrl = ("https://api.weixin.qq.com/cgi-bin/token?grant_type="
                   "client_credential&appid=%s&secret=%s" % (appId, appSecret))
        urlResp = urllib.urlopen(postUrl)
        urlResp = json.loads(urlResp.read())
        self.__accessToken = urlResp['access_token']
        self.__leftTime = urlResp['expires_in']

    def get_access_token(self):
        if self.__leftTime < 10:
            self.__real_get_access_token()
        return self.__accessToken

    def run(self):
        while(True):
            if self.__leftTime > 10:
                time.sleep(2)
                self.__leftTime -= 2
            else:
                self.__real_get_access_token()
# 5 Temporary Materials
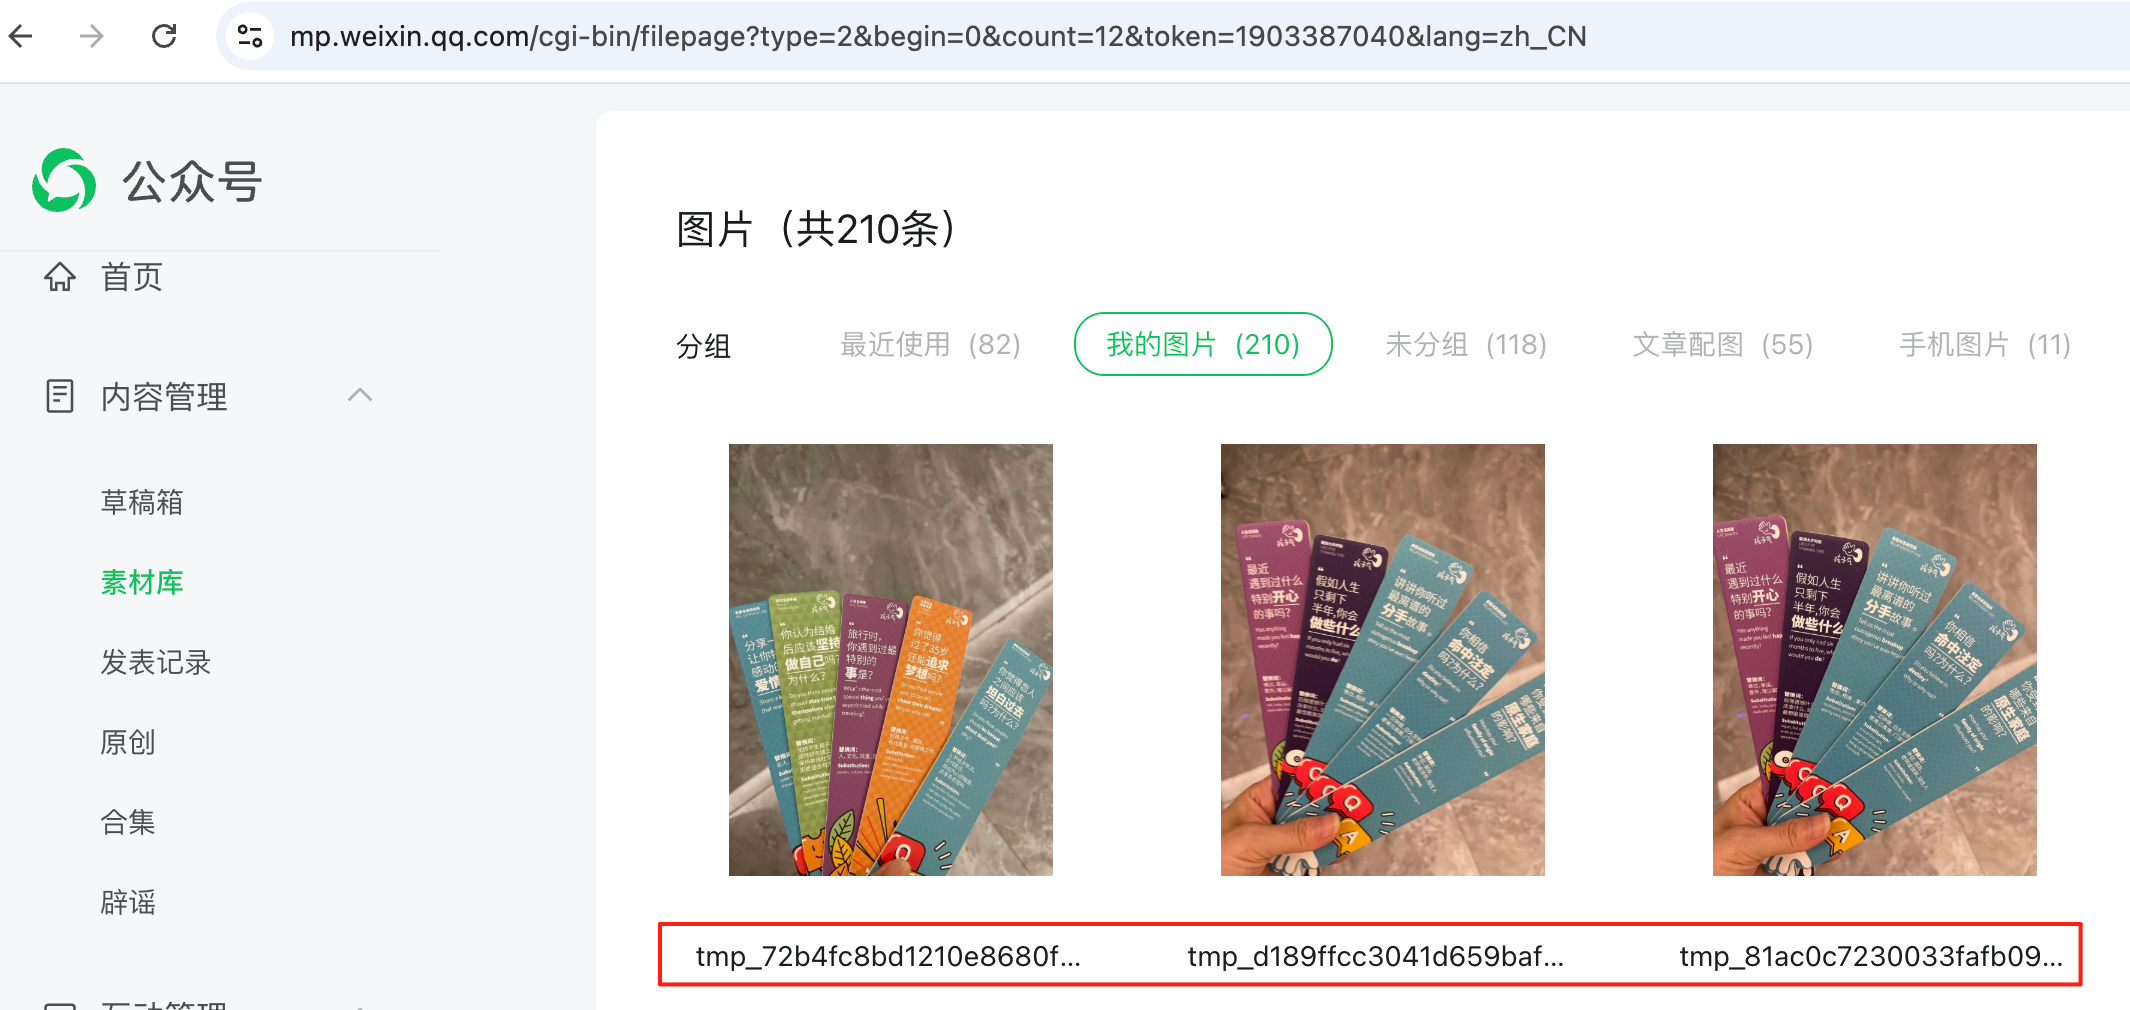
Service Account There are often situations where temporary multimedia material is needed, such as when using interfaces, especially when sending messages, the acquisition and call of multimedia files, multimedia messages, etc. are done through MediaID.For example, in implementing a "picture" feed, a fan sends a picture message to the service, which generates a temporary material.
Because there is a limit to the number of permanent assets, but Service Account needs to use some assets temporarily, so temporary assets are created.This kind of material is not stored in the background of the public platform for a long time, so it is not queried in the material management of the public platform's official website, but it can be operated through the interface.
For further details, please refer to the public platform wiki.
# 5.1 New temporary material
- Click here to view the interface details , providing reference code on how to upload material as temporary material for other interfaces to use.
After the preparation of vim media.py, run media.py directly to upload temporary material.
# -*- coding: utf-8 -*-
# filename: media.py
from basic import Basic
import urllib2
import poster.encode
from poster.streaminghttp import register_openers


class Media(object):
    def __init__(self):
        register_openers()

    # 上传图片
    def upload(self, accessToken, filePath, mediaType):
        openFile = open(filePath, "rb")
        param = {'media': openFile}
        postData, postHeaders = poster.encode.multipart_encode(param)

        postUrl = "https://api.weixin.qq.com/cgi-bin/media/upload?access_token=%s&type=%s" % (
            accessToken, mediaType)
        request = urllib2.Request(postUrl, postData, postHeaders)
        urlResp = urllib2.urlopen(request)
        print urlResp.read()

if __name__ == '__main__':
    myMedia = Media()
    accessToken = Basic().get_access_token()
    filePath = "D:/code/mpGuide/media/test.jpg"  # 请按实际填写
    mediaType = "image"
    myMedia.upload(accessToken, filePath, mediaType)
# 5.2 Get Temporary Material MediaID
The MediaID of the temporary material does not provide a specific interface for unified queries, so there are two ways to
MediaID is extracted from the returned JSON data through the last temporary material of the interface, in the case of successful invocation, which can be temporarily used
Temporary material in fan interaction, MediaID can be extracted from xml data, can be used temporarily
# 5.3 Download temporary material
- Click here to view the interface details
# 5.3.1 Handmade Experience
How do developers save pictures sent by fans?Click here to view the details of . To facilitate understanding, we start from the simplest way to get the material from the browser. According to the actual situation, the browser enters the following address: https://api.weixin.qq.com/cgi-bin/media/get?access_token=ACCESS_TOKEN&media_id=MEDIA_ID (self-replacement data) ACCESS_TOKEN as explained in the "AccessToken" section MEDIA_ID MediaId in Send / Receive Picture Message xml As long as the data is correct, the image will be downloaded locally, as shown in the following image:
# 5.3.2 Interface acquisition
Now that we understand the function of this interface, we're left with the code.
vim media.py
# -*- coding: utf-8 -*-
# filename: media.py
import urllib2
import json
from basic import Basic


class Media(object):
    def get(self, accessToken, mediaId):
        postUrl = "https://api.weixin.qq.com/cgi-bin/media/get?access_token=%s&media_id=%s" % (
            accessToken, mediaId)
        urlResp = urllib2.urlopen(postUrl)

        headers = urlResp.info().__dict__['headers']
        if ('Content-Type: application/json\r\n' in headers) or ('Content-Type: text/plain\r\n' in headers):
            jsonDict = json.loads(urlResp.read())
            print jsonDict
        else:
            buffer = urlResp.read()  # 素材的二进制
            mediaFile = file("test_media.jpg", "wb")
            mediaFile.write(buffer)
            print "get successful"


if __name__ == '__main__':
    myMedia = Media()
    accessToken = Basic().get_access_token()
    mediaId = "2ZsPnDj9XIQlGfws31MUfR5Iuz-rcn7F6LkX3NRCsw7nDpg2268e-dbGB67WWM-N"
    myMedia.get(accessToken, mediaId)
Run media.py directly to download the material you want, which graphic message type, will directly output JSON data section on the screen.
# 6 Permanent Materials
# 6.1 Ways to create new permanent material
# 6.1.1 Handmade Experience
Service Account Official website material management added material.In addition, the public platform only distinguishes material by MediaID, which is not equal to the file name of the material. MediaID can only be queried through the interface, and the official website of the public platform can see the file name of the material.
# 6.1.2 Additional permanent material
Add a permanent material interface (see wiki for details) . It's much like adding temporary material, but using URLs is different. Avoid duplication here. Take adding a permanent graphic material interface as an example. Please refer to Adding temporary material code for adding other types of material.
vim material.py
# -*- coding: utf-8 -*-
# filename: material.py
import urllib2
import json
from basic import Basic

class Material(object):
    # 上传图文
    def add_news(self, accessToken, news):
        postUrl = "https://api.weixin.qq.com/cgi-bin/material/add_news?access_token=%s" % accessToken
        urlResp = urllib2.urlopen(postUrl, news)
        print urlResp.read()

if __name__ == '__main__':
    myMaterial = Material()
    accessToken = Basic().get_access_token()
    news = (
        {
            "articles":
            [
                {
                    "title": "test",
                    "thumb_media_id": "X2UMe5WdDJSS2AS6BQkhTw9raS0pBdpv8wMZ9NnEzns",
                    "author": "vickey",
                    "digest": "",
                    "show_cover_pic": 1,
                    "content": "<p><img src=\"\" alt=\"\" data-width=\"null\" data-ratio=\"NaN\"><br  /><img src=\"\" alt=\"\" data-width=\"null\" data-ratio=\"NaN\"><br  /></p>",
                    "content_source_url": "",
                }
            ]
        })
    # news 是个dict类型,可通过下面方式修改内容
    #news['articles'][0]['title'] = u"测试".encode('utf-8')
    # print news['articles'][0]['title']
    news = json.dumps(news, ensure_ascii=False)
    myMaterial.add_news(accessToken, news)
# 6.2 Get Permanent Material MediaID
Save MediaID when you add a file by adding a permanent file interface (click here to view the interface details )
Get the MediaID by getting the material information by getting the permanent material list (described below)
# 6.3 List of Getting Materials
Get a list of materials (click here to see the interface details ) Special note: This interface only pulls material information in bulk, not all material information at once, so you can understand the meaning of the offset field.
vim material.py
# -*- coding: utf-8 -*-
# filename: material.py
import urllib2
import json
import poster.encode
from poster.streaminghttp import register_openers
from basic import Basic

class Material(object):
    def __init__(self):
        register_openers()
    #上传
    def upload(self, accessToken, filePath, mediaType):
        openFile = open(filePath, "rb")
        fileName = "hello"
        param = {'media': openFile, 'filename': fileName}
        #param = {'media': openFile}
        postData, postHeaders = poster.encode.multipart_encode(param)

        postUrl = "https://api.weixin.qq.com/cgi-bin/material/add_material?access_token=%s&type=%s" % (accessToken, mediaType)
        request = urllib2.Request(postUrl, postData, postHeaders)
        urlResp = urllib2.urlopen(request)
        print urlResp.read()
    #下载
    def get(self, accessToken, mediaId):
        postUrl = "https://api.weixin.qq.com/cgi-bin/material/get_material?access_token=%s" % accessToken
        postData = "{ \"media_id\": \"%s\" }" % mediaId
        urlResp = urllib2.urlopen(postUrl, postData)
        headers = urlResp.info().__dict__['headers']
        if ('Content-Type: application/json\r\n' in headers) or ('Content-Type: text/plain\r\n' in headers):
            jsonDict = json.loads(urlResp.read())
            print jsonDict
        else:
            buffer = urlResp.read()  # 素材的二进制
            mediaFile = file("test_media.jpg", "wb")
            mediaFile.write(buffer)
            print "get successful"
    #删除
    def delete(self, accessToken, mediaId):
        postUrl = "https://api.weixin.qq.com/cgi-bin/material/del_material?access_token=%s" % accessToken
        postData = "{ \"media_id\": \"%s\" }" % mediaId
        urlResp = urllib2.urlopen(postUrl, postData)
        print urlResp.read()

    #获取素材列表
    def batch_get(self, accessToken, mediaType, offset=0, count=20):
        postUrl = ("https://api.weixin.qq.com/cgi-bin/material"
               "/batchget_material?access_token=%s" % accessToken)
        postData = ("{ \"type\": \"%s\", \"offset\": %d, \"count\": %d }"
                    % (mediaType, offset, count))
        urlResp = urllib2.urlopen(postUrl, postData)
        print urlResp.read()

if __name__ == '__main__':
    myMaterial = Material()
    accessToken = Basic().get_access_token()
    mediaType = "news"
    myMaterial.batch_get(accessToken, mediaType)
# 6.4 Delete permanent material
If I want to delete 20160102.jpg this picture, in addition to the official website direct operation, you can also use [delete permanent material] interface: click here to view the interface details
You first need to know the mediaID of the image, as described in the section above. The code can be found in the previous section: Material ().delete () interface After the interface is successfully invoked, the deleted images cannot be retrieved in the images managed by the public platform's official website.
# 7 Custom Menus
Please refer to Create an interface .
Goal: three menu bar, experience click, view, media_id three types of menu buttons, other types of learning in this section, please consult the public platform wiki explanation understanding.
# 7.1 Create a menu interface
- Write code based on the JSON data given by the public platform wiki, which involves media_id. Please read the "Permanent Material" section.
vim menu.py
# -*- coding: utf-8 -*-
# filename: menu.py
import urllib
from basic import Basic

class Menu(object):
    def __init__(self):
        pass
    def create(self, postData, accessToken):
        postUrl = "https://api.weixin.qq.com/cgi-bin/menu/create?access_token=%s" % accessToken
        if isinstance(postData, unicode):
            postData = postData.encode('utf-8')
        urlResp = urllib.urlopen(url=postUrl, data=postData)
        print urlResp.read()

    def query(self, accessToken):
        postUrl = "https://api.weixin.qq.com/cgi-bin/menu/get?access_token=%s" % accessToken
        urlResp = urllib.urlopen(url=postUrl)
        print urlResp.read()

    def delete(self, accessToken):
        postUrl = "https://api.weixin.qq.com/cgi-bin/menu/delete?access_token=%s" % accessToken
        urlResp = urllib.urlopen(url=postUrl)
        print urlResp.read()

    #获取自定义菜单配置接口
    def get_current_selfmenu_info(self, accessToken):
        postUrl = "https://api.weixin.qq.com/cgi-bin/get_current_selfmenu_info?access_token=%s" % accessToken
        urlResp = urllib.urlopen(url=postUrl)
        print urlResp.read()

if __name__ == '__main__':
    myMenu = Menu()
    postJson = """
    {
        "button":
        [
            {
                "type": "click",
                "name": "开发指引",
                "key":  "mpGuide"
            },
            {
                "name": "公众平台",
                "sub_button":
                [
                    {
                        "type": "view",
                        "name": "更新公告",
                        "url": "http://mp.weixin.qq.com/wiki?t=resource/res_main&id=mp1418702138&token=&lang=zh_CN"
                    },
                    {
                        "type": "view",
                        "name": "接口权限说明",
                        "url": "http://mp.weixin.qq.com/wiki?t=resource/res_main&id=mp1418702138&token=&lang=zh_CN"
                    },
                    {
                        "type": "view",
                        "name": "返回码说明",
                        "url": "http://mp.weixin.qq.com/wiki?t=resource/res_main&id=mp1433747234&token=&lang=zh_CN"
                    }
                ]
            },
            {
                "type": "media_id",
                "name": "旅行",
                "media_id": "z2zOokJvlzCXXNhSjF46gdx6rSghwX2xOD5GUV9nbX4"
            }
          ]
    }
    """
    accessToken = Basic().get_access_token()
    #myMenu.delete(accessToken)
    myMenu.create(postJson, accessToken)
Execute the command on the Tencent cloud server: python menu.py.
Check out: After refocusing on Service Account, you can see the new create menu interface. As an aside, if you do not refocus, the service number interface will automatically change, but there is a time delay.
As shown in the figure below, click on the submenu "Update Announcement" (view type) to bring up the web page (pc version)
Click Travel (media_id type) and Service Account displays a graphic message, as shown below:
Click on the development guidelines (click type), found Service Account system prompt: "This service number is temporarily unable to provide services."
# 7.2 Improve Menu Functions
View Public Platform Custom Menu and When you customize the menu event push , you know that by clicking the click type button, WeChat the background pushes an event type XML to the developer.
Obviously, click type also requires developers to further improve the background code logic, increase the response to custom menu events push.
# 7.2.1 Flow chart
# 7.2.2 Code code
- vimhandle.py (modified)
# -*- coding: utf-8 -*-
# filename: handle.py
import reply
import receive
import web

class Handle(object):
    def POST(self):
        try:
            webData = web.data()
            print "Handle Post webdata is ", webData  # 后台打日志
            recMsg = receive.parse_xml(webData)
            if isinstance(recMsg, receive.Msg):
                toUser = recMsg.FromUserName
                fromUser = recMsg.ToUserName
                if recMsg.MsgType == 'text':
                    content = "test"
                    replyMsg = reply.TextMsg(toUser, fromUser, content)
                    return replyMsg.send()
                if recMsg.MsgType == 'image':
                    mediaId = recMsg.MediaId
                    replyMsg = reply.ImageMsg(toUser, fromUser, mediaId)
                    return replyMsg.send()
            if isinstance(recMsg, receive.EventMsg):
                toUser = recMsg.FromUserName
                fromUser = recMsg.ToUserName
                if recMsg.Event == 'CLICK':
                    if recMsg.Eventkey == 'mpGuide':
                        content = u"编写中,尚未完成".encode('utf-8')
                        replyMsg = reply.TextMsg(toUser, fromUser, content)
                        return replyMsg.send()
            print "暂且不处理"
            return reply.Msg().send()
        except Exception, Argment:
            return Argment
- vimreceive.py (modified)
# -*- coding: utf-8 -*-
# filename: receive.py
import xml.etree.ElementTree as ET

def parse_xml(web_data):
    if len(web_data) == 0:
        return None
    xmlData = ET.fromstring(web_data)
    msg_type = xmlData.find('MsgType').text
    if msg_type == 'event':
        event_type = xmlData.find('Event').text
        if event_type == 'CLICK':
            return Click(xmlData)
        #elif event_type in ('subscribe', 'unsubscribe'):
            #return Subscribe(xmlData)
        #elif event_type == 'VIEW':
            #return View(xmlData)
        #elif event_type == 'LOCATION':
            #return LocationEvent(xmlData)
        #elif event_type == 'SCAN':
            #return Scan(xmlData)
    elif msg_type == 'text':
        return TextMsg(xmlData)
    elif msg_type == 'image':
        return ImageMsg(xmlData)

class EventMsg(object):
    def __init__(self, xmlData):
        self.ToUserName = xmlData.find('ToUserName').text
        self.FromUserName = xmlData.find('FromUserName').text
        self.CreateTime = xmlData.find('CreateTime').text
        self.MsgType = xmlData.find('MsgType').text
        self.Event = xmlData.find('Event').text
class Click(EventMsg):
    def __init__(self, xmlData):
        EventMsg.__init__(self, xmlData)
        self.Eventkey = xmlData.find('EventKey').text
# 7.3 experience
After compiling the code, restart the service, (sudopython main.py80), the view type, the media_id type is easy to implement, and now focus on the click type menu button.
WeChat Scan the code to become a fan of Service Account and click the menu button "Development Guidelines."
Looking at the background log, I found that I received an xml, such as a screenshot:
The background code settings of Service Account handle the event by replying to a text message with the content "in writing," so the service sent me a text signal, as shown in the diagram:
Well, by now, the goal has been achieved. The same is true for other types of custom menus.