# Create a plugin project
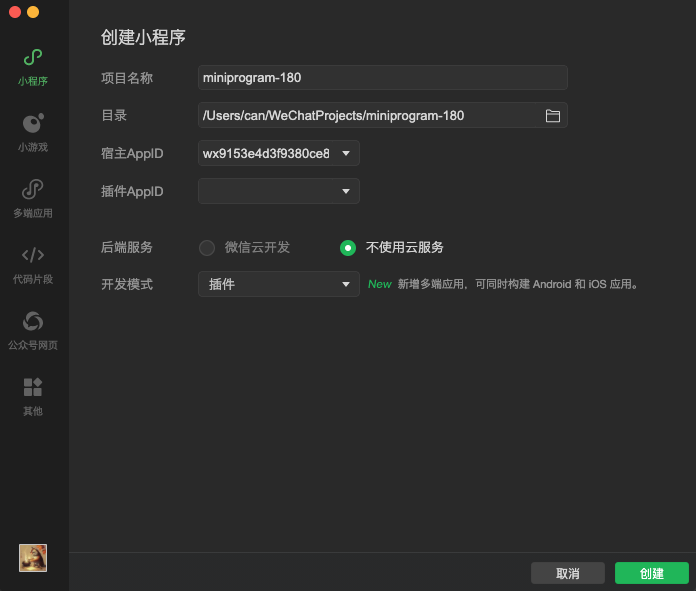
Weixin Mini Program AppID can create an Mini Program plug-in project. When developing an Mini Program plug-in, the AppID of the Mini Program that provides the plug-in should be filled in the "Plugin AppID" In this column, the host AppID is used to debug when other Mini Programs refer to Mini Program plug-ins you developed. On the creation of the project page, select an empty folder as the project path. You can choose to create Mini Program plug - launch template
Plug-ins are independent of Weixin Mini Program, but the AppID is common, so don't use the old Mini Programs project for plug-in development

Quick Start Template Instructions:
The miniprogramfolder is a normal Weixin Mini Program project for writing a demo for the use of a small plug-in. The demo is uploaded together when the plug-in code is uploaded and is used as a basis for reviewing the release of the small plug-ins.The pluginfile is the Weixin Mini Program plugin project, which is used to write the code for the Mini Programs plugin.Project.config.jsonneeds to focus oncompileTypefields,compileType = = 'plugin'before you can use the plugin project properly. Details
Weixin Mini Program Host AppID: AppID of Mini Programs referencing plug-ins
Plug-in AppID: The Weixin Mini Program AppID of the plug-in provider
Weixin Mini Program is not allowed to refer to your plugin on the real machine. By default, use your own test number as the host to refer to the plugin.
Version 1.05. 2111051 and earlier, when developing a plug-in in the tool, the Weixin Mini Program host AppID and plug-in AppID are the same;It differs from real plug-in usage scenarios.
Version 1.05. 2111051 allows you to change the Weixin Mini Program host AppID (default is your test number) to verify the performance of the plugin under different host Mini Programs.Plug-in AppID: Required, corresponding to the pluginAppid field in project.config.json. When the host AppID is the same as the plug-in AppID, the live preview will use your test number as the host.
# Open an existing plug-in project
If it is a plug-in project created previously, you can open it directly in the project list;
If you recreate the project and select a non-empty directory, then you need to have [[]] in this non-empty directoryproject.config.json Details , make sure this file has the following fields:
{
  "miniprogramRoot": "./miniprogram",
  "pluginRoot": "./plugin",
  "compileType": "plugin"
}
During project development, you can manually modify thecompileTypefield of theproject.config.jsonfile to switch the compilation type of the project.
# Plugin Upload

Before uploading the plug-in code, you need to specify a version number in the format numbers.numbers.numbers, with a maximum of 999 numbers per number.
Version numbers need to be incremented each time they are submitted and will be used by plug-in users. Please fill in carefully.
When uploading the plugin, theproject.config.jsonThe contents of the directory specified in``miniprogramRootare uploaded together as a plug-in demo. This demo needs to cover all the plug-in usage scenarios for plug-in auditing
# Writing, previewing, and uploading plug-in documents

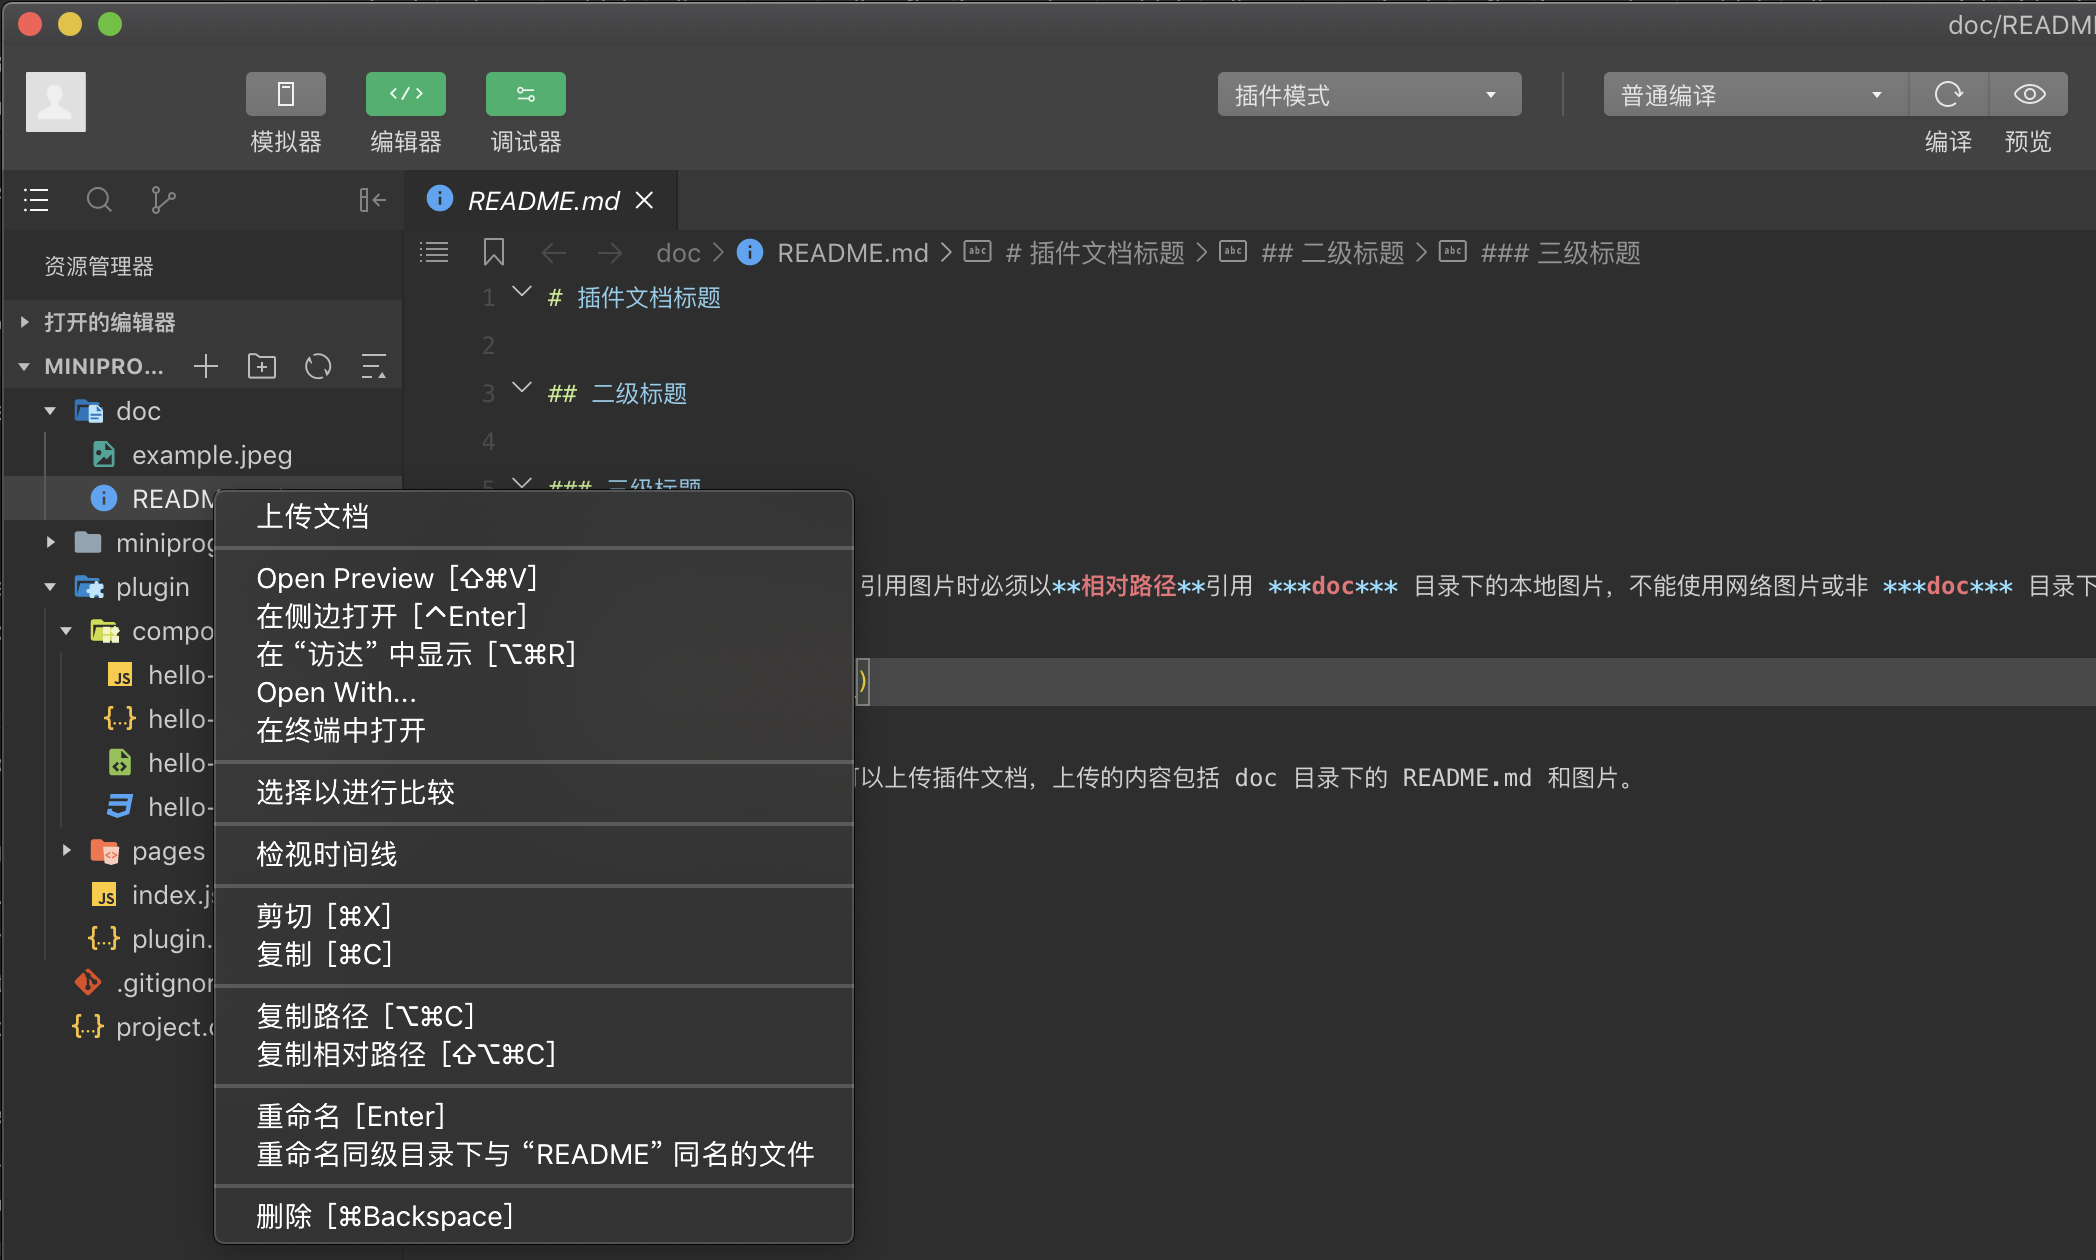
The plugin documentation must be placed in thedoc [directory in the plugin project root directory.doc/README.md,Images referenced inREADME.mdmust be local images in thedocdirectory.
After editingREADME.mdin the Developer Tools, right-click on the file and select "Upload Document" from the menu that pops up
# Plugin use
The use of plug-ins can be declared in theapagejsonfields ofpluginsof the Weixin Mini Program project. If the current compilation type is a Mini Program, you need to specify the version number of the published plug-in, and the developer tool pulls the corresponding version of the plug-in to compile according to the version number.
project.config.json``compileType = = 'plugin'`` 'dev'