Quick start
- Drag the video file to the Project panel to import the video file, and automatically generate video resources that can be used for small program projects.
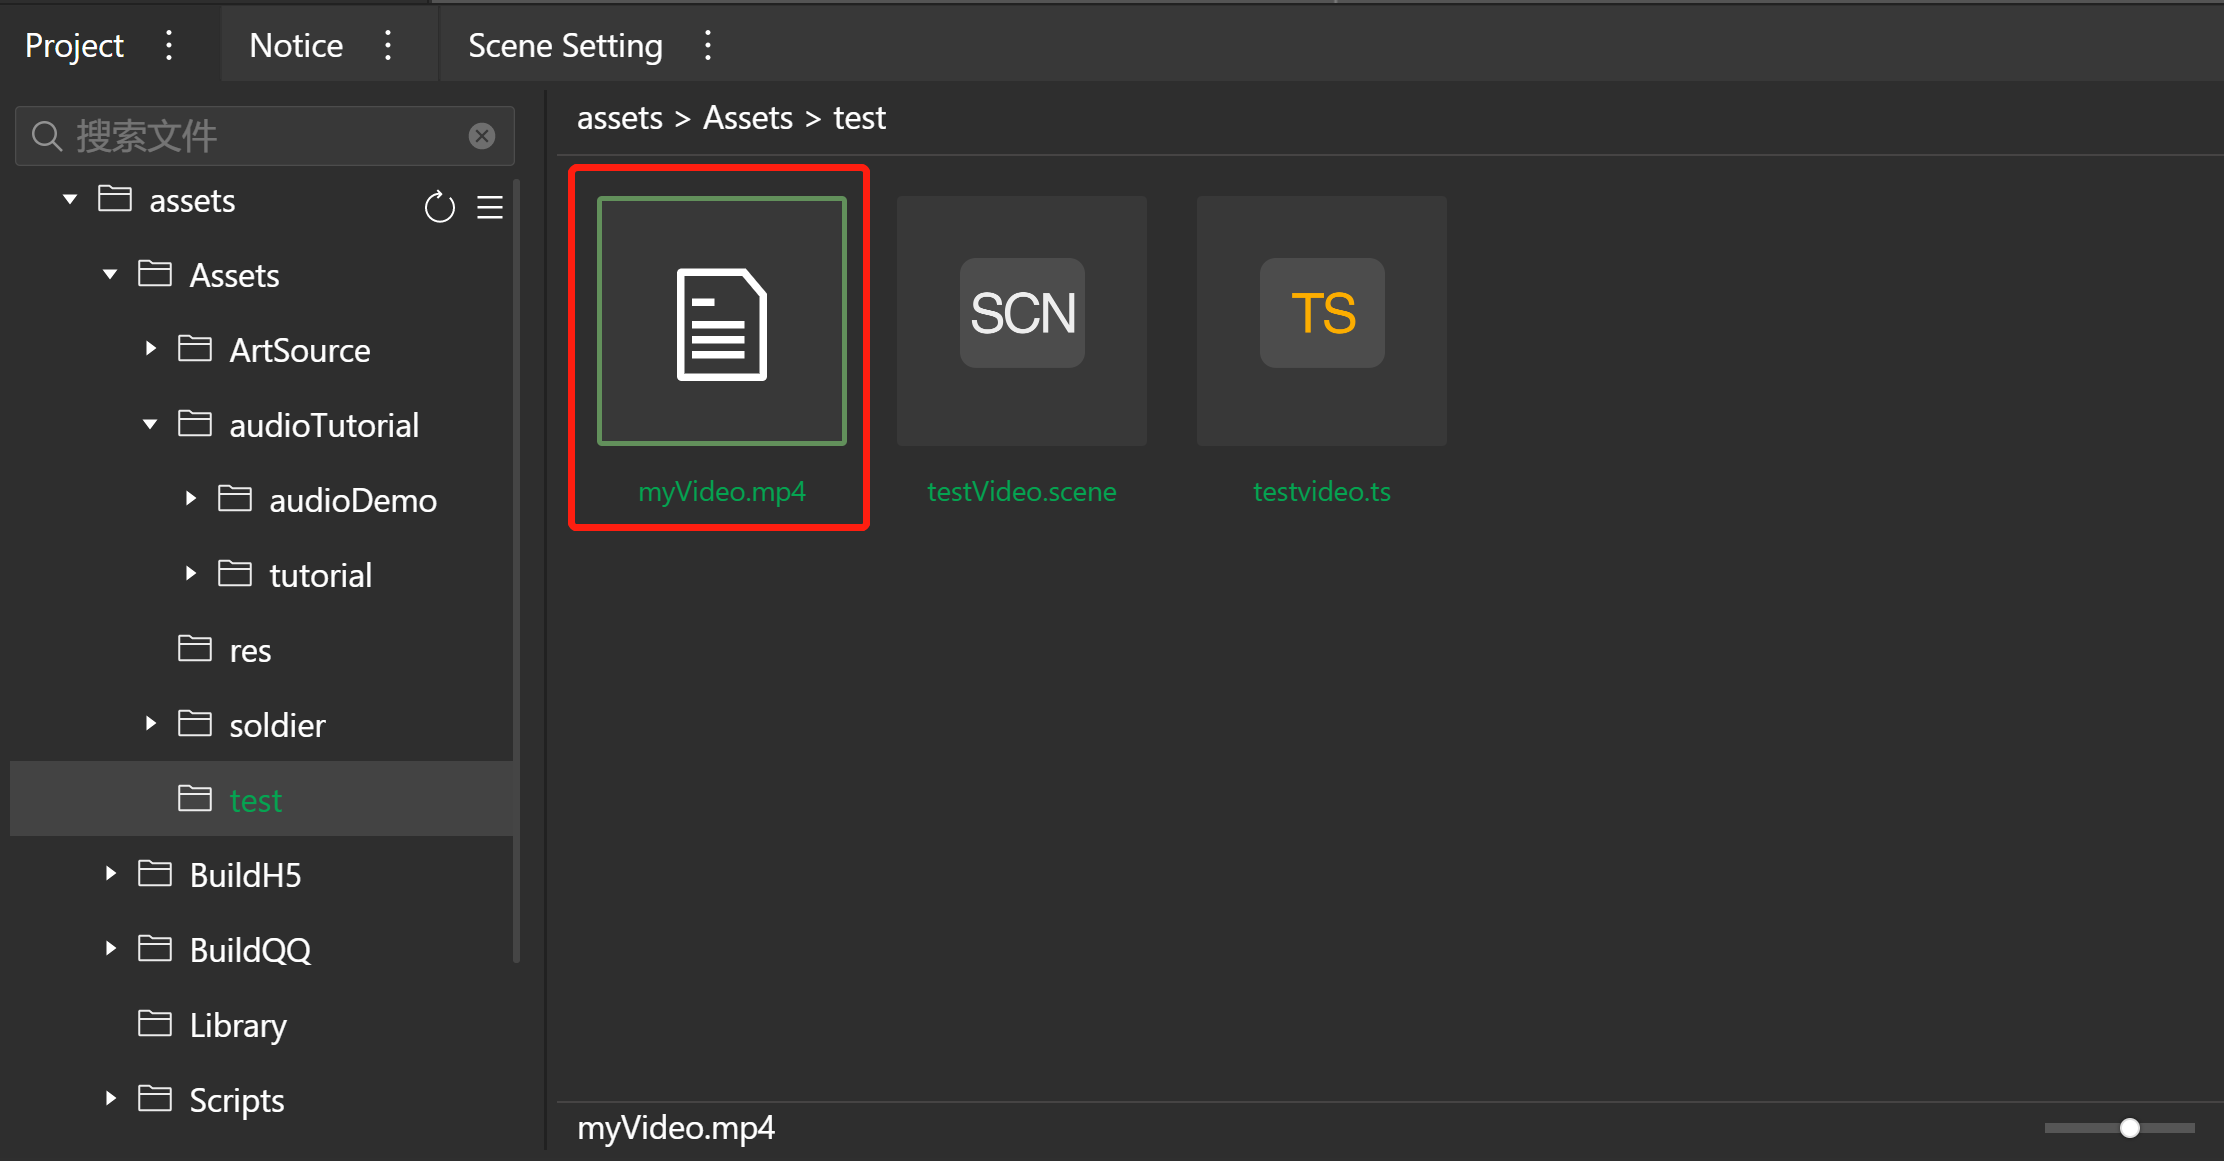
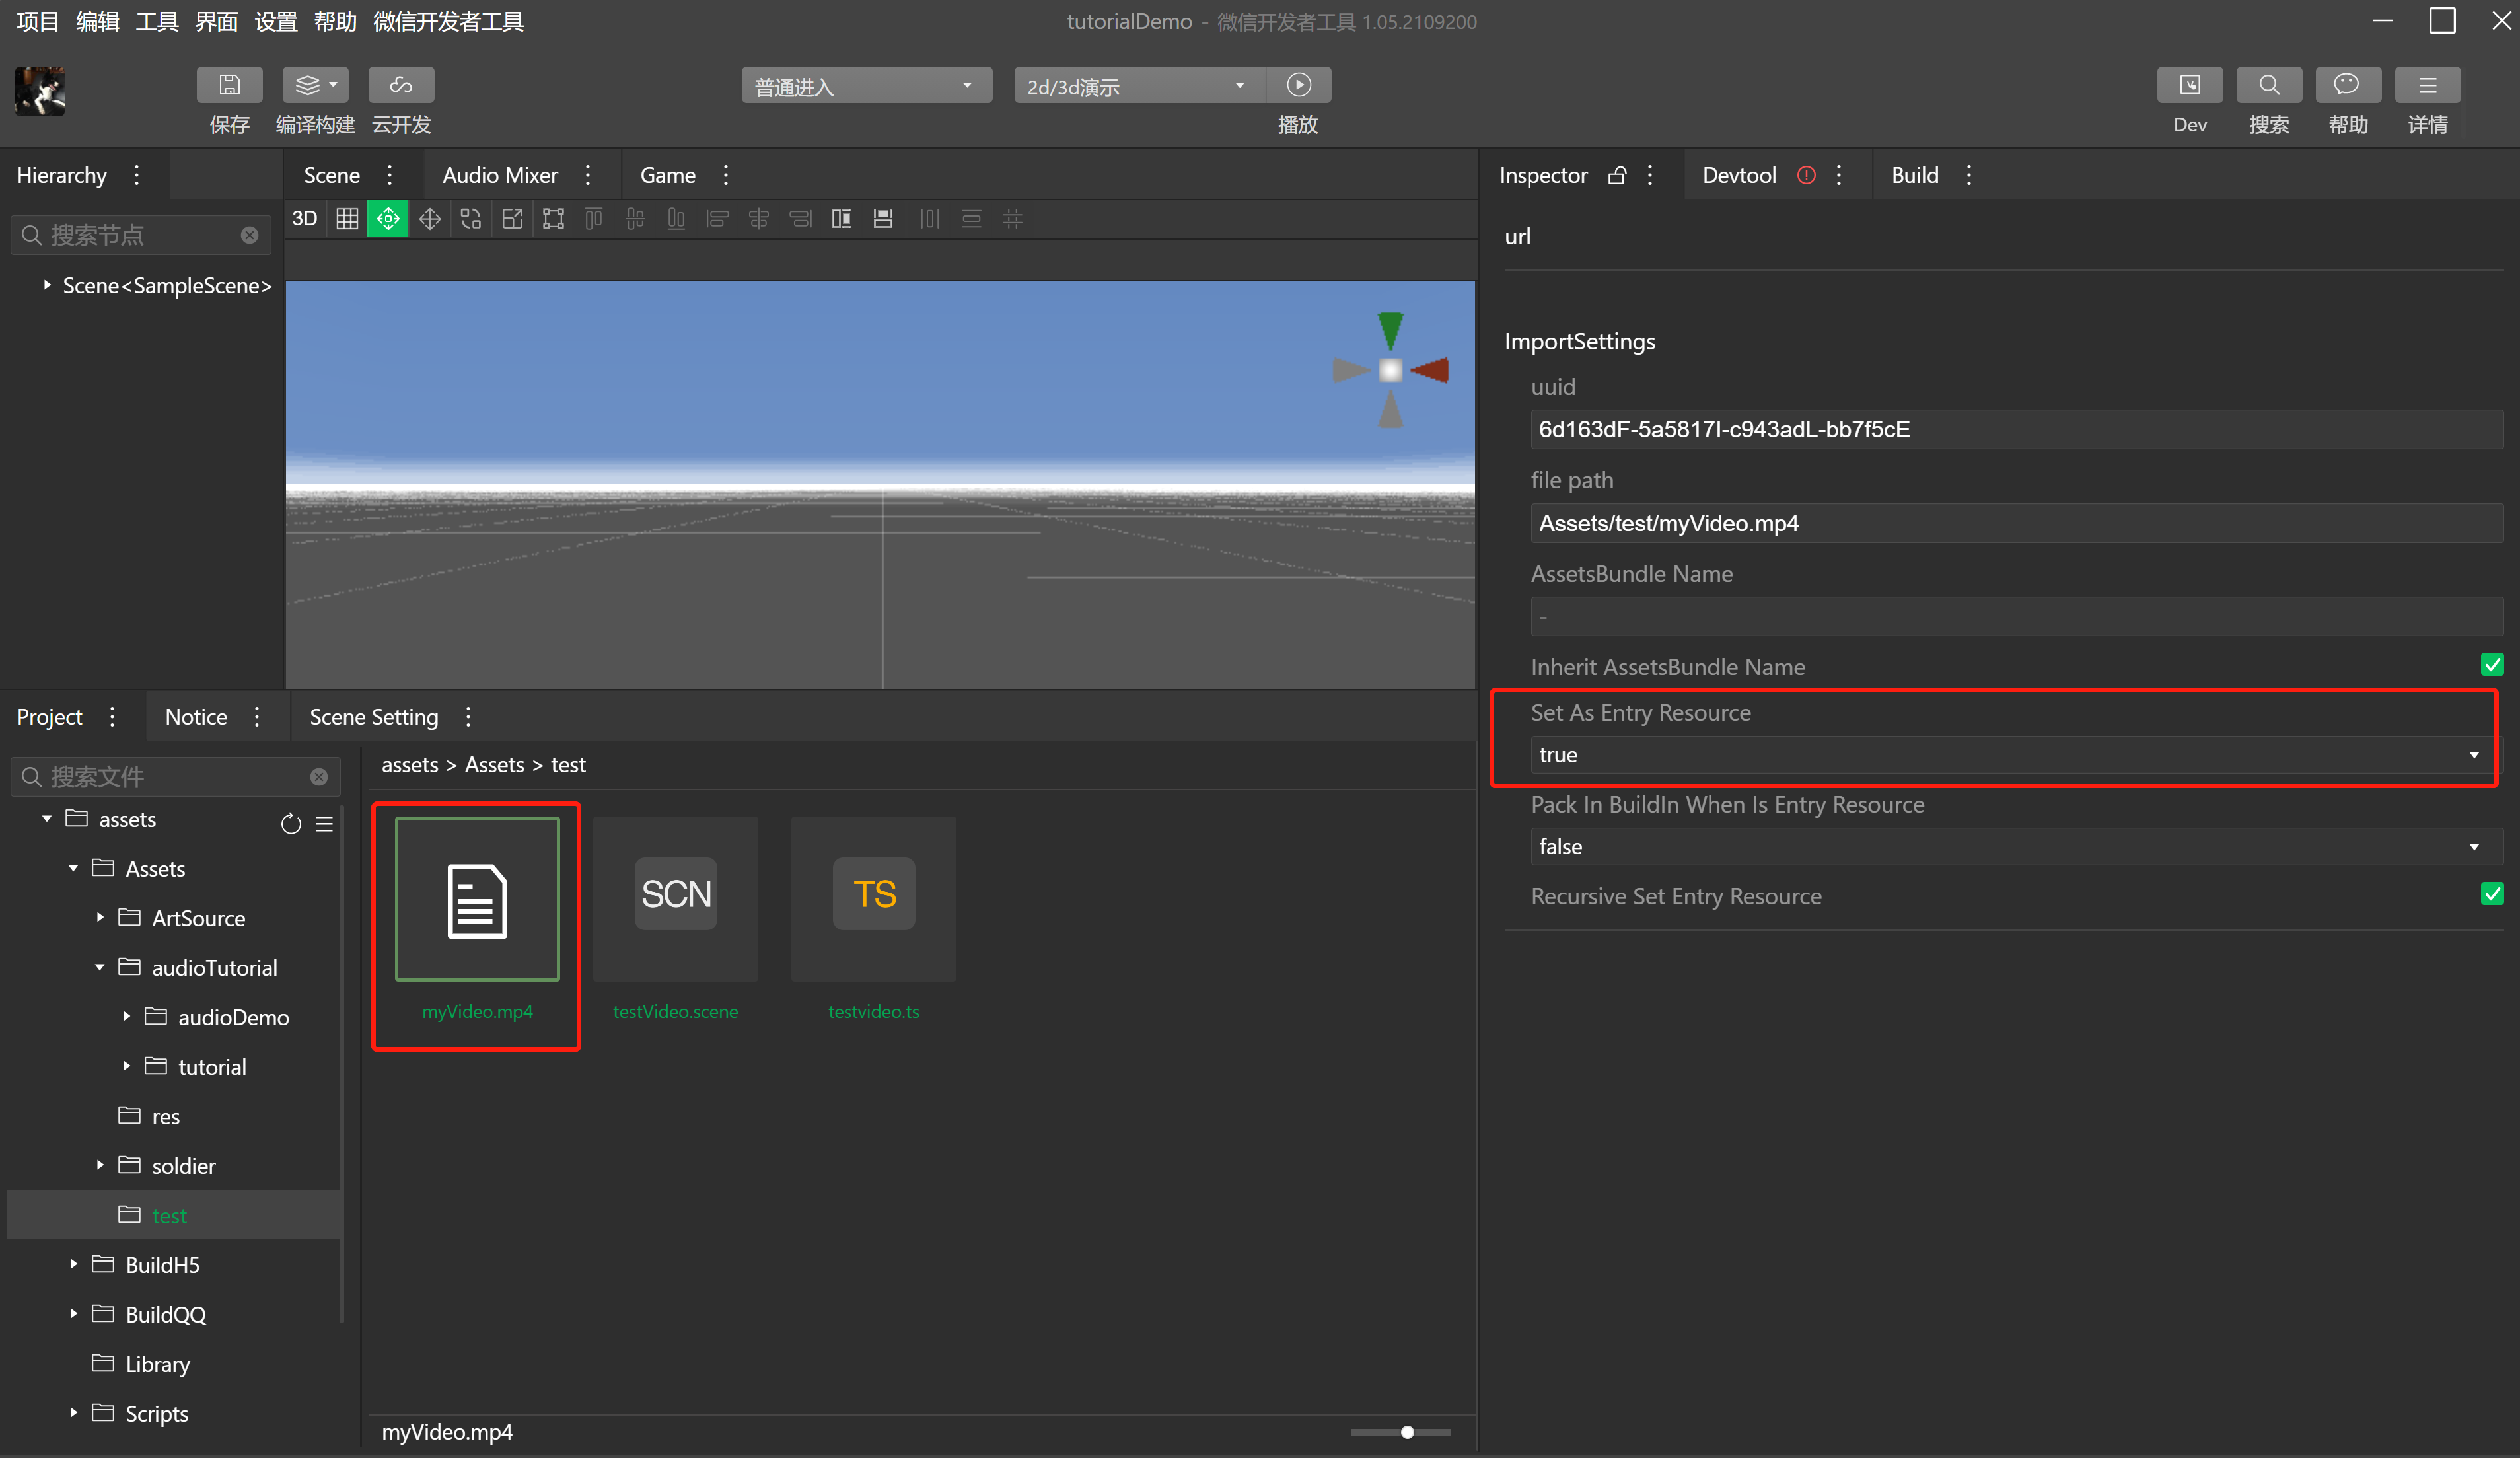
- Click the newly imported video file in the Project panel and set it as the entry resource in the Inspector panel, that is, Set As Entry Resource = true. In this way, the corresponding video resource can be loaded through the engine.loader.load interface.
- Right-click "New" -> script in the blank area of the Project panel to create a script file and rename it to testvideo.

- Copy the following code to the newly created script file and save it.
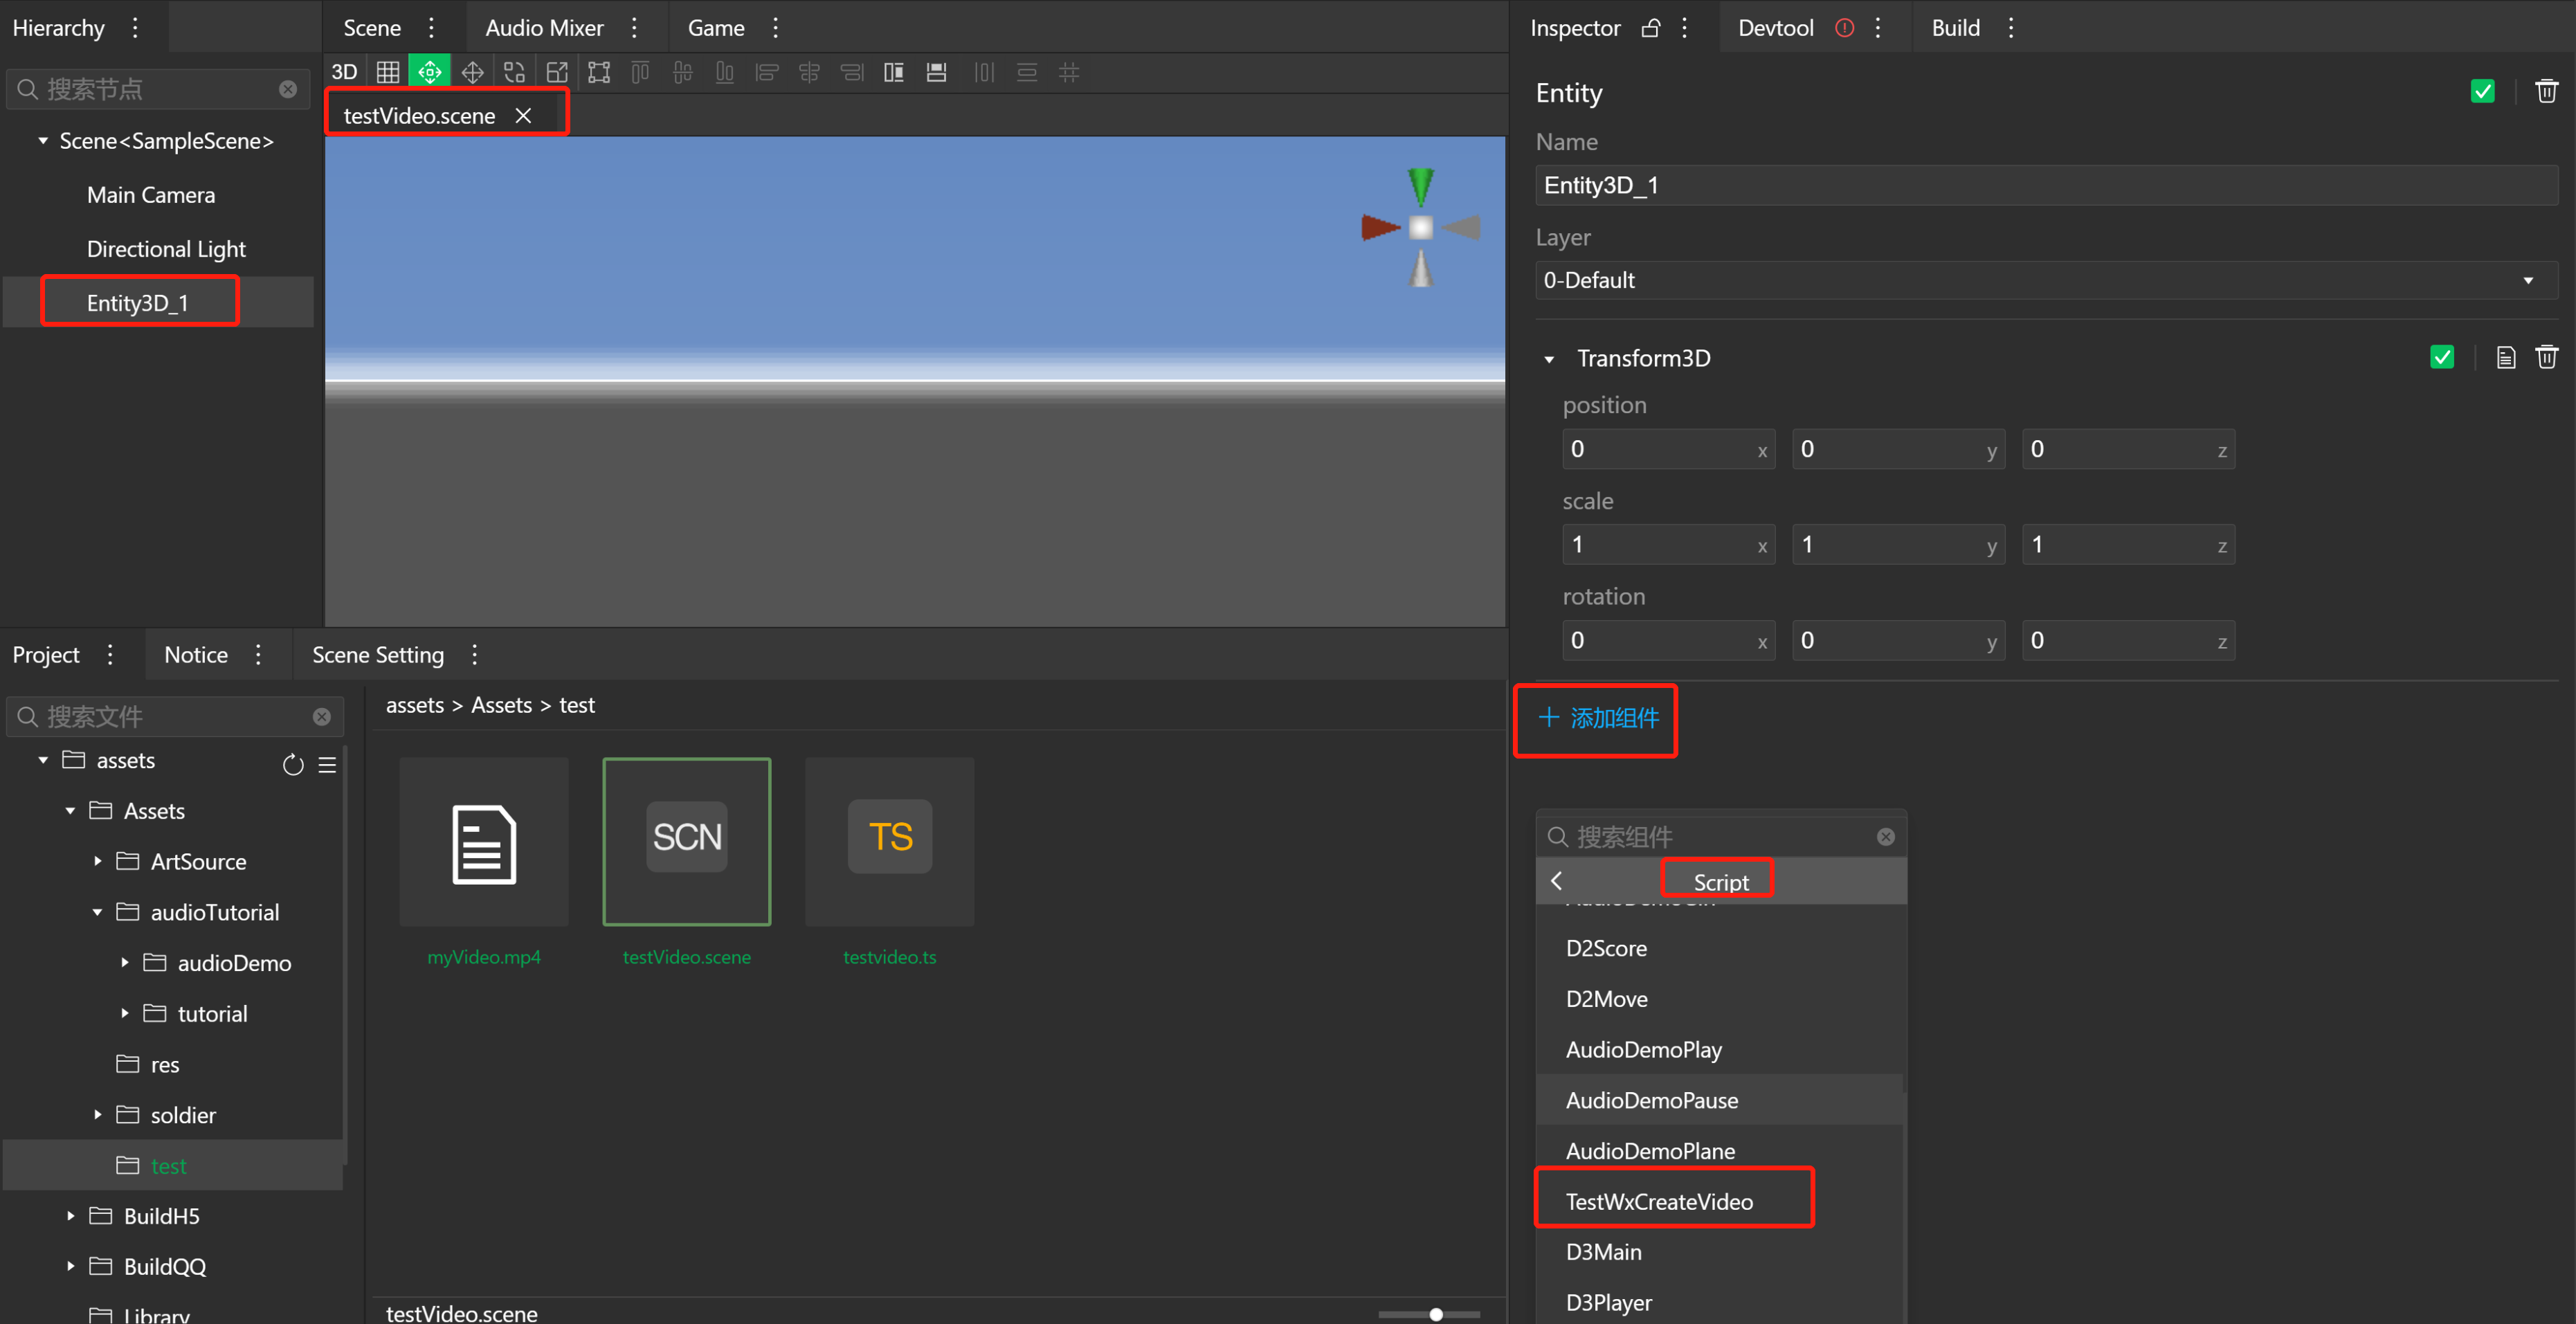
- Open the 3D scene resource and create an empty node in the Hierachy panel. Then configure this empty node in the Inspector panel, and add the script resource just created through "+Add component" at the bottom of the Inspector panel -> Script -> TestWxCreateVideo. Press ctrl+s (command+s for macOS) to save the scene.
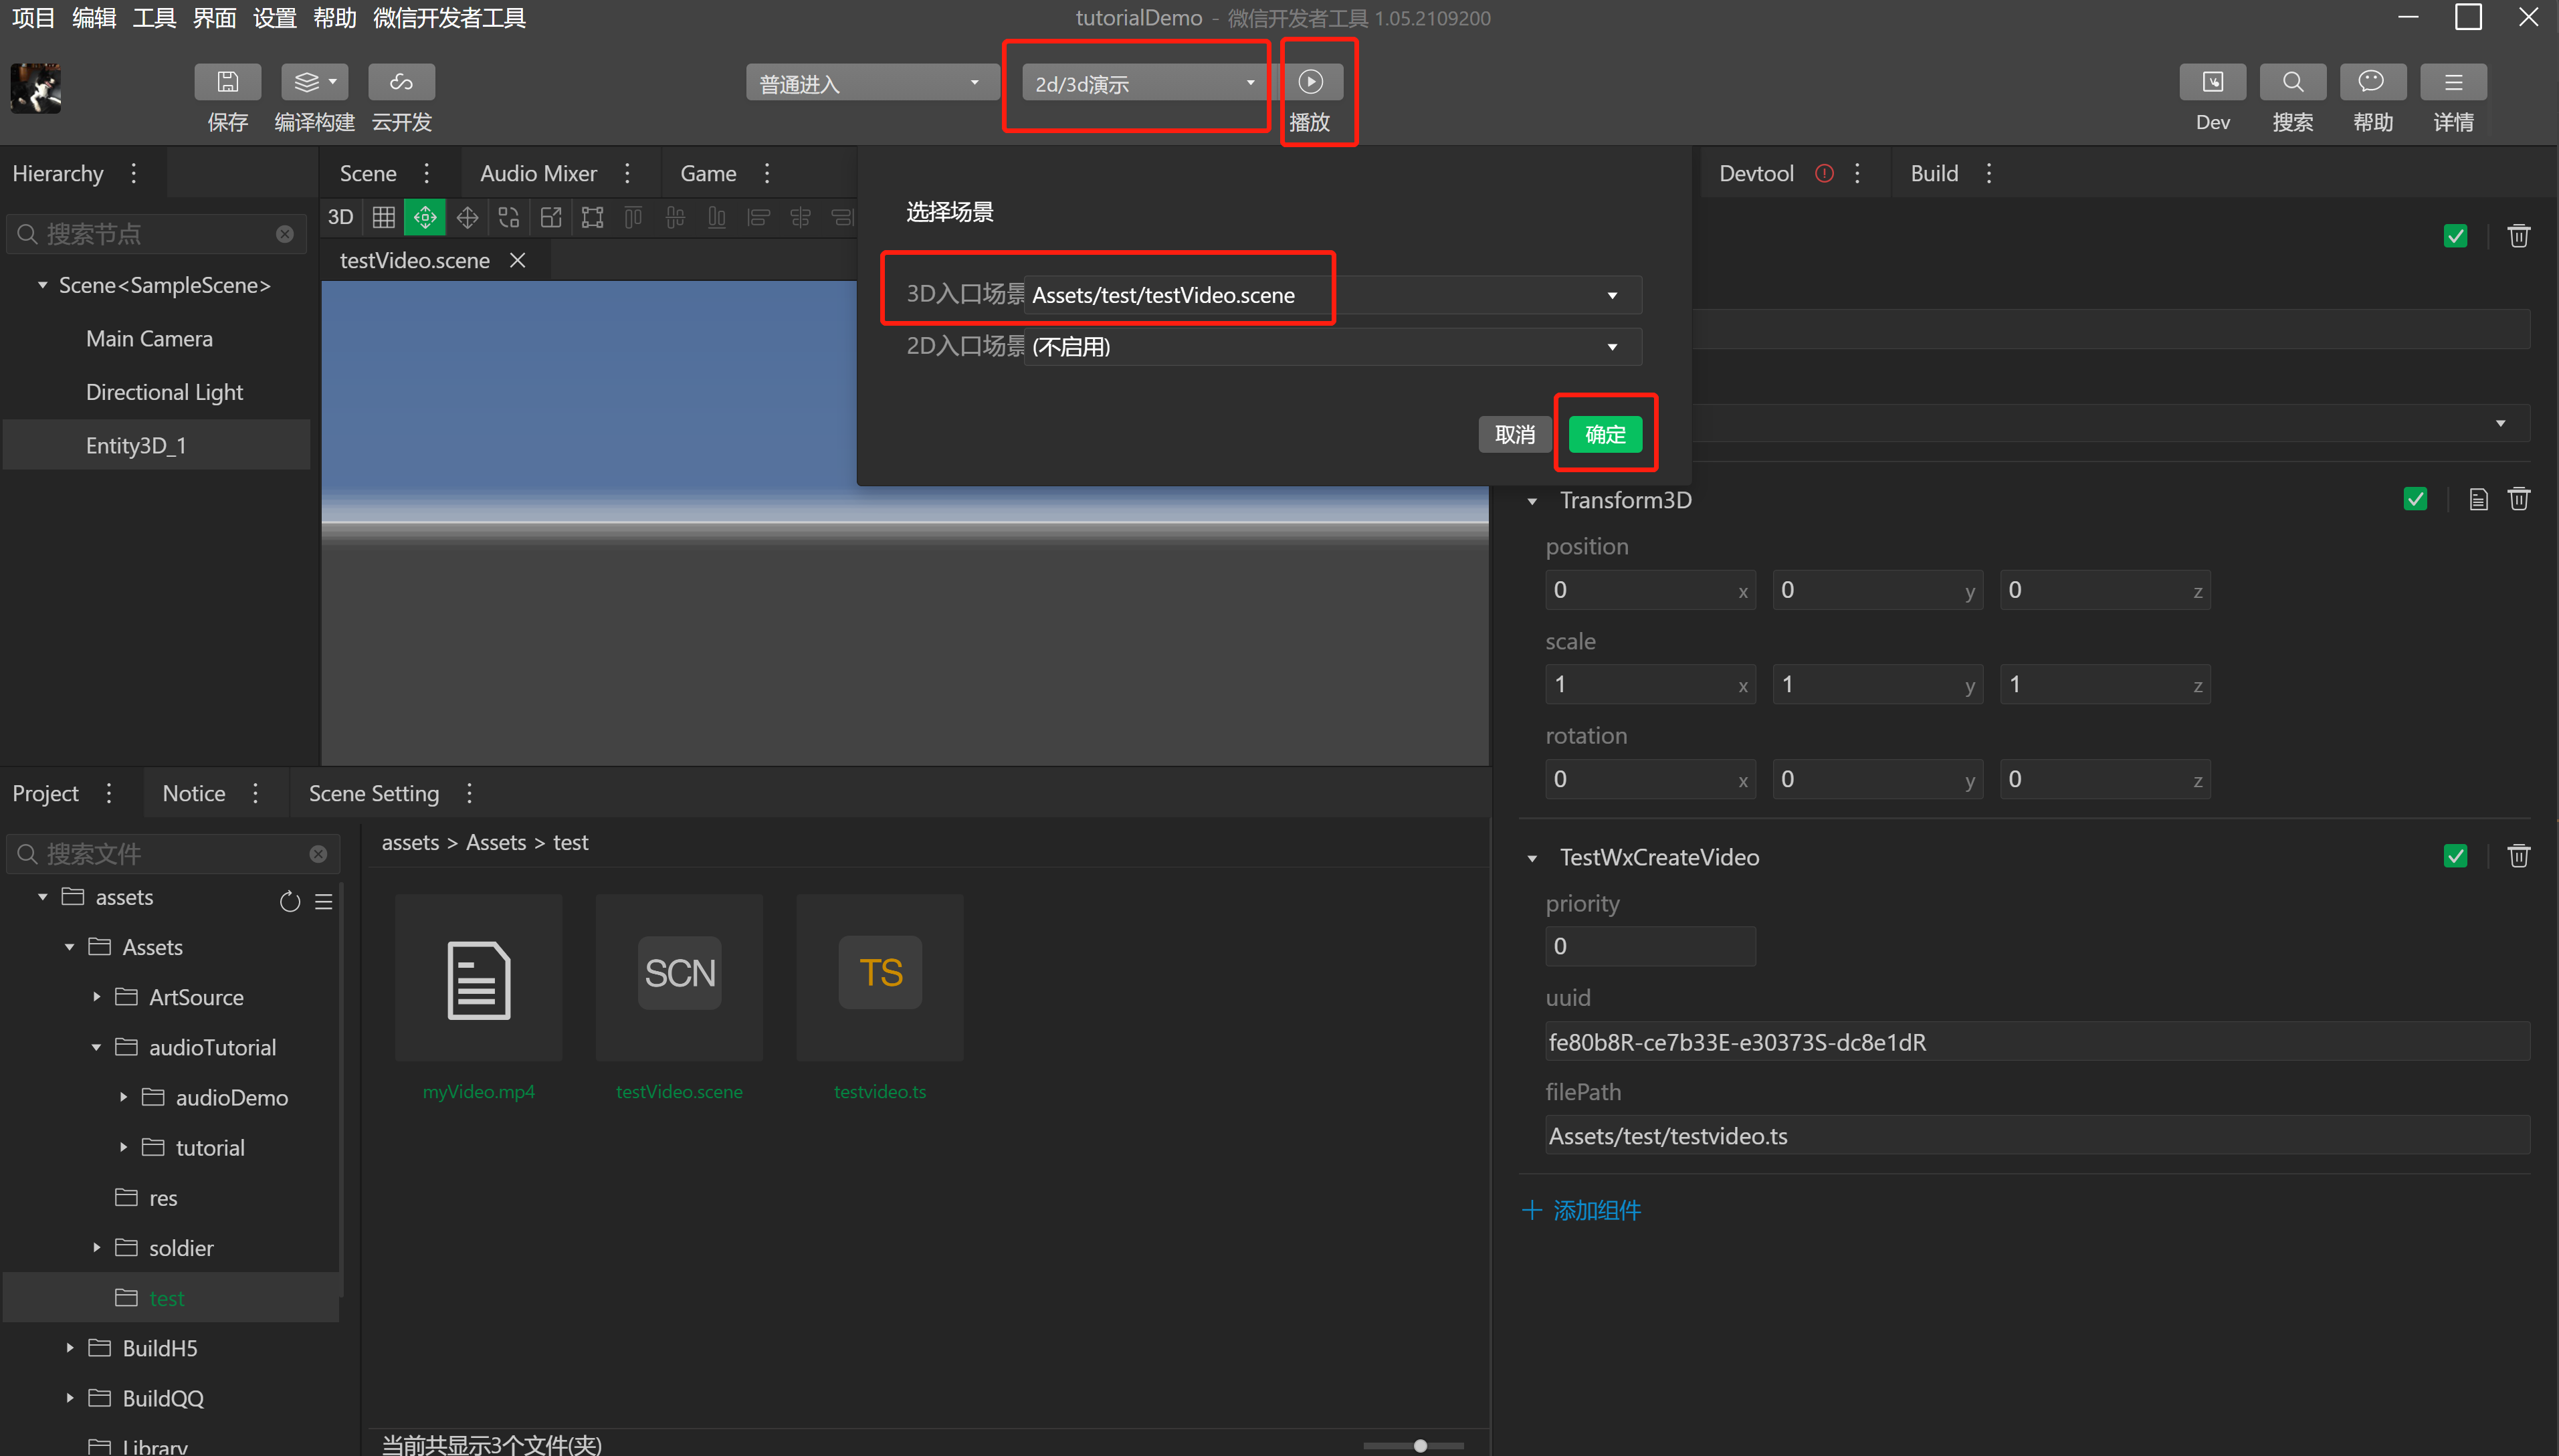
- Click "2d/3d presentation" at the top of the tool, set the main 3D scene, and click the "OK" button to save. Then click the "Play" button at the top of the tool to play the scene, you can play the scene, and play the video in the game scene.
The translations are provided by WeChat Translation and are for reference only. In case of any inconsistency and discrepancy between the Chinese version and the English version, the Chinese version shall prevail.Incorrect translation. Tap to report.