# Layered Blending
In action games or FPS games, there is often a need for independent control of the upper body and lower body of the character. For example, in FPS games, the upper body has actions such as raising a knife, raising a gun, changing weapons, and shooting, and the lower body has actions such as standing still, running, jumping, and squatting. If you want to create a set of actions for each combination, it will make AnimationClip very redundant, affecting resource loading time and memory usage. Layered Blending can effectively solve this kind of demand.
In this chapter, we will add a gun action based on a running character.
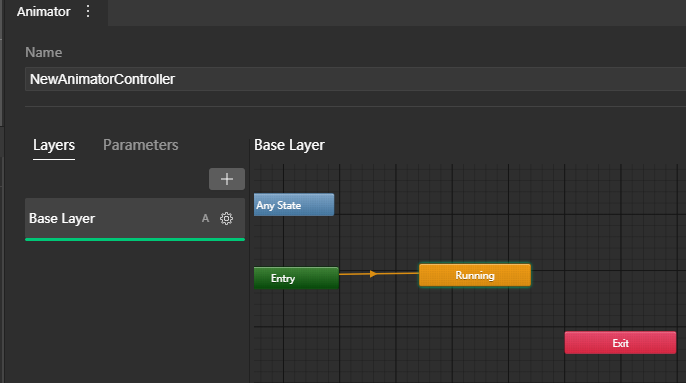
First we create an AnimatorController for the character, which contains a Running state. If you don’t know how to create a character or Controller, please refer to the Introduction to Skeleton Animation chapter
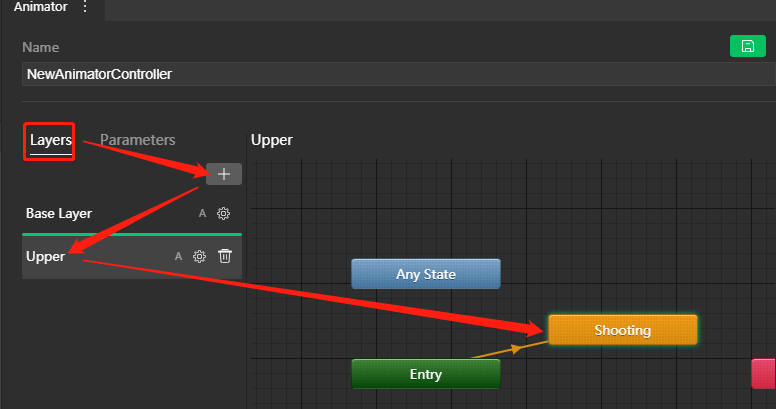
Click the plus icon under the Layers option to create a new blend layer (BlendLayer) and name it Upper. And add the Shooting state on the right to play shooting action.
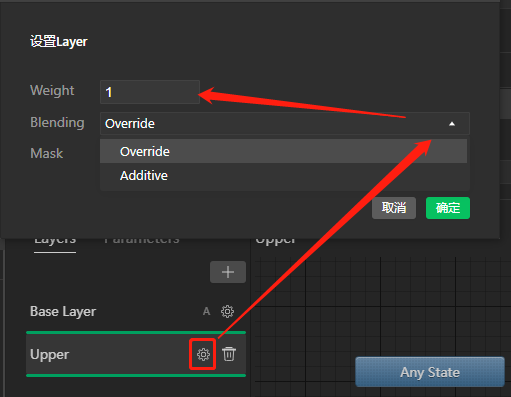
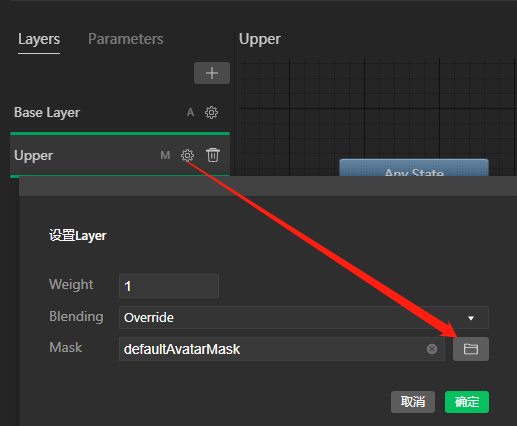
Click the gear icon on the right side of Upper and set Blending to Override and Weight to 1
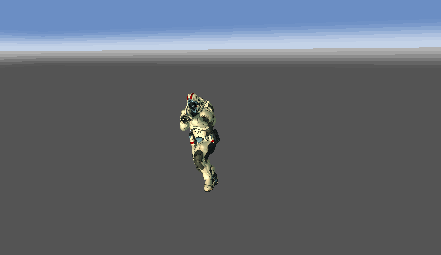
The state machine for saving the animation is running, and it is found that the animation of standing shooting is played. The reason is that the Running animation in the BaseLayer layer is overwritten by the Shooting animation in the Upper layer.
# Use AvatarMask
In the mini game framework, we use the AvatarMask resource to indicate whether each node of the bone should be controlled by the level of animation.
In this case, the upper body is actually required to be shooting, and the lower body is to be running. So we only need to create an AvatarMask, select the node of the upper body, and let the Upper blend layer use the AvatarMask.
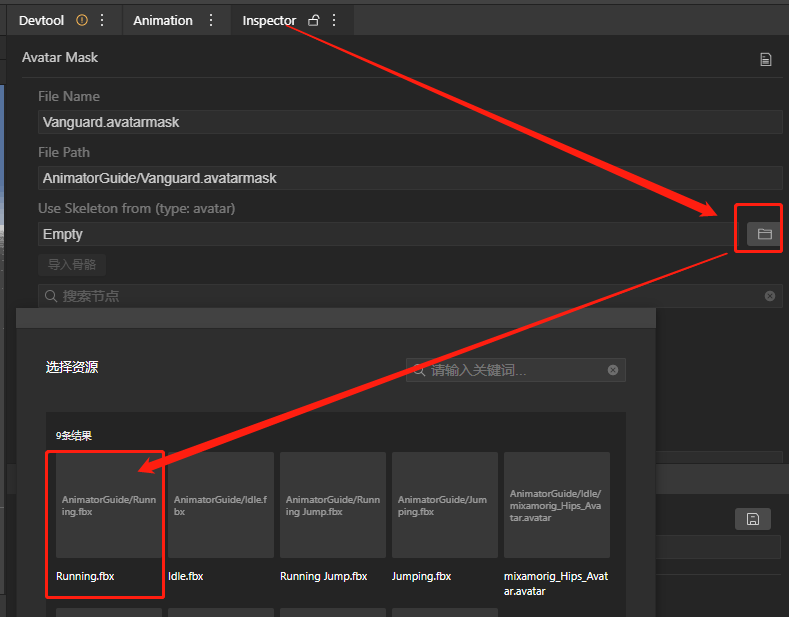
In the Project panel, right click ->New->Animation->avatarmask to create an AvatarMask. Enter the Inspector panel and select the Running animation skeleton in Use Skeleton from to import the skeleton configuration.
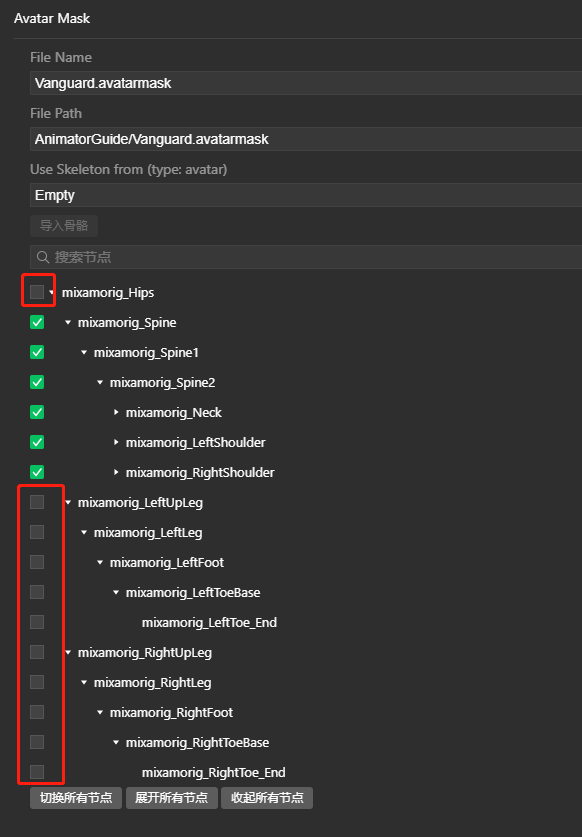
After importing, you can see the hierarchical relationship of all nodes of the skeleton. The check box in front indicates whether the node should be controlled. We uncheck Hips node, LeftUpLeg and its children, RightUpLeg and its children, and the remaining nodes represent the upper body.
Enter the upper blend layer configuration and set the Mask field to the AvatarMask just created.
Save the state machine, run the scene, you can see the effect of layering and mixing