# Simple animation guide
In this chapter, we will use a simple example to illustrate the basic process of using animation, and introduce several basic concepts in the animation system
# Create objects and animation clips
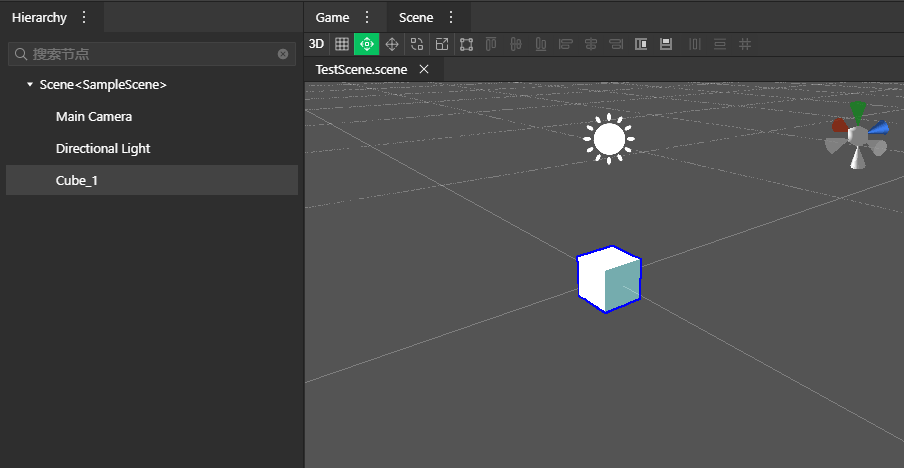
First, in the Hierarchy panel, right click -> Create 3D Node -> Mesh -> Cube, create a Cube node in the scene and name it Cube_1
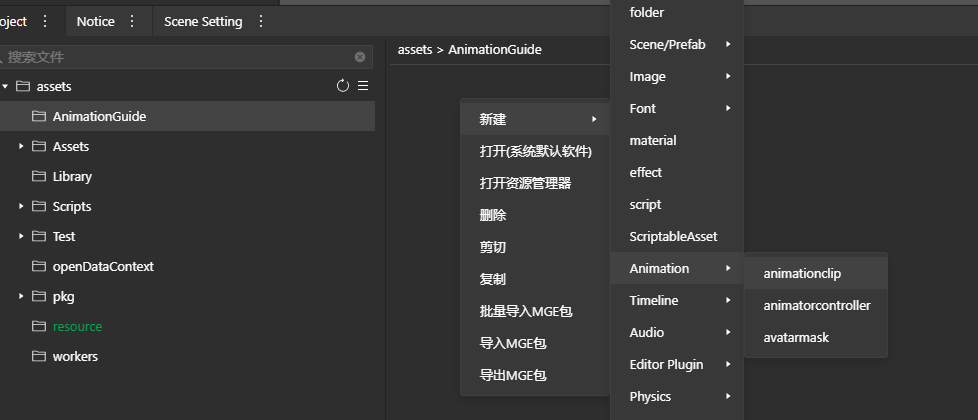
In the Project panel, right-click->New->Animation->animiationclip, create an animation clip and name it BoxMove
# Create Animation component and use animation clips
Now that we have the animation clip and the object to which the animation is applied, we need to configure the object to play the animation clip. In the small game 3D, the Animation component is mainly used to manage the animation played by the object.
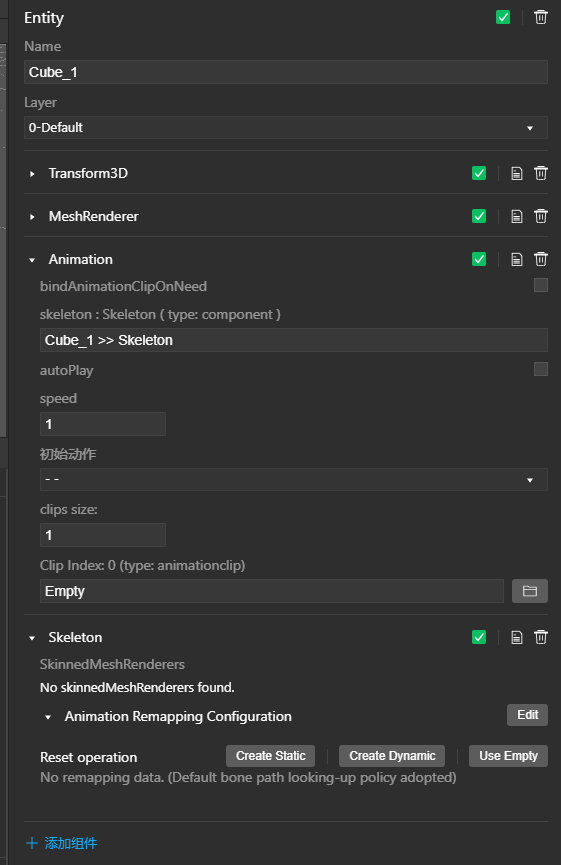
In the Inspector panel of Cube_1, add component->Animation->Animation to add an Animation component to the object. As shown in the figure, an Animation and Skeleton components will be automatically created and bound to each other. The Skeleton component is mainly used for subsequent skeletal animation, which can be ignored here.
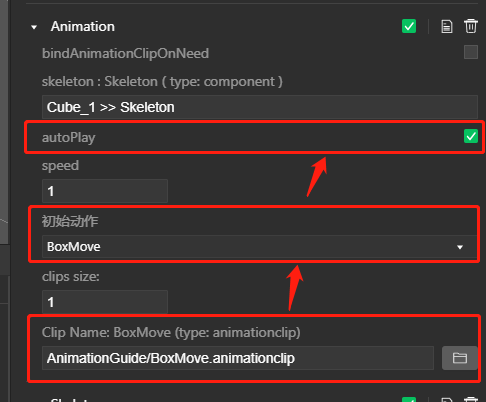
Then in the configuration of the Animation component, configure Clip, initial action, and autoPlay in turn, so that the BoxMove animation can be played when the object is initialized
# Edit animation clips
Now that we have completed the association between the object and the animation clip, we need to start editing the content of the animation.
First, we open the tool Animation panel, interface -> new label -> Animation -> Animation.
Then the Cube_1 object in the Hierarchy panel, you will see the corresponding animation clip BoxMove information in the Animation panel, which is still empty at present.
Next we start editing BoxMove
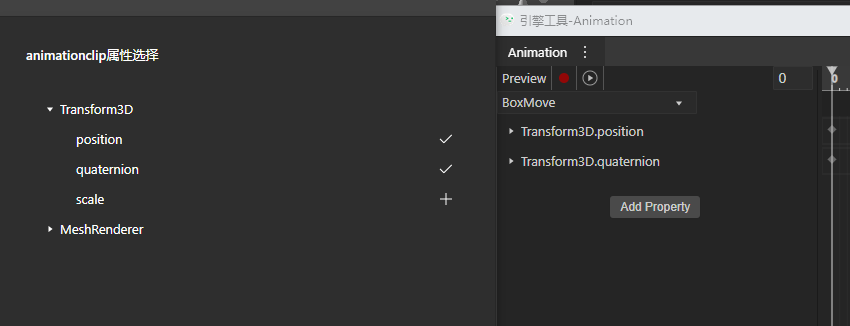
# Add propertyKey
First, we click the Add Property button, and the components and their properties on the Cube_1 object appear, which are called properties.
Here we want the animation clip to control the displacement and rotation of the object, so check Transform3D.position and Transform3D.quaternion
# Recording property
Click the red dot (record button) next to Preview. At this time, you will find that the corresponding attribute in the Inspector turns red, which means that you are currently in recording mode.
Drag the timeline on the right to the position of frame 120, and then edit the displacement and rotation information of the object in the scene, it will automatically create a key frame at the position of frame 120, as shown in the figure
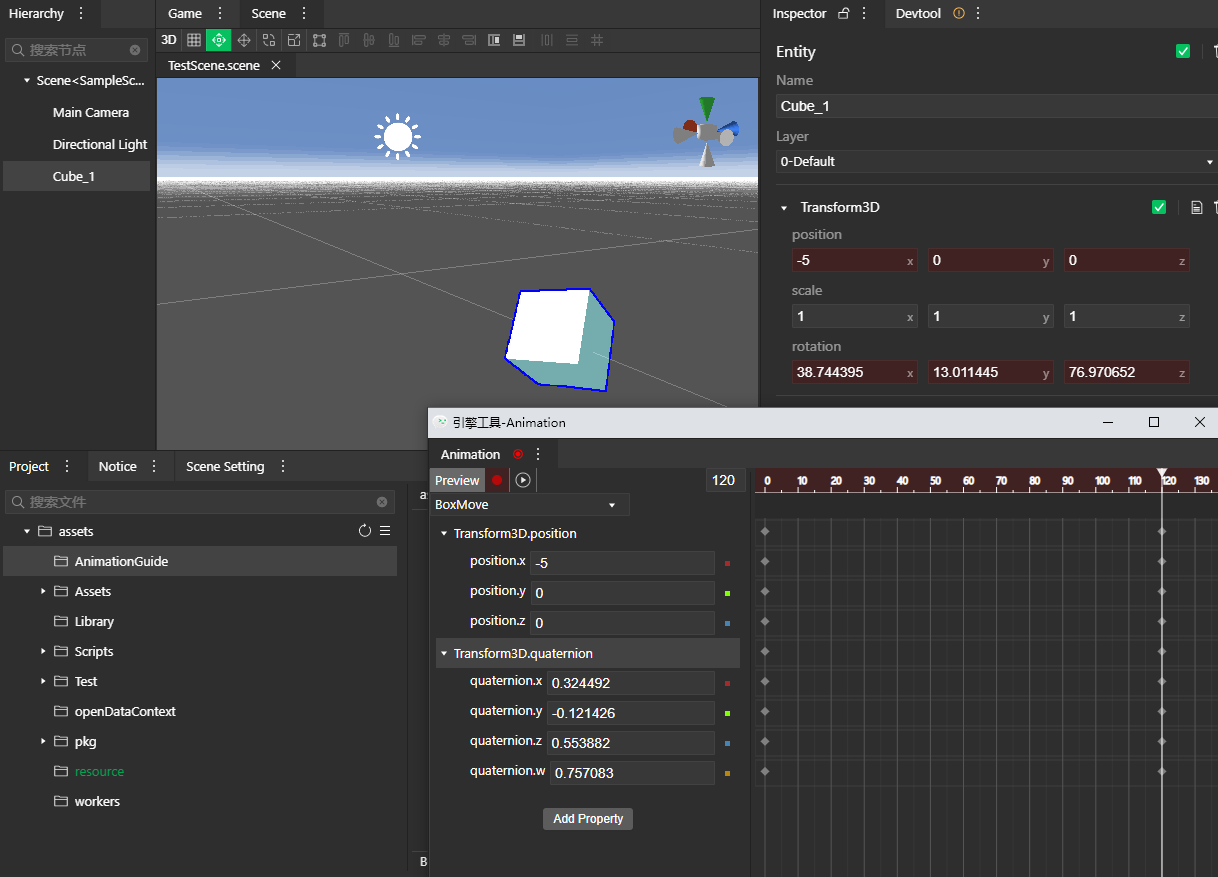
Click the red dot again to end the recording mode. Click the play button next to the red dot to preview the animation you just edited in the scene. After the preview is ok, just save by Ctrl+S, and then play the scene to preview
# Configure WrapMode
At this time, you will find that the animation stops after only playing once. At this time, because the default configuration of the animation clip is to play only once, if the animation we edit needs to be played in a loop, it needs to be configured.
First, click BoxMove animation clip in the Project panel, and then select WrapMode (loop mode) in the Inspector tab. Here we choose PingPong, which means that we want the animation to play in forward order first, and then in reverse order, and so on.

As a result, the object plays the animation as we expected
If you want to know more about the editing functions and usage of animation clips, please refer to the Animation Panel chapter
# Use code to control animation
In actual games, developers may often need to use code to control animation. In the small game 3D, the developer's code mainly controls and manages the animation through the Animation component.
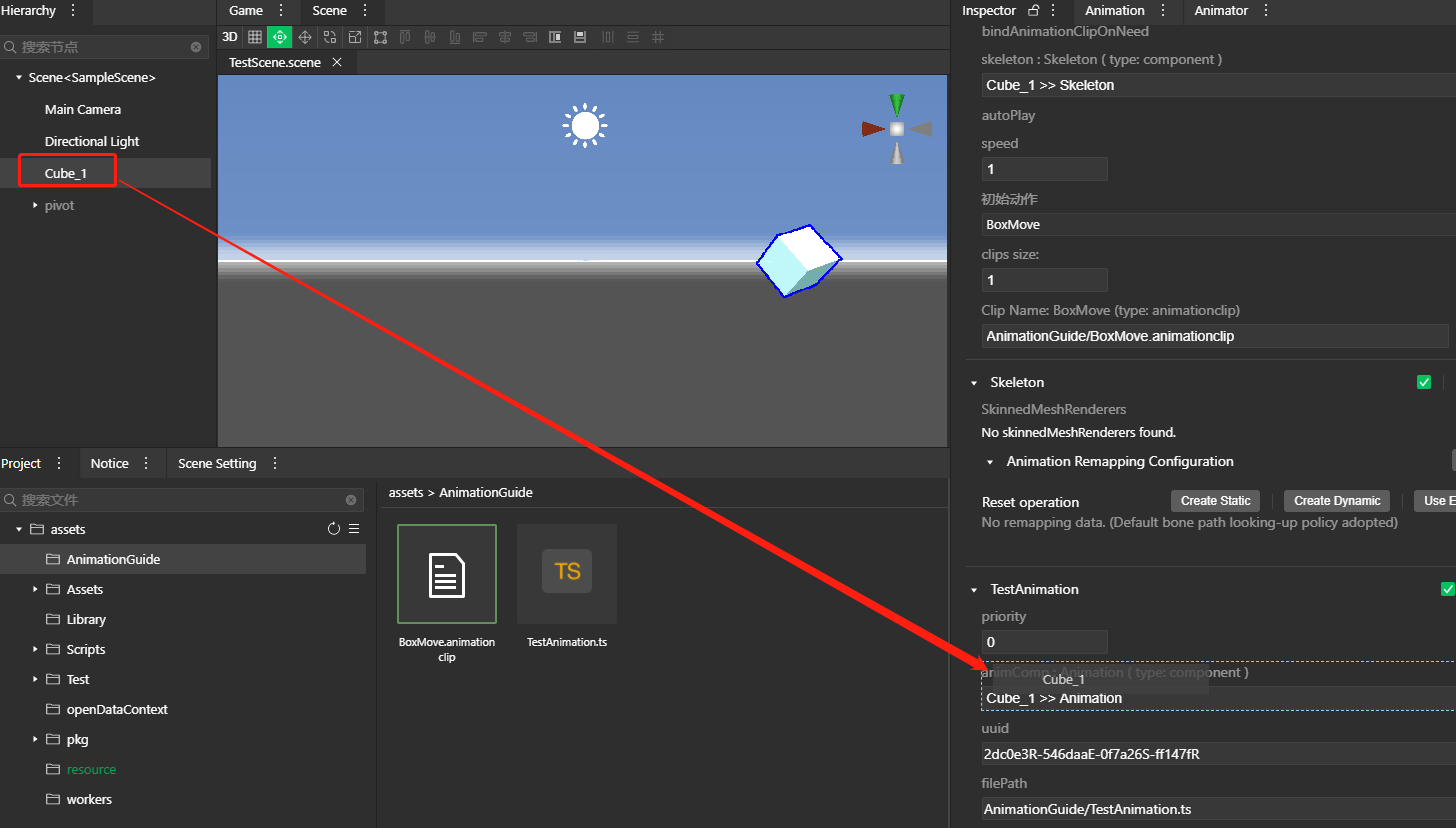
We add a custom Script component on Cube_1, named TestAnimation, and copy the following code to save
import engine from "engine";
@engine.decorators.serialize("TestAnimation")
export default class TestAnimation extends engine.Script {
  @engine.decorators.property({
    type: engine.Animation
  })
  public animComp: engine.Animation;

  public onStart() {
    this.animComp.play("BoxMove",1000,engine.Animation.WrapMode.Loop);
  }
}
Drag the Cube_1 section in the Hierarchy to the animComp field in the Inspector to complete the binding of the properties.
Run the game, you will find that the animation is played in Loop mode, instead of running in PingPong mode in the configuration
If you want to know more about the Animation component, please refer to the Animation Panel chapter
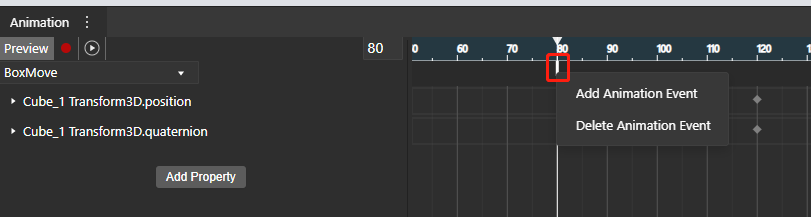
# Use animation events
In the process of game development, a very common method is to define some key events (Event) for the animation clips to trigger different custom logics. Mini game 3D provides the ability to animate events.
Open the animation panel and enter the details of BoxMove, right-click the position as shown in the figure -> Add Animation Event
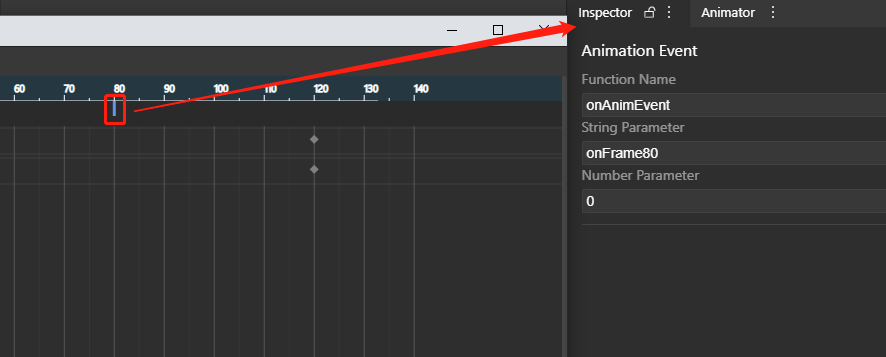
 Then click on the generated vertical line, you can edit the event's callback function name and parameters in the Inspector
Let's go back to the TestAnimation.ts script and add the following method to the component
  public onAnimEvent(e: engine.Animation.AnimationEvent) {
    console.log('animationEvent',e.stringParameter, e.numberParameter);
    this.animComp.stop();
  }
Save the running scene, you will find that the animation stops at frame 80, and you can see the printed log in DevTools