# Getting started with skeletal animation
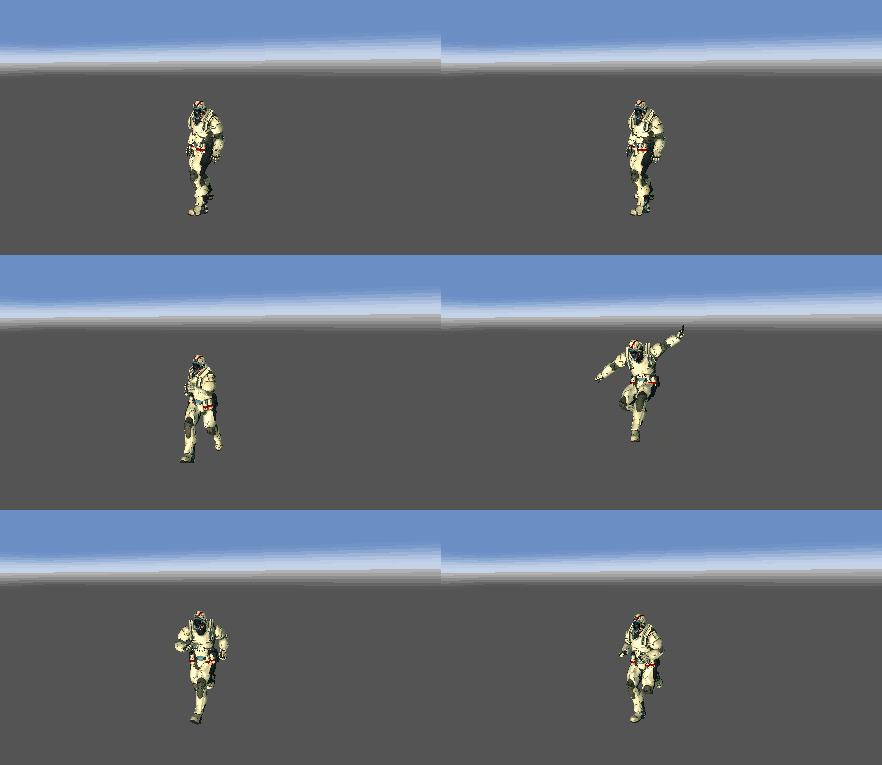
In game development, skeletal animation is usually used to achieve the performance of characters, monsters, etc.
In this chapter, we will use a simple example to introduce how to use skeletal animation in a small game 3D
# Model resource import
Usually the model resources with animation come from third-party modeling tools, such as Maya and 3DSMax. At present, the small game 3D only supports the import of models and animation resources in the fbx format.
Since fbx is a composite resource format, which may contain resources such as model grids, materials, textures, animations, skeletons, etc., in a small game 3D, all resources contained in an fbx can be used separately, which can realize some projects Optimization requirements, for example, a movie clip is reused by multiple characters, etc.
Put the fbx file into the assets directory, you can see it in the Project directory. Click the arrow on the right of fbx to expand all the resources contained in it.
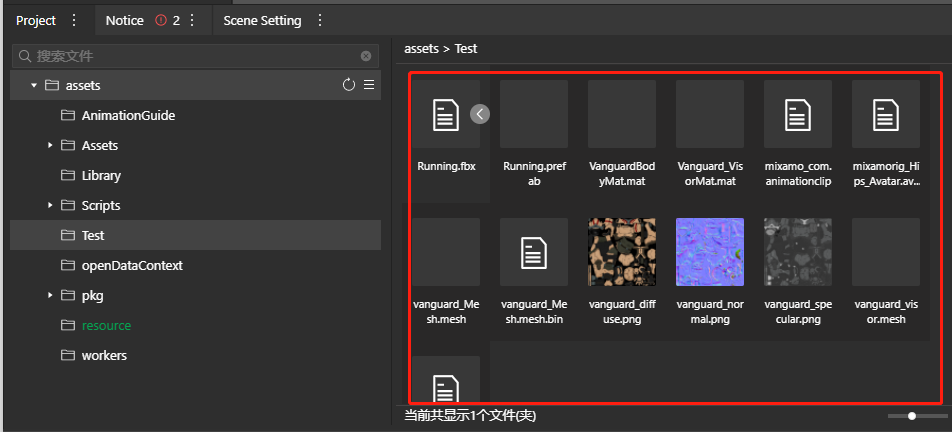
Then right-click in the Hierarchy panel -> Add Prefab, and select Running.fbx to add it to the scene.
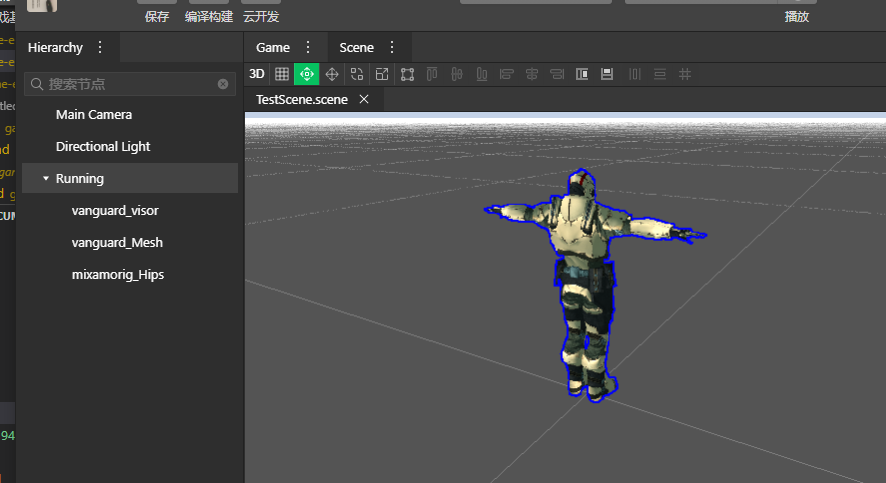
Click play, you can see the normal movement of the playing characters
If your animation resources come from a third-party game engine, please refer to the Conversion Scheme chapter.
# Use hanging points
A very common requirement in games is that a character holds a weapon or pendant. The usual practice is to use the model of the weapon as a child node of the character's hand bone node. In the small game framework, based on performance considerations, the skeleton node of the character does not exist as a node on the field. So the small game framework provides a mechanism for hanging points.
Here we use a simple model instead of weapons to illustrate the usage of hanging points. Create a Hand node under Running, create a Capsure model as its child node, and adjust the attributes of the Capsure node to a suitable size.

Click the Edit button of Animation Remapping Configuration in the Skeleton component of the Running node to enter the skeleton node configuration mode. Find the left-hand skeleton node, and drag the Hand node in the Hierarchy panel into the Model Binding Transform field. This operation means that the transform information of the left-hand skeleton node will be synchronized to the Hand node on the field in real time, that is, Hand becomes the hanging point of the model.
- Note: The hanging node must be the
direct childof the node where Skeleton is located
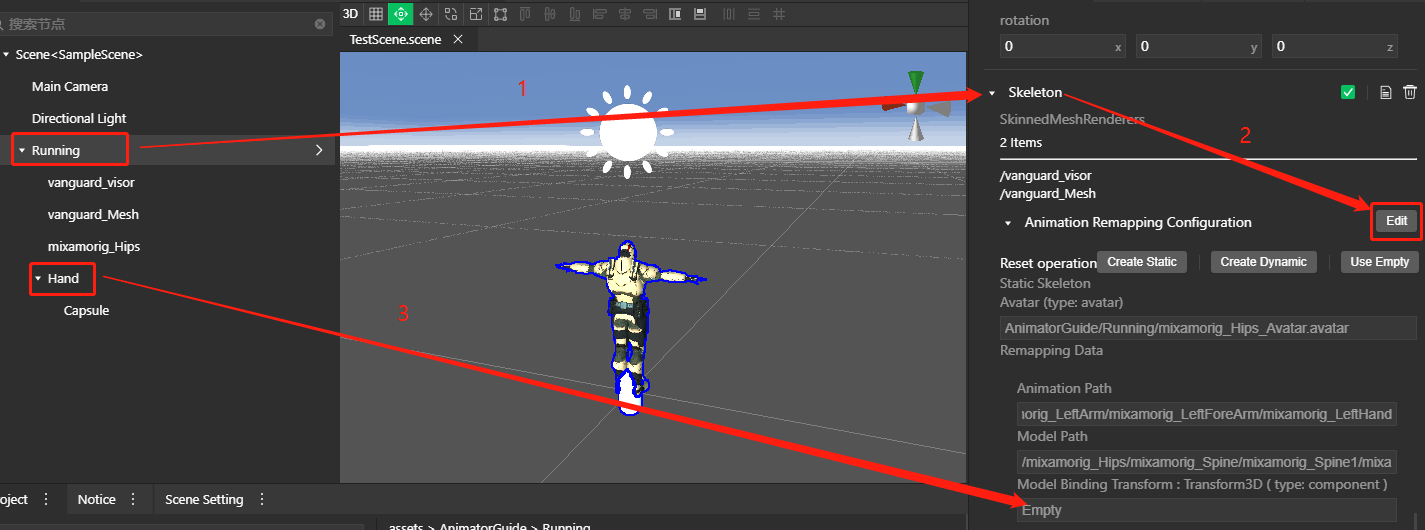
Click Apply to apply the skeleton node configuration just now.

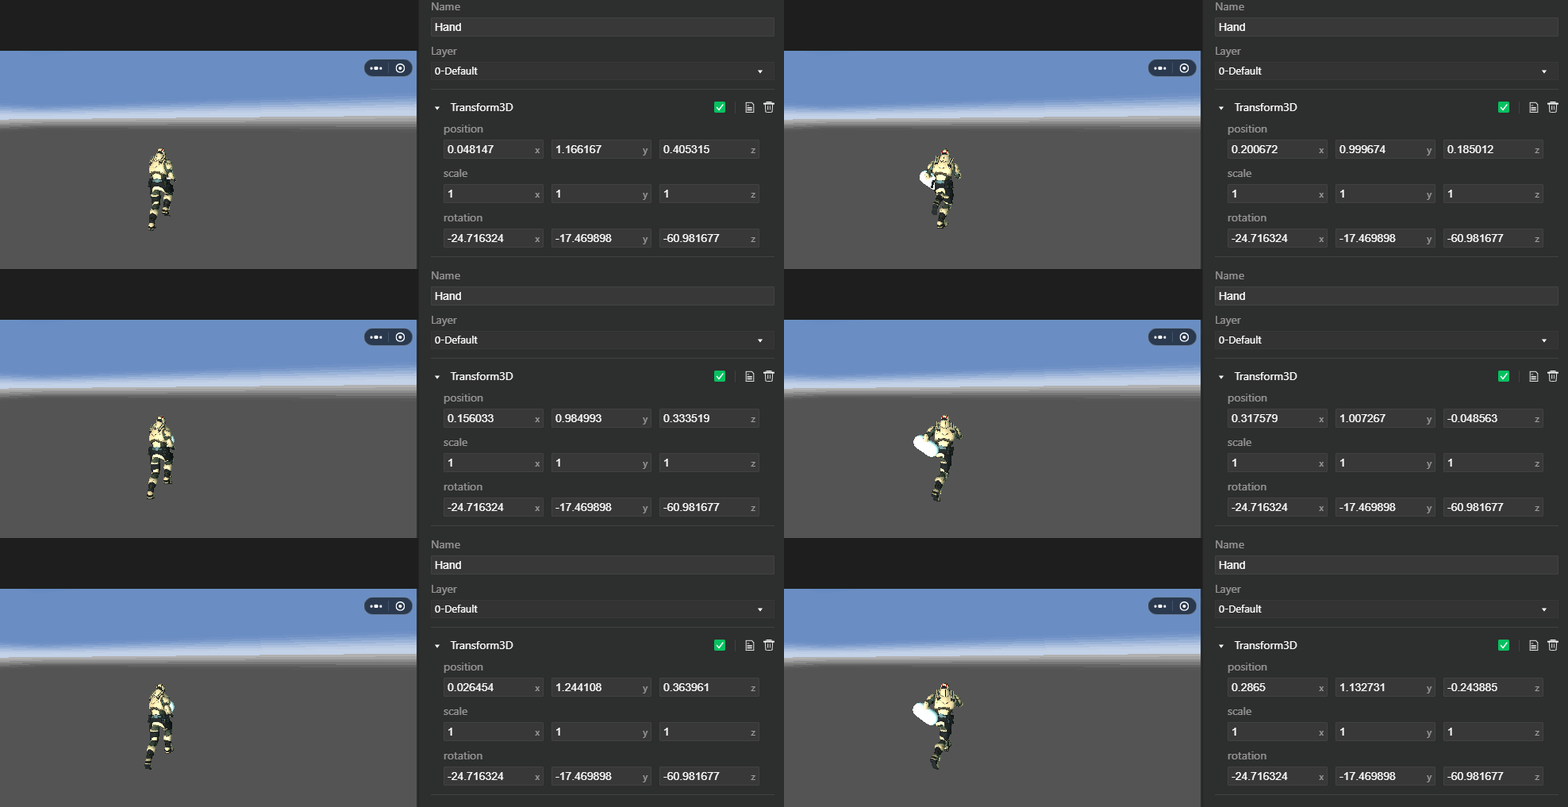
Preview the scene, you can see that the model will follow the hand movement, and the Transform component properties of the Hand node will also be updated every frame
# Extract resources
In the example in this chapter, if you run Running directly, you will see that the animation is only played once. If you need to loop, you need to modify the AnimationClip, at this time we need to extract resources.
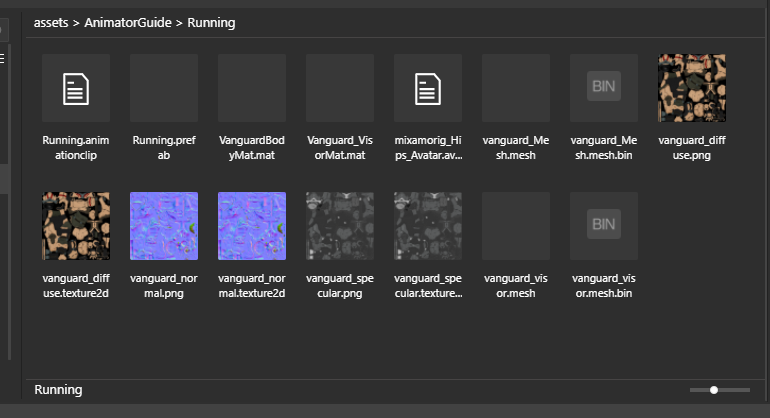
Right-click Running.fbx in Project and select Extract. You can see that the Running directory is created under the same path, which contains all the resources contained in fbx, including a Prefab, and the Mesh, Material, Texture, AnimationClip, Avatar, etc. it depends on
Add the unpacked prefab in the Running directory to the field, and then modify the AnimationClip to Loop. Run the scene to see the effect.
# Use animation state machine
In the game, the action of a character or monster is often defined as a form of a state machine, and the character's walking, running, jumping, etc. are all regarded as its states. The small game framework provides support for the animation state machine.
In the small game framework, the AnimatorController resource is used to represent the configuration of the animation state machine, and the Animator component is used to control and manage the animation.
# Create an Animation Controller (AnimatorController)
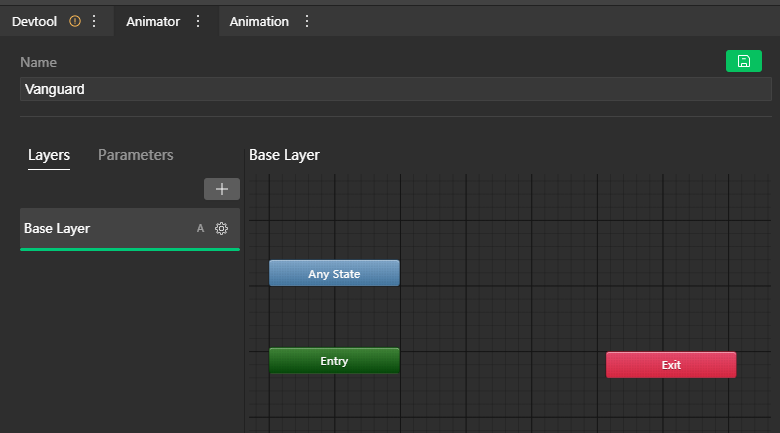
Right-click in the Project directory -> New -> Animation -> animatorcontroller, you can create AnimatorController resources. Then add a new tab ->Animation->Animator to open the animation Animator panel, you can enter the editing interface of the animation state machine.
# Add State (State)
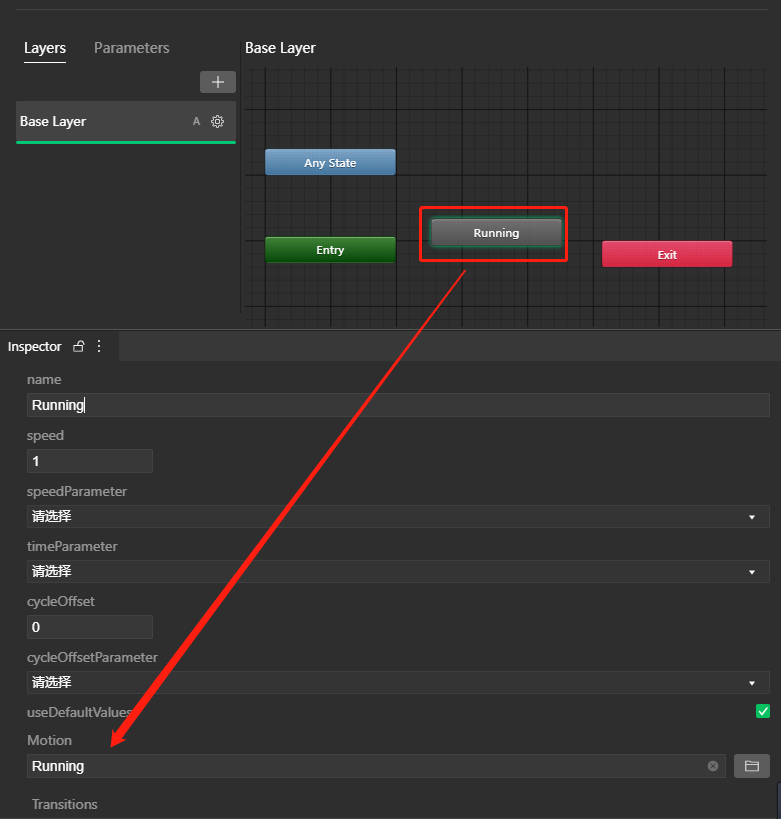
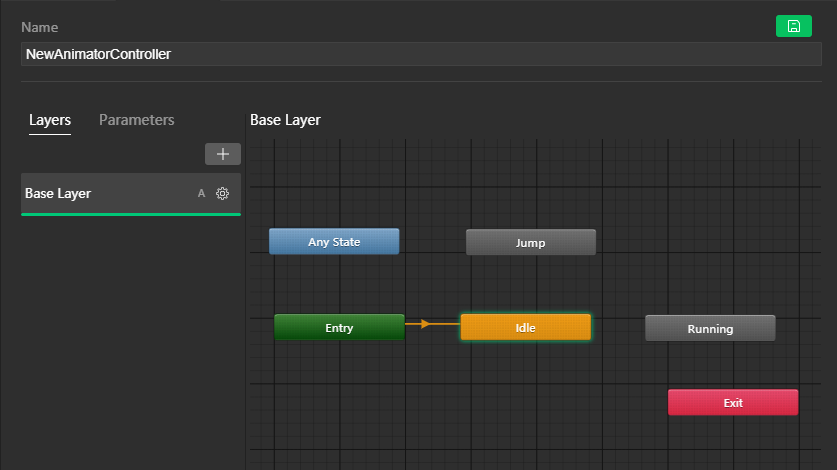
Right-click on the grid position of the animation state machine view ->Create State->Empty to create a State. Select this State, you can edit the details in the Inspector panel. Here we modify the name to Running, and select the animation clip with Motion as Running.
At the same time, we use the same method to create an Idle State, which represents the state of standing; create a Jump State, which represents the state of jumping. Right-click on the Idle state -> Set As Layer Default State to change Idle to the default state.
Click the green save button above to save the current editing status.
# Using the Animator component
In the Inspector panel of the model, add component->Animation->Animator, add an Animator component to the object, and disable or delete the Animation component.
Set the controller field to the AnimatorController resource just created, play the scene, you can see that the animation is playing Idle action by default
If you want to know more about the Animator component, please refer to the Animator Component Reference chapter
# Switch between different states
We add a custom Script component to the model, named TestAnimator, and copy the following code to save
import engine from "engine";
@engine.decorators.serialize("TestAnimator")
export default class TestAnimator extends engine.Script {
  public animComp: engine.Animator;

  public onStart() {
    this.animComp = this.entity.getComponent(engine.Animator);

    setTimeout(() => {
      this.animComp.crossFade("Base Layer.Running",0.5);
    }, 3000);
    setTimeout(() => {
      this.animComp.crossFade("Base Layer.Jump",0.5);
    }, 5000);
  }
}
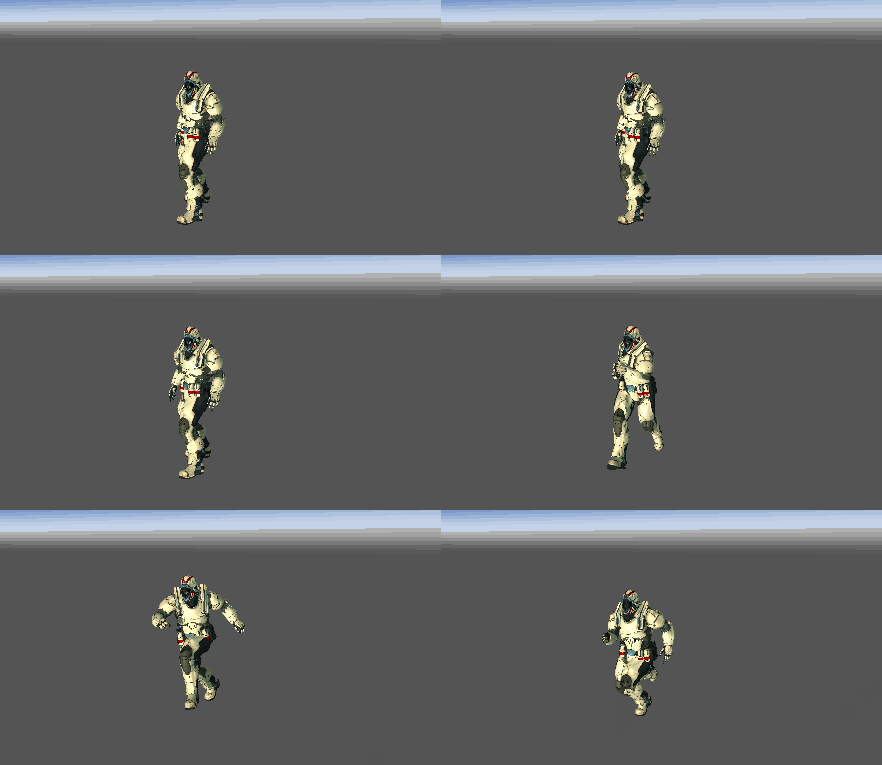
Playing the scene, you can see the animation transition from standing smoothly to running, and then smoothly transitioning to jumping.
 ;
;
# Set the transfer relationship of the state machine
In practical applications, the transition relationship and conditions between states are usually very complicated, and it is difficult to maintain using code control. The mini game framework provides a set of state transition editing and control mechanisms.
Open the Animator panel, right-click on the Idle state->Make Transition->click Running to establish a state transition between Idle and Running. Use the same method to establish a two-way transfer between Running and RunningJump.
Select the Paramerters on the left and add a parameter speed of type Float and a parameter jump of type Trigger.
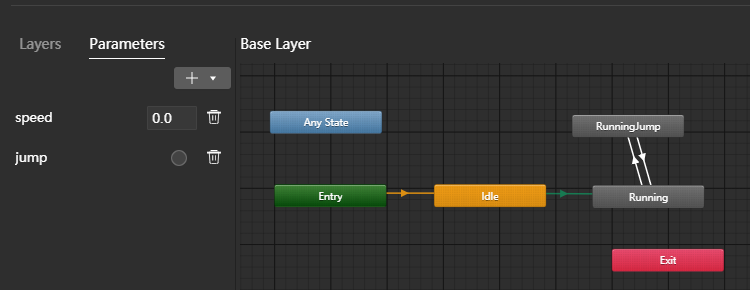
Next we have to configure conditions for the state transition. Click the arrow between Idle and Running, and you can see the details of the transfer under the Inspector panel. Add a condition of speed Greater 0 under Conditions
In the same way, we add the condition of jump to the transition from Running to RunningJump
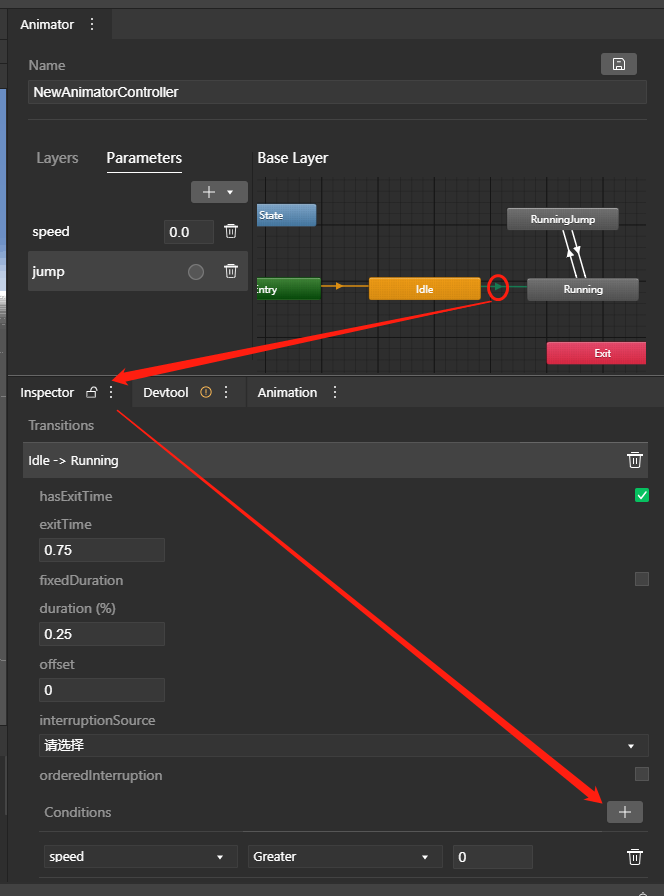
Finally, we modify the TestAnimator script and use the code to trigger Parameter changes at runtime
import engine from "engine";
@engine.decorators.serialize("TestAnimator")
export default class TestAnimator extends engine.Script {
  public animComp: engine.Animator;

  public onStart() {
    this.animComp = this.entity.getComponent(engine.Animator);

    setTimeout(() => {
      this.animComp.setFloat("speed",1.0);
    }, 3000);
    setTimeout(() => {
      this.animComp.setTrigger("jump");
    }, 5000);
  }
}
Preview the scene to see the effect
