# Texture
In the previous section, we said that there is a special Uniform whose type is SAMPLER, which is texture. The texture is essentially the expression of the texture on the GPU. After the texture is submitted to the GPU as a texture, it can be sampled by the GPU.
Texture can be divided into 2D texture Texture2D and cube texture CubeTexture in the frame of the mini game. The latter is mainly used as a sky box.
# Create
In order to use textures, developers must first create textures. The small game framework provides many ways to create textures, but they can be mainly classified into two categories:
# Edit in IDE
First, the developer can drag a picture (such as JPG, PNG) into the IDE and select it:

Then you can see its configuration options in the Inspector on the right:
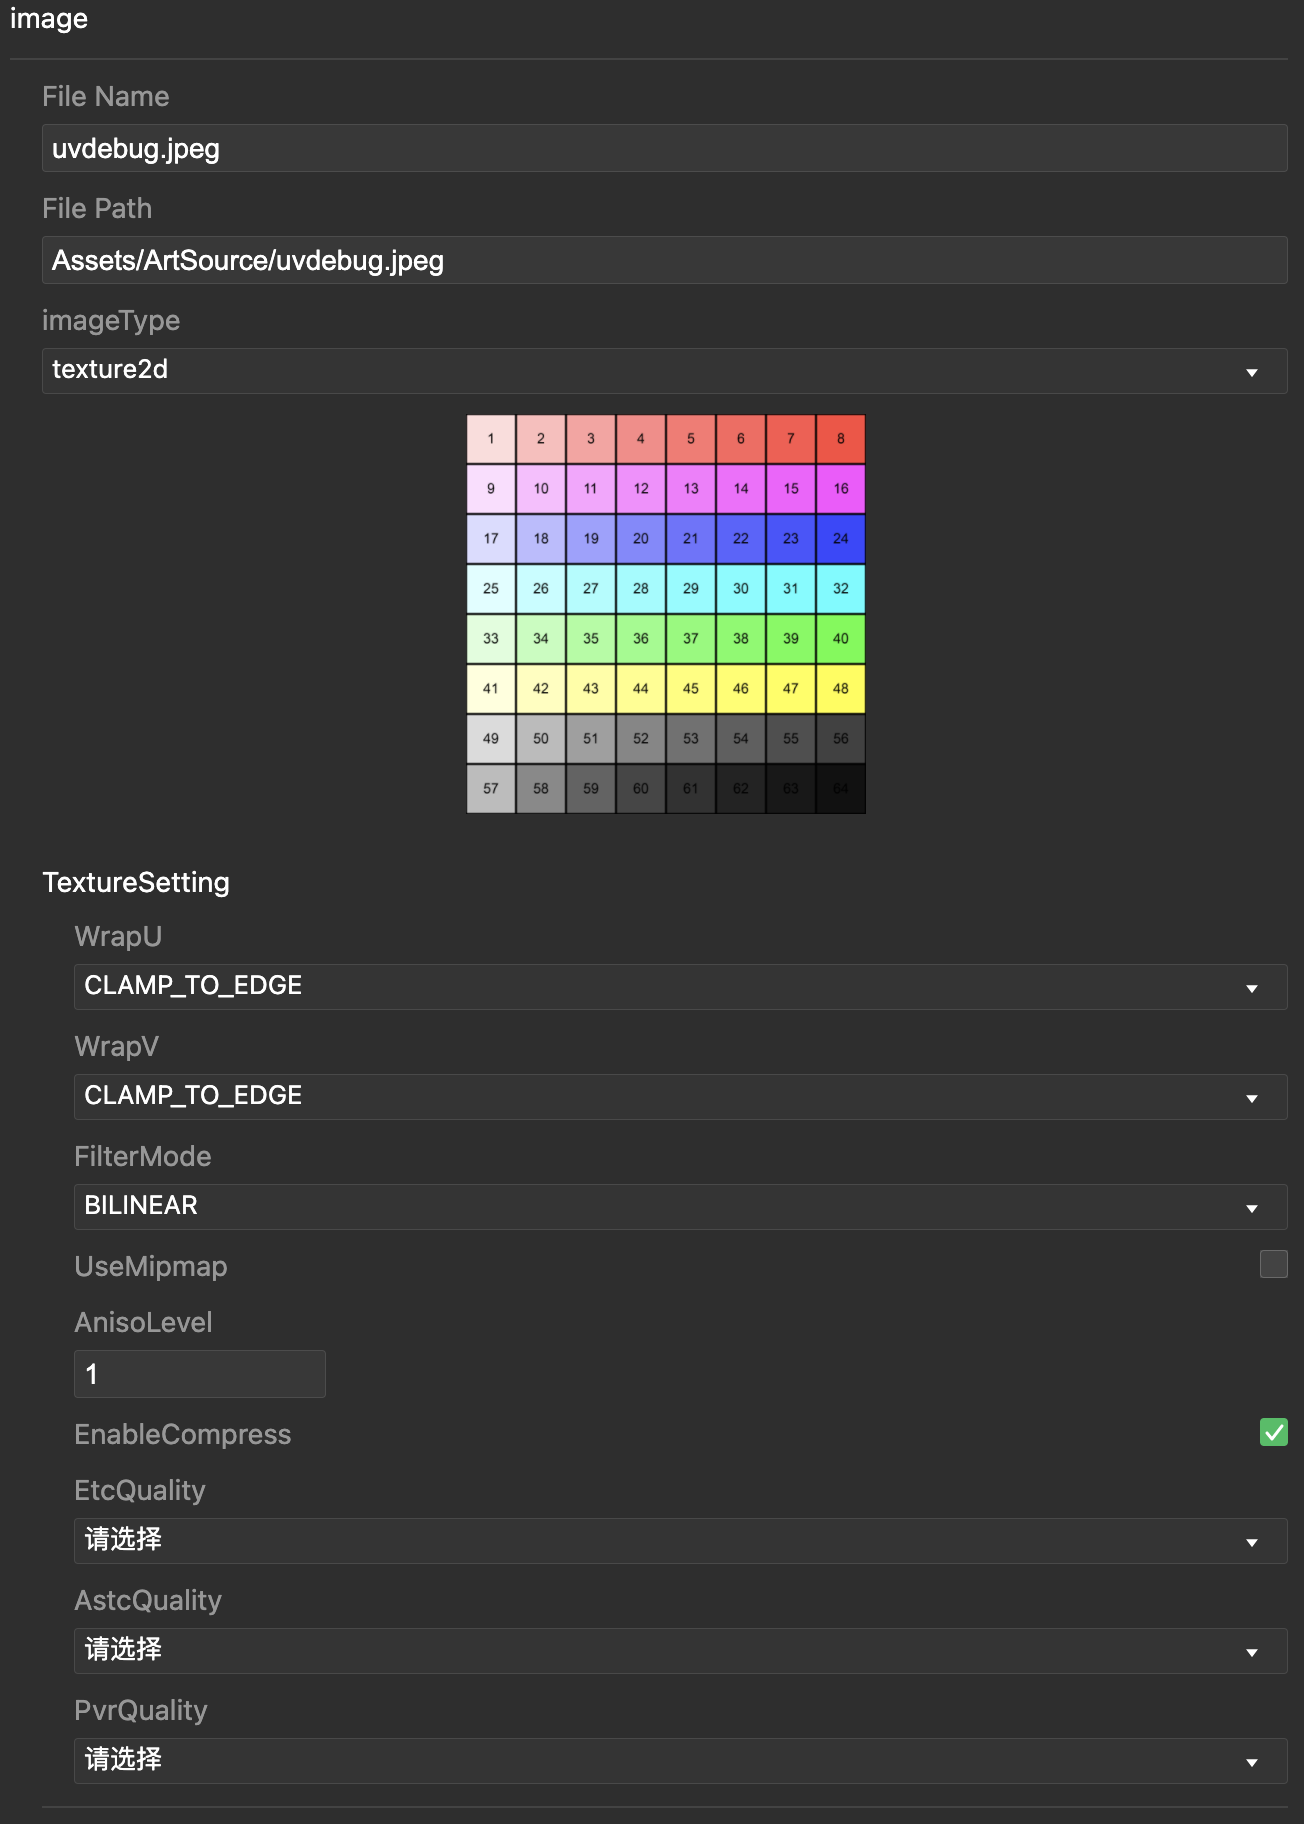
A picture generates a 2D texture (obviously). In the TextureSetting, the developer can configure some of its parameters, such as filter mode, whether to generate Mipmaps and other general configuration, as well as the detailed configuration of compressed texture.
Compressed texture is a technology that saves GPU bandwidth. Different platforms have different compressed texture support. Therefore, when the small game framework is built, the compressed texture of the whole platform will be constructed according to the configuration and delivered in subcontracts.
Through EtcQuality, AstcQuality and PvrQuality, you can configure the quality of the three most common compressed texture formats on mobile platforms.
# Created by code
In addition to importing images as resources into the IDE to create textures, sometimes developers also need to create textures directly from existing data, such as ArrayBuffer. If you want to create a texture manually, the developer needs to create an instance first, and then use the member method to initialize it, such as a 2D texture:
// Create texture and set sampling parameters
const tex = new engine.Texture2D({
  filterMode: engine.TextureFilterMode.BILINEAR,
  wrapU: CLAMP_TO_EDGE,
  wrapV: CLAMP_TO_EDGE,
  anisoLevel: 1
});

// Initialize a red texture with `ArrayBuffer`, width and height are both 1, and generate mipmaps
tex.initWithRGBABuffer(new Uint8Array([255, 0, 0, 255]), 1, 1. true);

// Initialize a texture through the `engine.Image` instance and generate mipmaps
tex.initWithImage(image, true);
The cube texture is similar, but requires six faces:
// Create texture and set sampling parameters, there is an extra `wrapW` dimension
const tex = new engine.TextureCube({
  filterMode: engine.TextureFilterMode.BILINEAR,
  wrapU: CLAMP_TO_EDGE,
  wrapV: CLAMP_TO_EDGE,
  wrapW: CLAMP_TO_EDGE,
  anisoLevel: 1
});

// Initialize a red cube texture with the width and height of 1 through `ArrayBuffer`, and generate mipmaps
tex.initWithTextureSources([
  new Uint8Array([255, 0, 0, 255]),
  new Uint8Array([255, 0, 0, 255]),
  new Uint8Array([255, 0, 0, 255]),
  new Uint8Array([255, 0, 0, 255]),
  new Uint8Array([255, 0, 0, 255]),
  new Uint8Array([255, 0, 0, 255])
], 1, 1. true);

// Initialize a cube texture with 256 width and height through the `engine.Image` instance array, and generate mipmaps
tex.initWithTextureSources([img1, img2, img3, img4, img5, img6], 256, 256, true);
# Update texture
In addition to creating it at the beginning, sometimes developers may need to dynamically update the content of the texture. At present, the small game framework has enabled dynamic update support for 2D textures, and the texture needs to be created as dynamic at the beginning:
// Create a dynamic texture of 256x256 size
tex.initDynamicTexture(256, 256);

// Use `ArrayBuffer` or `engine.Image` to update part of the texture.
tex.updateSubTexture(source, 0, 0, 256, 256);
# Use texture
After the texture is created, it needs to be used. This has to be divided into two parts. In the Runtime part, if you use the Prefab process, the texture will be automatically set. If you need to manage it manually, you generally need to set it to the global or material In the Uniform, this will be discussed in the subsequent chapters Effects and Materials.
The final texture needs to be sampled in the Shader, see Shader for details.